Introduction
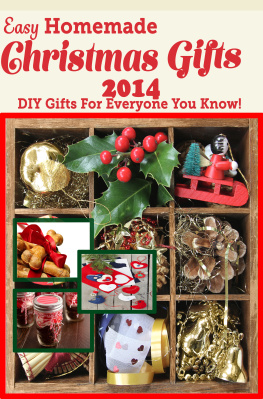
Hello and welcome to the world of DIY Christmas gifting! Id like to begin by thanking you for picking this book up. You will not be disappointed with the ideas in it!
The holiday season is among the most stressful times of the year this is old news. With Christmas just around the corner, you are busy running around looking for the perfect gift for your loved one. This is mostly an expensive affair, filled with frustration and worry. What if you could just cut out the anxiety with easy solutions? Take a step into the pages of this book and see how you can make the gifting season a fun one!
Each chapter in this book has been written to give you simple gifting ideas that you can make at home. All the projects require a basic set of craft supplies and items found in your house. You dont even have to be a master at arts and crafts for to make these ideas into reality!
Every project is simple to make, and can be followed in easy steps. The best part is that they take very little time but allow you to produce high quality results. You dont need months in advance to prepare these gifts. An evening or two after work will be more than enough.
You will also find a variety of projects covering gifting needs for all your loved ones. Find edible gift ideas for the foodie in your family. Decorative items can easily be made in a few steps to decorate your best friends new apartment. Surprise the culinary lovers in your life with kitchen-crafted gifts. Make your own candles and candle holders with the projects in these pages. Create your own beauty blends and gifts kits for the beauty-conscious in your family. The options are endless!
Are you intrigued enough to find out how you can add a touch of personality and creativity to your Christmas gifts this season? Get out your crafty side and lets begin!
Chapter I: Edible Gifts
Do you have many food-lovers in your circle of friends? Does your family miss your homemade cooking while theyre away? Why not give them edible gifts this Christmas season to get them through the cold winter season? In this chapter you will find simple recipes for various treats such as:
- Assemble your own cookie mix in minutes.
- Learn how to make cake pops and
- Make and drink your own chocolate.
- Create spice blends for your loved ones to use.
- Finally, learn how you can make your own marzipan goodies in no tim e .
The Sinful Holiday Cookie Mix

For the containers:
- Labels
- Markers
- Tags of the Cookie Recipe
- Paper
- Scissors
- Ribbons for Recipe and Lid
- Canning Jar with Lid (Mason Jar)
- Fabric
For the cookie mix:
- cup Sugar (powdered)
- cup Brown Sugar
- tsp Baking Powder
- cup White Chocolate Chips
- cup Dark Chocolate Chips
- 1 cups All-Purpose Flour
- tsp Baking Soda
- cup Chopped/Pecans/Walnuts
- cup Oats (rolled)
- cup Chocolate (M&M)
Step-by-Step Instructions:
Preparing your jars:
1. Wash and dry all your jars properly before you using them.
2. Mark all jar labels with the name of the cookie mix.
3. Write down or print the recipe for your cookie mix on the tags. These will be tied to the jar later.
Preparing the cookie mix:
- In a dry mixing bowl, add all-purpose flour, then add the baking soda and baking powder. Mix together well.
- Pack your jar with the cookie mix. Add the white sugar to the bottom of the jar and pack it in place with a spatula or big spoon.
- Next, add the brown sugar and pack it in. Over the brown sugar, pour the all-purpose flour gently.
- Next, add your chocolate chips and candy bits. You can mix the chocolate chips if you want the layer to have a colorful pattern.
- On top of the candy, add the rolled oats, and finally add the layer of chopped nuts.
- Now, it is time to wrap your jar for a festive look.
Decorating your jar:
- Take a sheet of paper and place a medium-sized bowl on it, upside down.
- Trace the rim of the bowl with a marker or pen, then cut out this circle with a pair of scissors.
- Your Mason jar lids have two parts: a round section and then metal screw lid.
- Place the round section of the lid onto your jar, then gently place the cut-out cloth on top, and attach the other lid firmly on top.
- This lid will keep your cloth from moving. Arrange the cloth on the sides once the lid is shut.
- Take the recipe tag, and punch a small hole in the upper corner of the tag.
- Fit your decorative ribbon through this hole. Make sure the ribbon is long enough to go around the jars neck.
- Tie the ribbon around the neck of the Mason jar, and thats it! You cookie mix is ready for gifting!
Cookie Recipe Directions to Include With Your Mason Jars:
"This cookie mix yields 4 dozen cookies. Preheat oven to 350 degrees. In a large bowl, add cup unsalted butter, teaspoon vanilla extract, and 1 egg. Combine all the ingredients together. Then put in the contents from the jar and mix together well. Take a baking tray out for your cookies. Scoop about 1 teaspoon of your cookie mixture onto the tray. Place the baking tray in the oven for 10 to 12 minutes. Cool for a couple minutes after taking out of the oven. Enjoy!"
You can also replace this cookie mix for a cake, brownie or even hot cocoa recipe! Follow the same instructions to layer the ingredients and decorate your jars. Stick on festive candy-cane or snowman stickers for an added holiday touch.
Chocolate Cake Pops

For the Chocolate Cake:
- cups Granulated Sugar
- tsp Salt
- 1 cups All Purpose Flour
- cup Unsalted Butter
- tsp Vanilla Extract
- cup Water
- tsp Baking Powder
- cup Cocoa Powder
- tsp Baking Soda
- 4 tbsp Vegetable Oil
- cup Milk
- 2 Eggs
For the Cake Pop Decoration:
- 250g White Chocolate Chips
- 250g Dark Chocolate Chips
- Lollipop Sticks
- 4tbsp Canola Oil
- 2 Candy Canes, crushed
- Styrofoam
- Handful of Walnuts, Almonds, Pecans, all finely chopped or crushed
Step-by-Step Instructions:
- Preheat your oven to 350 degrees Fahrenheit.
- Grease a medium sized cake pan or baking tray with oil or butter.
- To make the cake, first combine the dry ingredients. Take a large mixing bowl, and add your flour, baking powder, baking soda, sugar, salt and cocoa. Combine them well.
- Use whisk or beater to add butter the butter into the mixture.
- Add oil and continue to mix till you get a grainy texture.
- In another small bowl, add vanilla extract, milk and water, and mix together. Add this wet mix to your grainy dry mix.
- Continue to mix the ingredients.
- Add eggs, one by one, and keep whisking. The ingredients should form a smooth batter.
- Dont worry if your mix looks thin, as it will thicken when it bakes.
- Pour the cake batter evenly onto greased baking tray and slide into the oven.
- Your cake should take around 25 minutes, check the cake by inserting fork into the center of the cake and take it out. The fork should be completely clean. If it comes with liquid batter stuck, allow it to bake for a couple minutes more.


