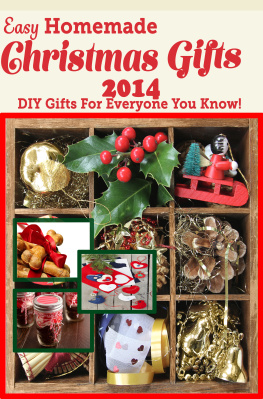
Easy Homemade Christmas Gifts 2014:
DIY Gifts For Everyone You Know!
By: Katie Cotton
TABLE OF CONTENTS
PUBLISHERS NOTES
Disclaimer
The author and publisher specifically disclaim all responsibility for any liability, loss or risk, personal or otherwise, which is incurred as a consequence, directly or indirectly, from the use or application of any contents of this book.
Any and all product names referenced within this book are the trademarks of their respective owners. None of these owners have sponsored, authorized, endorsed, or approved this book.
Always read all information provided by the manufacturers product labels before using their products. The author and publisher are not responsible for claims made by manufacturers.
Kindle Edition 2014
Manufactured in the United States of America
DEDICATION
This book is dedicated to all of you who give gifts from the heart and who know that giving your time to make a personal gift makes any gift a treasure. The true meaning of gift giving is in the feeling the giver and receiver share ( my Mom taught me this!).
CHAPTER 1- 9 EASY TO MAKE CHRISTMAS GIFT IDEAS FOR KIDS
The Christmas season is always the best time of DIY homemade gifts. It is fun to give toys that is something specifically tailored of the kids than their store bought toys. You can put together a huge ball pit or build them an a beautiful kiddie kitchen and those things are still played with nearly daily. Here are some of the wonderful DIY handmade gifts for kids this Christmas. And the best part about these gifts is that they work not only for this holidays, but also other special occasions.
SOFTEST PLAY DOUGH
Supplies
1 part Hair Conditioner
2 parts Corn Starch.
Food Coloring
1. We added some food coloring for diversity. Since not all hair conditioners are the same consistency, you may need to alter the amounts just a bit so it is dough consistency.
2. Think of this as a mix between playdough and cloud dough. It is light and airy like cloud dough, but molds better as the conditioner helps the cornstarch become more pliable. You can also make goop or silly putty with cornstarch. It is such a fun ingredient to have in your craft cabinet!
3. You can make your Silky Play Dough as a gift for a friend. Package the playdough up with glitter, a couple of play dough toys (rolling pin, cookie cutters, sequins, etc.) and cupcake liners. Everything a princess needs for her own magical pretend play.
DRAWING JOURNAL
Materials Needed
Drawing paper
Thick paper for cover (watercolor paper, thin cardboard, or cardstock)
String or yarn
Hole puncher
1. Decide on the size of the journal and cut drawing paper and two cover pages to match. Make the cover pages slightly larger than drawing paper.
2. Decorate the cover. Cover the covers in pieces of bleeding tissue paper. Paint water over the tissue paper. Let it sit for a few minutes. Remove the tissue paper and let it dry.
3. Laminate or use clear contact paper on the covers.
4. Create three holes at the end of all paper and cover.
5. Attach the papers together with string. Tie loosely to allow room to move pages.
Enjoy giving a truly unique present to the special child in your life!
GREAT KEEPSAKE
Materials Needed
Model Magic
Colored Marker
1. Roll out your piece of Model Magic and push your childs hand in evenly.
2. Use a straw to make a hole in the top before it dries.
3. Let it dry for 24-48 hours, turn it over to make sure the back dries too.
4. Brainstorm some Christmas ideas of what could be drawn (eg. Snowmen.)
5. Now dried and ready for details! Use a black Sharpie to trace the outline of his hand.
6. Make sure you write your name and date on the back for posterity!
POPSICLE STICK PUZZLES
Materials Needed
Popsicle sticks
Crayons
Glue
Painters Tape
1. Tape the popsicle sticks together into a canvas of sorts. Use painters tape so the surface wouldnt get gummy.
2. Draw the outline of the picture you are going to create with permanent markers. Paint inside the lines of the pictures you drew.
3. Use shaving cream finger-paint as it doesnt spill. Its cheap, washable and smells nice.
4. To make the puzzles more difficult, wait until the paint dries, un-tape the sticks, mix them up and tape the painted side. Make a double sided puzzle it is simple enough that the three year old kids could make them, but once you mixed a bunch of the double-sided puzzles together, it is complicated enough to stump an 8 year old.
MELTING GIANT WAX CRAYONS
Use the crayon scraps to make your own crayons. This is a great way to use broken crayons and kids love doing this!
Melt crayons:
Hot plate
Small glass jars or bowls an old muffin tin also works great!
Broken crayons brands dont matter.
Candy mold or ice cube trays.
Refrigerator or freezer space
Peel the crayon bits to remove the paper and sorting them into color groups. Melt the crayons in color groups. To melt you can either use a hot plate or melt it in the microwave in a bowl, inside a bowl of water. You want to be sure that it heats the wax evenly. Pour into the mold and then stick the mold into the fridge or freezer till the wax sets. Have fun!
CHRISTMAS SWEATER BABY LEG WARMERS
Supplies
Old Sweater
Scissors
Sewing Machine
Felt (1 sheet)
Needle and Thread (embroidery thread works best)
1. To start out, cut off the sleeves. If possible, try the leggings on your baby model to get an idea of the length.
2. Now that you have the length you want, cut off half of the sleeve cuff.
3. Take the cuff you just cut and pin it right sides together to the opposite end of the sleeve. Sew together with 1/4 inch seam.
4. Now you have one completed leg warmer. Follow those steps to finish your second leg warmer.
5. Grab your felt and cut out two little Christmas trees. You can use green felt Tip: Christmas trees are about 2 1/2 in x 3 in in size.
6. Pin the trees in place and grab a needle and thread to sew on the christmas tree patch. If you love the homemade look, stitch the tree patch. It didnt take any time at all to sew the trees on. Probably about 10 minutes for each tree. If you arent crazy about hand stitching, you can use your sewing machine.
DIY DRUMS FOR YOUR LITTLE DRUMMER BOY
Supplies:
Tin cans
Leather
Decorative fabric
Leather laces
Crop-a-dile (or large needle)
Wooden dowel
Ball
Hot glue gun
Cotton.
1. Cut your fabric to fit around your tin can. Glue it in place.
2. Lay out your leather and trace around your can. Measure 1 inch around the traced circle and draw another circle.
3. Use a pen to map out your holes. Use a Crop-a-dile to punch the holes out. If you don't have a Crop-a-dile, you can use a large needle to make your holes.
4. Run your leather lace through the holes. Cinch tight over the top of the can. Repeat the same steps to the bottom. Run another leather lace diagonally through the top and bottom laces.

