Photoshop
for Landscape Photographers
Art and Techniques
Photoshop
for Landscape
Photographers
Art and Techniques
John Gravett

THE CROWOOD PRESS
First published in 2017 by
The Crowood Press Ltd
Ramsbury, Marlborough
Wiltshire SN8 2HR
www.crowood.com
This e-book first published in 2017
John Gravett 2017
All rights reserved. This e-book is copyright material and must not be copied, reproduced, transferred, distributed, leased, licensed or publicly performed or used in any way except as specifically permitted in writing by the publishers, as allowed under the terms and conditions under which it was purchased or as strictly permitted by applicable copyright law. Any unauthorised distribution or use of this text may be a direct infringement of the authors and publishers rights, and those responsible may be liable in law accordingly.
British Library Cataloguing-in-Publication Data
A catalogue record for this book is available from the British Library.
ISBN 978 1 78500 119 2
CONTENTS
Chapter 1
Photography and Photoshop
A s landscape photographers, we should be using editing software like Photoshop to improve and enhance photographs rather than rescue poor images. There is an old adage rubbish in, rubbish out and this applies to the photographic process as much as anything else.
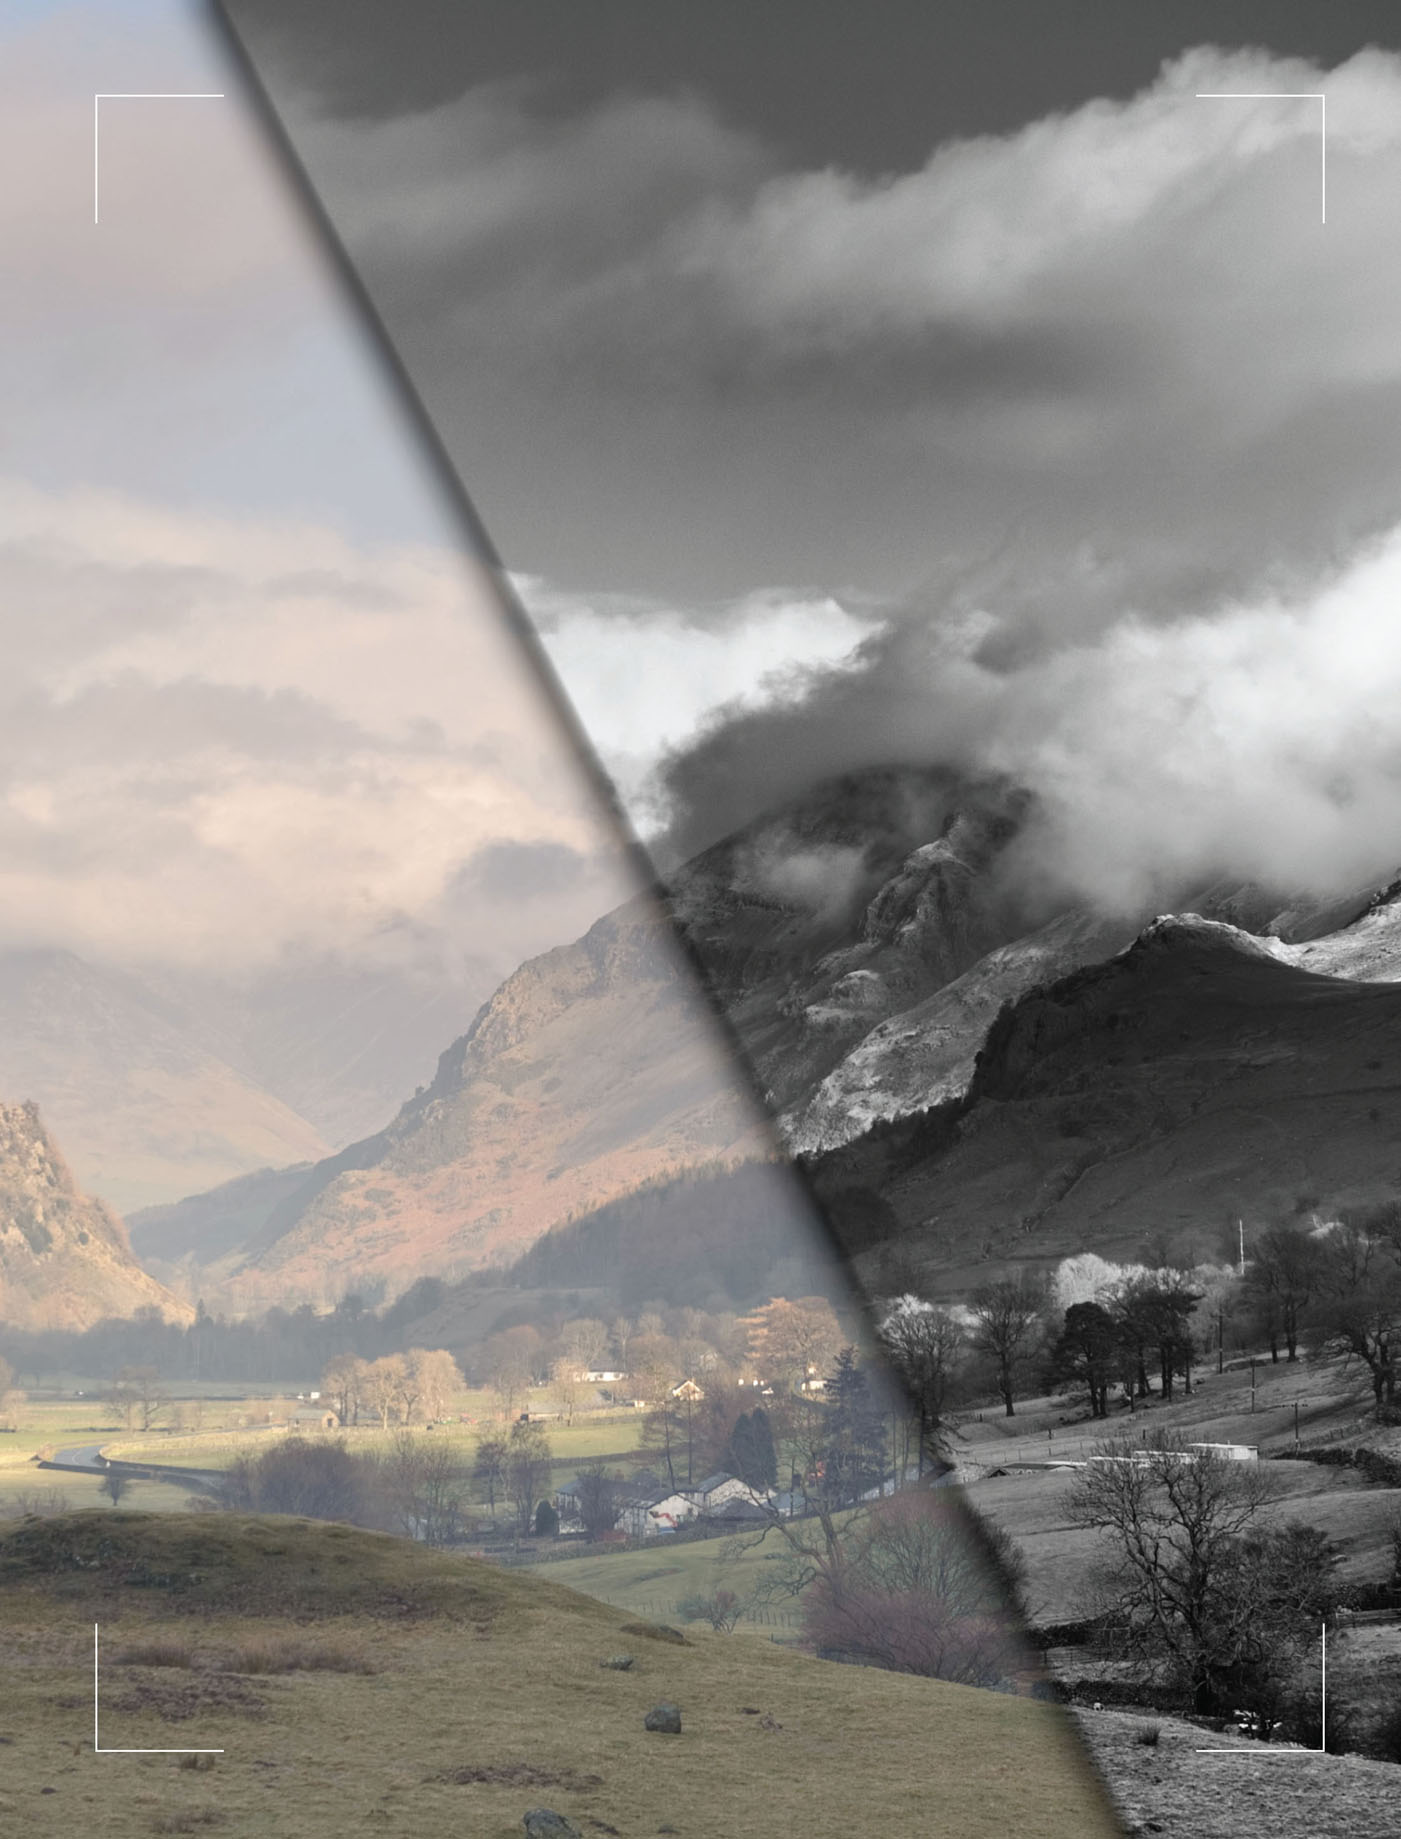
The photographic process doesnt start with importing the pictures into editing software, but right back at the beginning, with the initial exposure. In the days of film, we talked about going out and taking photographs. Now it might be more relevant to talk about shooting data, as the more data we can capture at the taking stage, the better our final image quality will be. Some photographers these days refer to making photographs and that is what editing software gives us the ability to do.
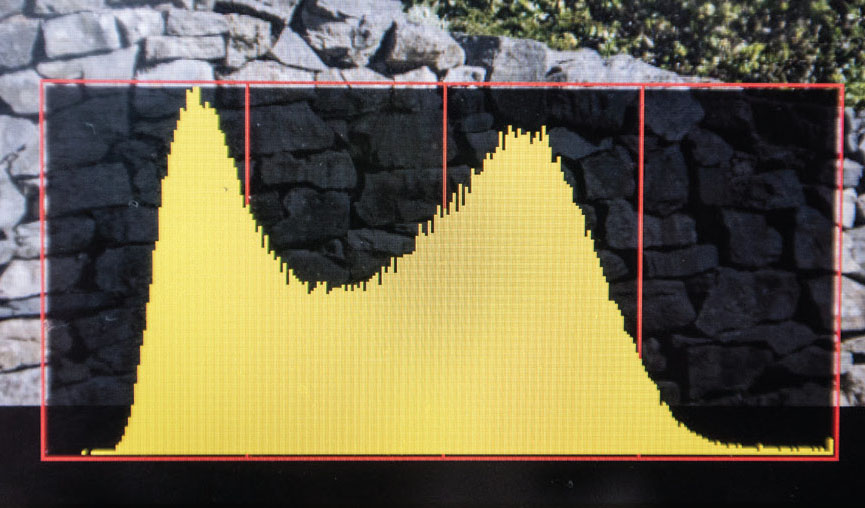
Fig. 1.1
The histogram showing the spread of data from dark tones (on the left), to highlights (on the right).
I started really looking at the histogram on the back of my camera a few years back, not just to see if the exposure was acceptable but to see if I could maximize the data in my file by improving the exposure. Changing from slide film to digital was a real step change for me. With slides, the initial exposure produced the final shot no further adjustments were possible. With digital, the greatest aggregation of data occurs at the right end of the histogram, so pushing the histogram to the right (by maximizing exposure) will give more data to work with. In doing this, it is of course vital that you retain highlight detail, and dont clip your highlights, but getting into the habit of this will give greater data with significantly improved shadow detail. Over-lightening dark shadows in Photoshop is a sure-fire way to create poor images with noise.
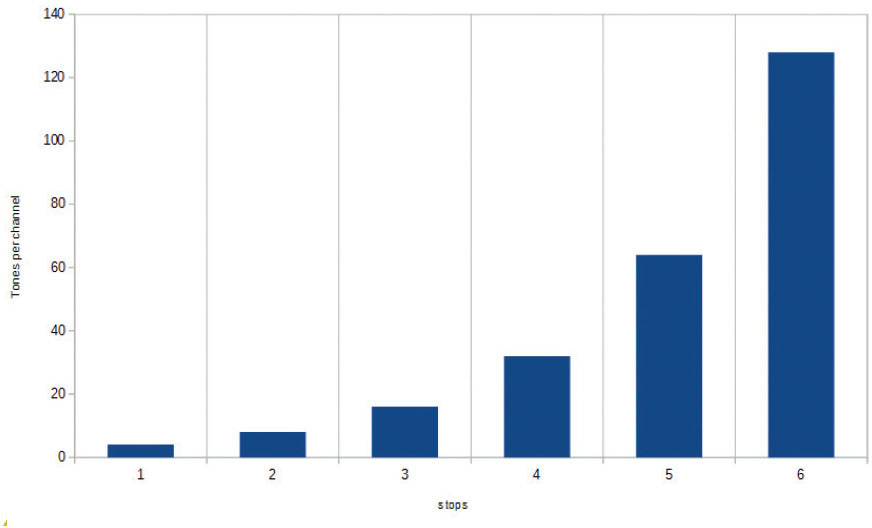
Fig. 1.2
Data spread over the 6 stops of the dynamic range of a typical digital camera showing that the right-hand stop of the histogram holds 50% of the total available data.
Although the dynamic range of the human eye is only about 7 stops, as we scan a scene the eye constantly adjusts and the brain pieces together the information, giving us an effective dynamic range of in excess of 20 stops. The digital image recorded in-camera has a dynamic range of about 6 stops; this works well with most subjects, but where the dynamic range exceeds the capabilities of the camera, either highlight or shadow detail will be lost. Getting round this problem is something we will be looking at in Chapter 8. On a typical scene though, where there is a bit of leeway at each end of the histogram, positioning makes a huge difference.
If we look at the spread of data across the histogram first (and these numbers relate only to the JPEG image RAW files have significantly more data), there are 256 tones in each of the red, green and blue channels, from white through to black. These however are not spread evenly across the 6 stops of the histogram. The extreme right-hand (lightest) stop holds 50 per cent of the information, in other words 128 tones, the next 64, then 32, 16, 8 and 4 respectively.
It follows therefore, if you lighten dark shadows excessively, you are pushing data from an area which contains say, 4 tones per channel, into an area that requires 8 or 16 tones per channel, effectively trying to create new data, which is achieved simply by creating noise. Pushing your histogram as far to the right as possible at the taking stage should give you more data, as long as you retain highlight detail.
 | WHAT SHAPE SHOULD A HISTOGRAM BE? A question I get asked time and time again Should a perfect histogram be high in the middle and low at each end a classic bellshaped histogram? The answer is of course that there is no correct shape for a histogram, it merely shows the distribution of the brightness across an entire image. But as far as exposure is concerned, we are striving to keep the brightest highlights towards the right end of the histogram. If the image is predominantly dark, with a few light areas, the majority of the histogram will be to the left, but those few bright areas will be towards the right, and we endeavour to push them as far to the right as possible without clipping the highlights. |  |
 |  |
RAW FILES V JPEGS
The debate on what type of file to shoot RAW or JPEG has raged since digital photography has been about, and will doubtless continue forever. The simple answer is whichever suits you best. Both have their advantages, both their disadvantages. For me, one clearly outweighs the other, but this is dependent upon your priorities.
JPEGs
Shooting an 8-bit JPEG will give you a relatively small file size, minimizing the space taken up on your computer. A certain amount of processing can occur in-camera maybe not as sophisticated as doing it in Photoshop, but the downloaded thumbnails will have a more complete look than with RAW, possibly encouraging you to look at them further, and certainly for those without the inclination to process pictures this may be the better option.
The downside of JPEGs is that the way they are written to the computer means they are compressed to take up as little space as possible. As the JPEG format is a lossy format, every time a JPEG file is written to, data is compressed in slightly different ways, losing (destroying) the quality of the image.
Lightening shadow details on JPEG files is more likely to cause noise due to the lack of information present in the original data. Similarly, trying to create texture in relatively smooth areas, such as cloudy skies, is more likely to create artefacts and banding (lines across areas that should be a smooth transgression of tones) in the image, compromising the quality. That said, if editing is kept to a minimum, JPEGs can still produce superb results.
Next page
