1. Table Views Quick Start
In this chapter, youll start your exploration of table views. This chapter begins with an overview of what table views are and some examples of how theyre used in practice. Then, in the second section, youll build a simple Hello, world-style table view app to introduce you to the components behind the user interface and help you contextualize the detail that will come in later chapters.
If youre just starting to use table views, its worth taking some time to build a very simple one from scratch before diving into the gnarly details. However, if youve reached the stage where you feel more confident about how the components of the table view jigsaw fit together and want to get straight into the code, feel free to skip the rest of this chapter completely. Ill cover the elements in detail later, so you wont miss out.
What Are Table Views?
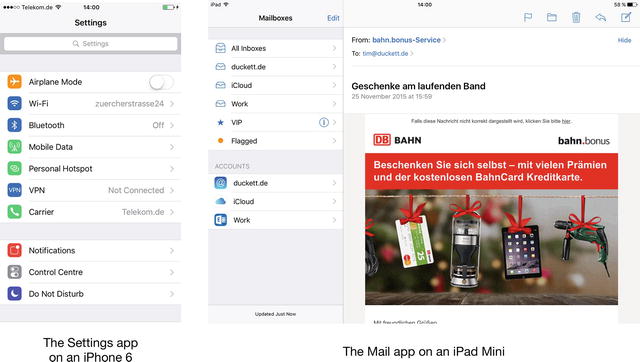
Examples of table views can be found everywhere in iOS apps. You are already familiar with simple tables, implemented as standard controls such as the iPhones Settings app or the iPads Mail app, shown in Figure .
Figure 1-1.
Some basic table-based applications
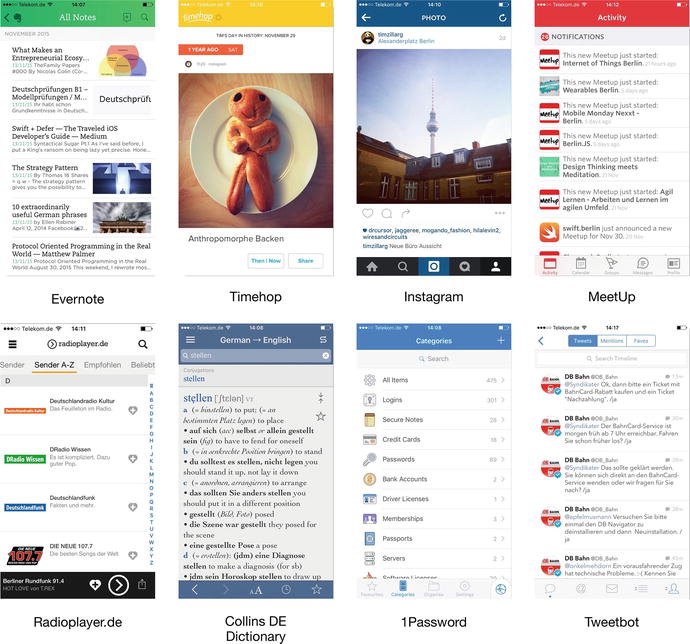
At the other end of the scale, the default look, feel, and behavior of the table view and cells can be customized to the point where they are hardly recognizable as table views at all. Figure shows some examples.
Figure 1-2.
Examples of table views in action on the iPhone
The Anatomy of a Table View
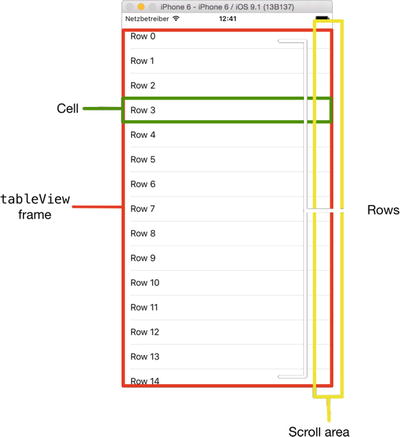
The table view displays a list of elements, also known as table view cells, that can be scrolled vertically. The table view is composed of two physical parts:
The container partthe tableView itselfis a subclass of UIScrollView and contains a vertically scrollable list of table cells.
Table cells, which can be instances of one of four standard UITableViewCell types or custom subclasses of UITableViewCell that can be customized as required.
Figure illustrates the parts of a table view.
Figure 1-3.
The basic anatomy of a table view
The table view cant operate on its own, though; it needs the support of objects that conform to two UITableView protocols:
The object that conforms to the UITableViewDatasource protocol provides the table view with the data that it needs to construct and configure itself, such as the number of sections and rows. It also creates and provides the cell objects that the table view displays.
The object that conforms to the UITableViewDelegate protocol is responsible for handling user interaction with the table, such as selection, editing, and ordering.
A very common pattern is for the UIViewController instance that manages the view in which the table lives to also act as the data source and delegate. As youll see later in , this doesnt always have to be the case; it can help to make the architecture of your app cleaner if those functions are delivered by other classes.
Creating a Simple Table View App
In the rest of this chapter, youll build a simple Hello, world style table view app from scratch. It will show you how the container, cells, data source, and delegate all fit together and give you an app that you can use as the basis for your own experiments.
Im going to take it deliberately slowly and cover all the steps. If youre a confident Xcode driver, you wont need this hand-holdingjust concentrate on the code instead.
Still with me? Okayyoure going to do the following:
Create a simple, window-based application skeleton.
Generate some data to feed the table.
Create a simple table view.
Wire up the table views data source and delegate.
Implement some very simple interactivity.
Its a very straightforward but useful practice. Onward!
Creating the Application Skeleton
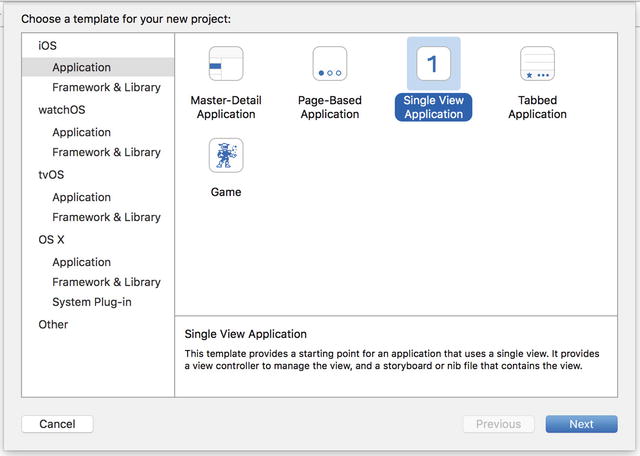
For this application, youre going to use a simple structure: a single view managed by a view controller, and a Storyboard file to provide the content for the view. Fire up Xcode and select the Single View Application template, as shown in Figure .
Figure 1-4.
Xcodes template selection pane
Note
With each new release of Xcode, Apple frequently (and pointlessly) changes the templates that are included. You may see a set that is different from those shown in Figure . Check the description of the templates to find the one that provides a single view application.
Figure 1-5.
Name the application
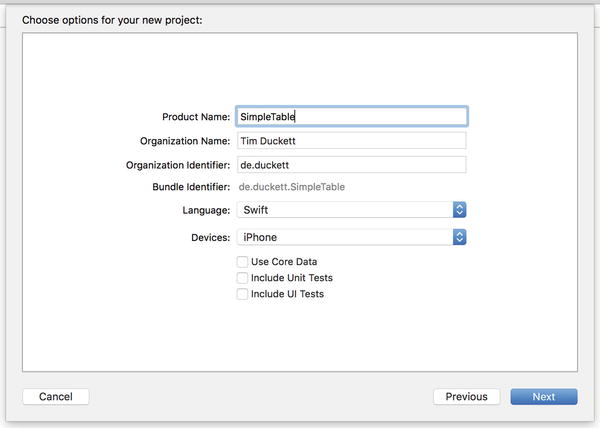
Call the application SimpleTable . Youre going to build an iPhone version, but you dont need Core Data or any tests.
Make sure those options are selected as needed, as shown in Figure .
Finally, you need to select where you want to save the project. You dont need to worry about creating a local Git repository for this project unless you particularly want to.
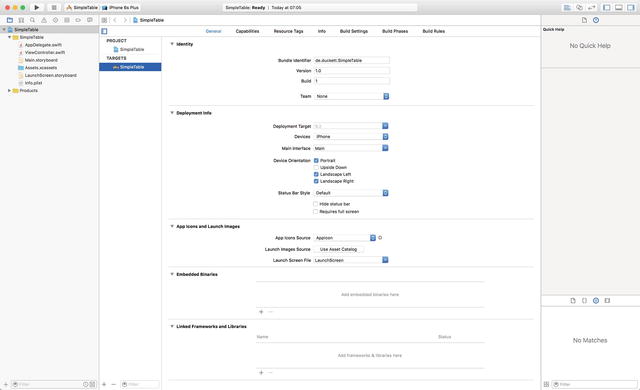
When youve reached this point, youll see the project view of Xcode, with the initial skeleton of your application. Itll look something like Figure , assuming that youve stuck with the SimpleTable application name.
Figure 1-6.
The initial Xcode view showing your new skeleton application
Youll see that you have the following:
An app delegate ( AppDelegate.swift )
A view controller ( ViewController.swift )
A Storyboard file ( Main.storyboard )
At the end of this chapter, youll look again at how these fit together. For the moment, youll be working with the view controller and the Storyboard file.
At this point, you can run the app to verify that it compiles correctly. Go to Product Run or press Command+R and youll see the apps launch screen and an empty white view. Now youre ready to start building the table view.
Generating Some Data
Before you start with the table view itself, you need to create some data to feed it. Because this is a simple table example, the data is going to be simple too. Youll create an array of strings that contains some information to go into each cell.
The data array will need to be ready by the time the data source is called by the table view, so where to create it? There are several options, but one obvious place is in the view controllers viewDidLoad function. Its safe to create it here.








![Neuburg - Programming iOS 8 : [dive deep into views, view controllers, and frameworks; covers Swift, iOS 8.1, Xcode 6.1]](/uploads/posts/book/108865/thumbs/neuburg-programming-ios-8-dive-deep-into.jpg)
