CONTENTS
Part I
Integrated Development Environment
- CHAPTER 1: A Quick Tour
- CHAPTER 2: The Solution Explorer, Toolbox, and Properties
- CHAPTER 3: Options and Customizations
- CHAPTER 4: The Visual Studio Workspace
- CHAPTER 5: Find and Replace and Help
Chapter 1
A Quick Tour
WHATS IN THIS CHAPTER?
- Installing and getting started with Visual Studio 2012
- Creating and running your first application
- Debugging and deploying an application
Ever since software has been developed, there has been a need for tools to help write, compile, debug, and deploy applications. Microsoft Visual Studio 2012 is the next iteration in the continual evolution of a best-of-breed integrated development environment (IDE).
This chapter introduces the Visual Studio 2012 user experience and shows you how to work with the various menus, toolbars, and windows. It serves as a quick tour of the IDE, and as such it doesnt go into detail about what settings can be changed or how to go about customizing the layout because these topics are explored in the following chapters.
GETTING STARTED
With each iteration of the Visual Studio product, the installation process has been incrementally improved, meaning that you can get up and running with Visual Studio 2012 with minimal fuss. This section walks you through the installation process and getting started with the IDE.
Installing Visual Studio 2012
When you launch Visual Studio 2012 setup, youll see the dialog in enabling you to specify the location for the installation. After you have read the licensing information (in great detail, of course), you can click the check box to accept the terms and move to the next screen in the installation sequence. Youll also notice an option to join the Customer Experience Improvement program. If you do so, anonymous information about how you use the product will be sent to Microsoft occasionally. And just so you have a sense of how that information is used, realize that many of the user interface changes that youre about to see were determined based on this feedback.

Visual Studio 2012 naturally has a number of mandatory features. Because these features are built in, the installation process doesnt bother mentioning them. However, you can select from a number of optional features, as shown in . Choose the features you believe you need (keeping in mind that you can always add or remove them later) and click Install to begin the process.
At this point, youll see the updated progress dialog, as shown in . Depending on which components you already have installed on your computer, you may be prompted to restart your computer midway through the installation process. When all the components have been successfully installed, a Setup Summary dialog indicates that there were no problems with the installation process.
Running Visual Studio 2012
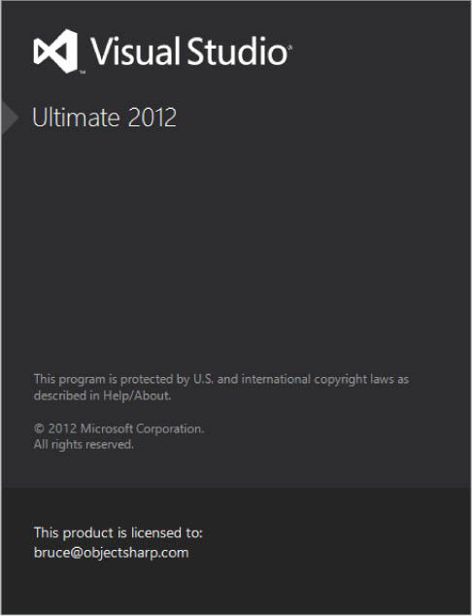
When you launch Visual Studio, the Microsoft Visual Studio 2012 splash screen appears. Like a lot of splash screens, it provides information about the version of the product and to whom it has been licensed, as shown in .
NOTE An interesting fact about the splash screen is that although a large portion of Visual Studio uses WPF to display its content, the splash screen in Visual Studio 2012 is still done in native code so that it displays as soon as possible after you start Visual Studio. A significant amount of time went into hand-crafting the wave at the bottom of the splash screen, so make sure you marvel at it whenever you sit there patiently waiting for Visual Studio to load.
The first time you run Visual Studio 2012, youll see the splash screen only for a short period before you are prompted to select the default environment settings. It may seem unusual to ask those who havent used a product before how they imagine themselves using it. Because Microsoft has consolidated a number of languages and technologies into a single IDE, that IDE must account for the subtle (and sometimes not so subtle) differences in the way developers work.
Take a moment to review the various options in this list, as shown in . The differences between them as reflected in the IDE vary. Youll find that the environment settings affect the position and visibility of various windows, menus, toolbars, and even keyboard shortcuts. You cant see the differences while youre in this list (naturally). But if you select a particular option, such as General Development Settings, a description of the changes that will be applied appears to the right. Chapter 3, Options and Customizations, covers how you can change your default environment settings at a later stage.
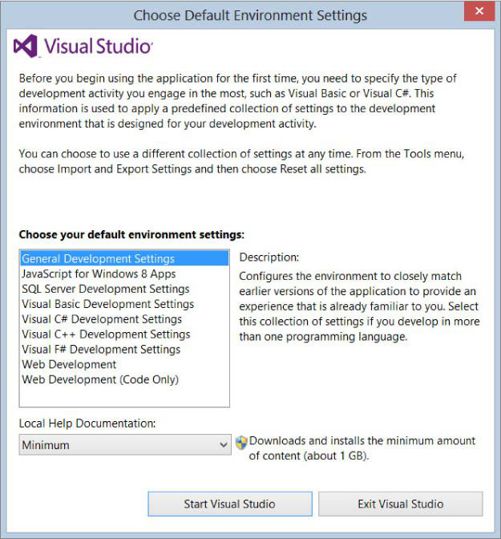
NOTE The name Visual Basic Development Settings makes it sound like its a natural fit for Visual Basic .NET developers. However, its not. These settings have been configured for VB6 developers and will infuriate Visual Basic .NET developers who are not familiar with VB6 because they will be used for different shortcut key mappings. Visual Basic .NET developers should use the general development settings because these use the standard keyboard mappings without being geared toward another development language.
THE VISUAL STUDIO IDE
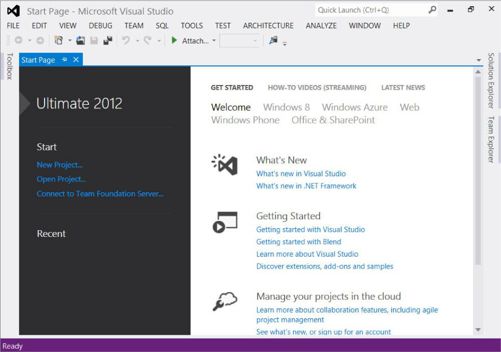
Depending on which set of environment settings you select, when you click the Start Visual Studio button, you will most likely see a dialog indicating that Visual Studio is configuring the development environment. When this process is complete, Visual Studio 2012 opens, ready for you to start working, as shown in .
Regardless of the environment settings you select, youll see the Start Page in the center of the screen. However, the contents of the Start Page and the surrounding toolbars and tool windows can vary.
NOTE If you click the Latest News, this opens a screen that enables you to set up an RSS feed containing news related to Visual Studio and .NET development. Clicking the button labeled Enable RSS Feed enables an RSS feed determined by the environment settings you specified. Each item displays with a title and summary, enabling you to click through to the full article. You can customize this feed by changing the Start Page News Channel property on the Environment Startup node of the Options dialog, accessible via the Options item on the Tools menu.
Before you launch into building your first application, you must take a step back to look at the components that make up the Visual Studio 2012 IDE. Menus and toolbars are positioned along the top of the environment, and a selection of subwindows, or panes, appears on the left, right, and bottom of the main window area. In the center is the main editor space. Whenever you open a code file, an XML document, a form, or some other file, it appears in this space for editing. With each file you open, a tab is created so that you can easily switch between opened files.
Next page

