Add data to a shape
Enter data into a shape's data property
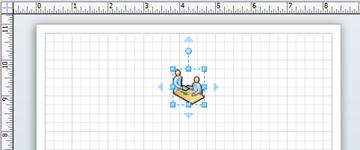
- Select a shape on the drawing page.
- Right-click the shape and then click Shape Data.
- In the Shape Data window, in the property row that you want, enter the data that you want.
Define a new data property for a shape
- Select a shape on the drawing page.
- Right-click the shape and then click Define Shape Data.
- In the Define Shape Data dialog box, click New.
- In the Label box, delete the default text and type a name for the property.
- In the Type list, select the type of data that you want to be entered into that property.
Tip If you want the property to accept text (like a persons name) as the type of data, select String.
- In the Value box, type the data that you want to store.
- Click OK.
- Right-click the shape again, point to Data, and this time click Shape Data.
The Shape Data window opens and displays all the data that has been defined for the shape. If all of the shapes have specific information, you can leave the Shape Data window open and click the shapes you are interested in to see the data that they contain.
For more information, see Data in diagrams.
Add a shape
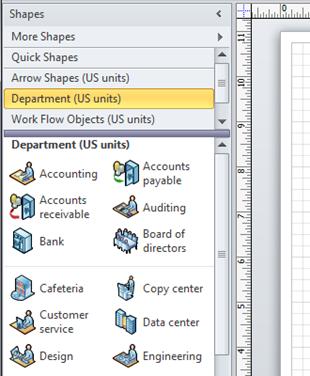
- From the Shapes window, click and hold the shape that you want.
- Drag the shape onto the diagram page.
For more information about how to add shapes, see Use the Shapes window to organize and find shapes and Find more shapes and stencils.
Connect data sources to shapes
If your data is in a database or an Excel workbook, you can pull that data into your diagram automatically and connect the rows of data with specific shapes.
Use the Data Selector wizard to import your data into the External Data window.
The data that appears in the External Data window is a snapshot of your source data at the time of import. You can update the data in your drawing to match the changes in your source data by clicking Refresh All on the Data tab.
- On the Data tab, in the External Data group, click Link Data to Shapes.
- On the first page of the Data Selector wizard, choose which of the following types of data sources have the data you're using:
- Microsoft Office Excel workbook
- Microsoft Office Access database
- Microsoft Windows SharePoint Services list
- Microsoft SQL Server database
- Other OLEDB or ODBC data source
- Complete the remainder of the wizard.
After you click Finish on the last page of the Data Connection wizard, the External Data window appears with your imported data shown in a grid. Drag a row of data onto a shape to add automatically the data to the Shape Data for that shape. Or, in the Shapes window, select a shape that you want to hold the data, and then drag a row of data and drop it on an empty area of the page. The selected shape is added to the page, connected to the data.
For more information, see Data in diagrams.
Add a connector between two shapes
AutoConnect with the mini toolbar
- Drag a first shape onto the drawing page.
- Hold your pointer over the shape that is already on the page. Notice that small blue arrows appear on the four sides of the shape. These are AutoConnect arrows that you can use to connect shapes.

- Move the pointer to cover one of the arrows.
A mini toolbar that contains four shapes appears, and a preview shape might also appear on the page. As you move the pointer over the shapes in the mini toolbar, previews of the shapes appear. The shapes on the toolbar are the top four shapes from the Quick Shapes area.
- Click one of the shapes in the mini toolbar to add it to the page.
AutoConnect with drag and drop
- Drag one shape onto the drawing page.
- Drag a second shape onto the drawing page and hold it so it covers the first shape, but do not drop it yet. Notice that the AutoConnect arrows appear.

The Analyze shape is held over the bottom AutoConnect arrow of the Service Request shape.
- Move the second shape over the AutoConnect arrow that points in the direction that you want, and drop it on the arrow.

The Analyze shape is dropped on the bottom arrow of the Service Request shape, and is connected automatically.
Connect shapes that are already on the page
- Hold the pointer over the shape you want the connector to come from.
- When the AutoConnect arrows appear, move the pointer over an arrow that is pointing toward the shape that you want to connect to.
- Click and hold the AutoConnect arrow, and then drag a connector from it to the center of the other shape.
When the arrow is over the center of the other shape, a red border appears around the shape. Drop the connector to attach it, or "glue" it, to the shape.
For more information about how to connect shapes, see Connect shapes by using AutoConnect or the Connector tool.
Contents

Create a new diagram
- Click the File tab. This opens up the Backstage view.
Note You are in the Backstage view when you first open Visio. If you have just opened Visio, proceed to the next step.
- Click New.
- Under Template Categories, click the category that you want, and then click the template that you want.
- Click Create.
When the diagram template opens, most of the space is taken up with a blank diagramming page. Along the side is the Shapes window, which contains several stencils full of shapes. The stencils are identified by title bars at the top of the Shapes window; you might need to scroll the title bar pane to see them all. When you click a stencil title bar, the shapes appear in the pane below.

To see information about a template, select it and look in the details pane on the right. For more information, see How can I tell what each Visio template is for?.
Free clip art, templates, and more from Office.com
Office.com has extensive help for Microsoft Office programs, and it's also a great place to download free clip art, templates, and other productivity enhancers for work and home.
What do you think of Office Help in e-book format?
Send us your feedback:

2011 Microsoft Corporation. All rights reserved.


