J.B. Wood - Gun Digest Hi-Power Assembly/Disassembly Instructions
Here you can read online J.B. Wood - Gun Digest Hi-Power Assembly/Disassembly Instructions full text of the book (entire story) in english for free. Download pdf and epub, get meaning, cover and reviews about this ebook. year: 2011, publisher: F+W Media, genre: Detective and thriller. Description of the work, (preface) as well as reviews are available. Best literature library LitArk.com created for fans of good reading and offers a wide selection of genres:
Romance novel
Science fiction
Adventure
Detective
Science
History
Home and family
Prose
Art
Politics
Computer
Non-fiction
Religion
Business
Children
Humor
Choose a favorite category and find really read worthwhile books. Enjoy immersion in the world of imagination, feel the emotions of the characters or learn something new for yourself, make an fascinating discovery.

- Book:Gun Digest Hi-Power Assembly/Disassembly Instructions
- Author:
- Publisher:F+W Media
- Genre:
- Year:2011
- Rating:5 / 5
- Favourites:Add to favourites
- Your mark:
Gun Digest Hi-Power Assembly/Disassembly Instructions: summary, description and annotation
We offer to read an annotation, description, summary or preface (depends on what the author of the book "Gun Digest Hi-Power Assembly/Disassembly Instructions" wrote himself). If you haven't found the necessary information about the book — write in the comments, we will try to find it.
This short eBook teaches you how to take apart and reassemble your Hi-Power with confidence. Thanks to clear Assembly/Disassembly instructions and crisp photography - aided by gun expert J.B. Woods sage advice - youll save an expensive trip to the gunsmith by getting to know your gun inside and out!
J.B. Wood: author's other books
Who wrote Gun Digest Hi-Power Assembly/Disassembly Instructions? Find out the surname, the name of the author of the book and a list of all author's works by series.


Gun Digest Hi-Power Assembly/Disassembly Instructions — read online for free the complete book (whole text) full work
Below is the text of the book, divided by pages. System saving the place of the last page read, allows you to conveniently read the book "Gun Digest Hi-Power Assembly/Disassembly Instructions" online for free, without having to search again every time where you left off. Put a bookmark, and you can go to the page where you finished reading at any time.
Font size:
Interval:
Bookmark:


| Data: | Browning Hi-Power (P-35) |
| Origin: | Belgium |
| Manufacturer: | Fabrique Nationale |
| dArmes de Guerre (FN), | |
| Herstal | |
| Cartridge: | 9mm Luger (Parabellum) |
| Magazine capacity: | 13 rounds |
| Overall length: | 7 9/16 inches |
| Height: | 5 inches |
| Barrel length: | 4 inches |
| Weight: | 32 ounces |
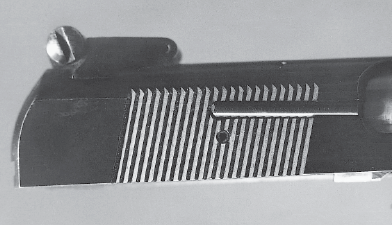
John M. Brownings last pistol design, the Hi-Power has been in continuous production since 1935, and is the standard and military sidearm of Belgium, England, Canada, and a number of other countries. It is also popular as a sporting and defense arm in the U.S., and is sold here by Browning in a slightly modified version, the one shown here. The main changes from the original (after about 1974) were in the extractor, sear lever pivot, and the shape of the hammer spur.
Remove the magazine and use the safety to lock the slide open.
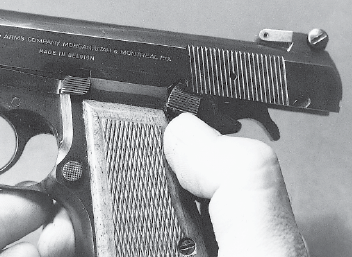
Push slide-latch up, and start it out of the frame by pushing on the exposed end of its shaft on the opposite side.
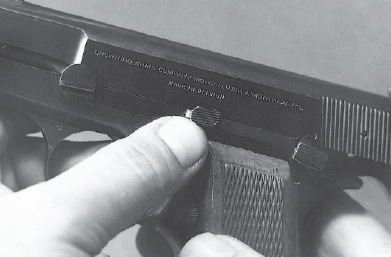
Remove the slide-latch from the left side of the frame.
Holding the slide against the spring tension, release the safety and run the slide and barrel assembly forward off the frame.
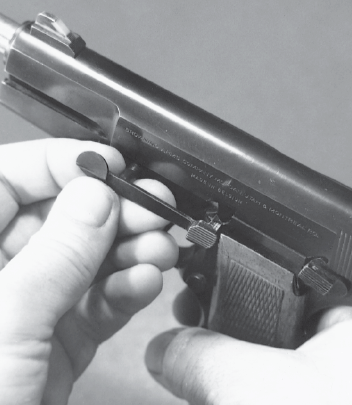
Move the recoil spring guide forward, out of engagement with its recess in the underlug of the barrel, and remove the recoil spring and guide. The forward end of the guide has a recessed screw which will release the internal spring and ball that supply slide latch tension.
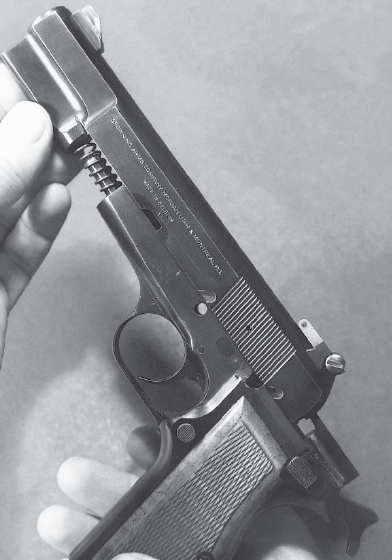
Lift the barrel at the rear and remove it from the underside of the slide. Gun is now field-stripped.

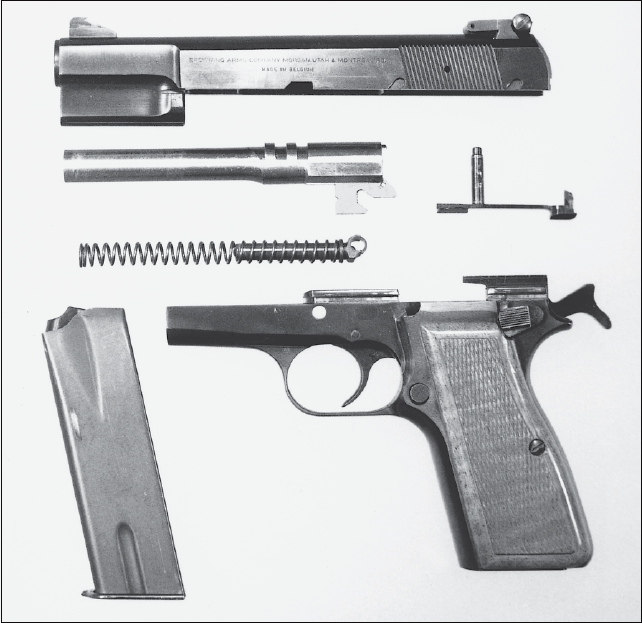
Browning Hi-Power field-stripped
Depress the firing pin with a drift of the proper size, and slide the firing pin retainer down and off to release the firing pin and spring for removal. CAUTION:This spring is under tension so ease it out!
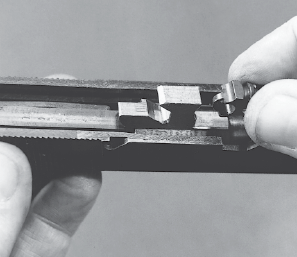
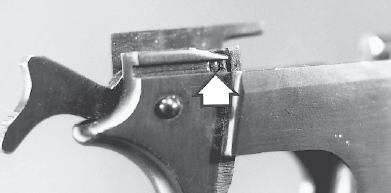
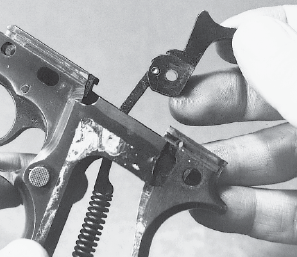
The sear lever (arrow) lies in a recess on the right underside of the slide. On older pistols, the extractor is removed in the same manner as our Model 1911 pistol, and this will release the sear pivot and its plate to be removed from the right side of the slide. Shown in the photo is the current model, which has a different system.
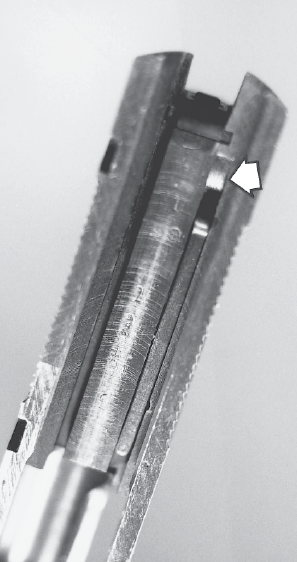
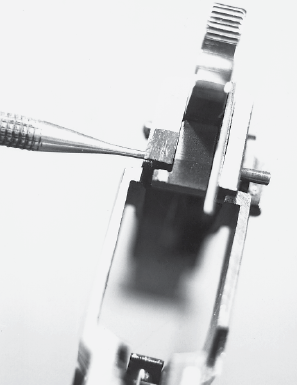
On current Hi-Powers, the sear pivot is a simple rolled cross-pin, located just below the extractor tail in this photo. Drifting out this pin will release the sear lever for removal from the underside of the slide.
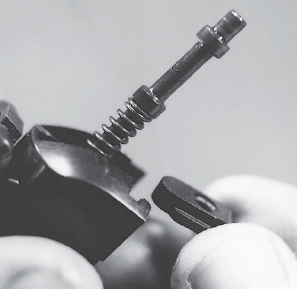
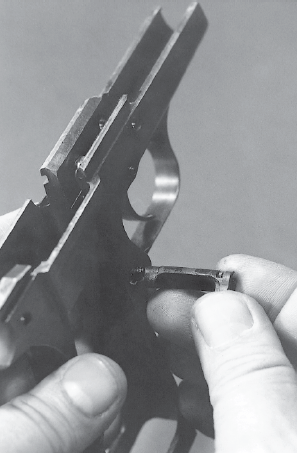
On current models, the extractor and its coil spring are released by drifting out a single vertical rolled pin.
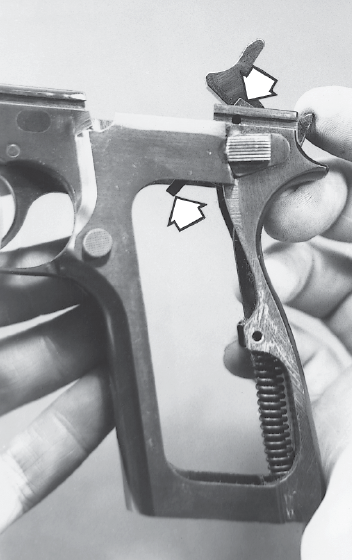
The sear pivot pin (arrow) which also stabilizes the ejector, is located at the top rear of the frame, in the slide track.
With the hammer down, drift out the sear pin and remove the sear from the top of the frame.
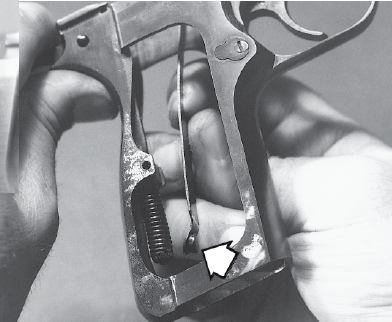
Draw the hammer back to compress the mainspring upward, and lift the sear spring stud (arrow) from its recess at the bottom of the grip frame. Remove the sear spring forward, into the magazine well.
Rotate the ejector (arrow) forward and down to free the safety catch.
The safety can now be removed from the left side of the frame. Driving out the small vertical pin in the safety will release the detent plunger and spring.
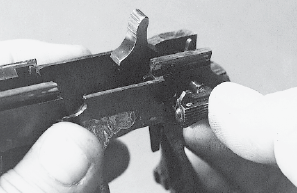
Removal of the safety will release the ejector, which is lifted out the top of the frame.
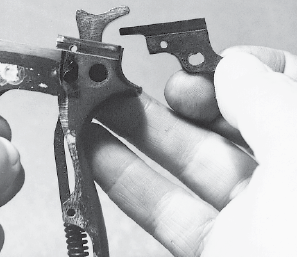
The hammer and its attached strut and spring are now moved forward to clear the spring from its shelf in the frame, and lifted out the top. The strut is cross-pinned to the hammer, and the spring is held by an adjustment nut and tiny cross-pin at the lower end of the strut.
The magazine release is retained by a screw-slotted catch on the right side. Push in the catch button until it is level with the frame, turn the slotted retainer toward the left, and remove the catch assembly toward the right side. The retainer and spring are removed by turning the slotted piece back toward the right. CAUTION:Spring is under tension; ease it out!
Font size:
Interval:
Bookmark:
Similar books «Gun Digest Hi-Power Assembly/Disassembly Instructions»
Look at similar books to Gun Digest Hi-Power Assembly/Disassembly Instructions. We have selected literature similar in name and meaning in the hope of providing readers with more options to find new, interesting, not yet read works.
Discussion, reviews of the book Gun Digest Hi-Power Assembly/Disassembly Instructions and just readers' own opinions. Leave your comments, write what you think about the work, its meaning or the main characters. Specify what exactly you liked and what you didn't like, and why you think so.