It's Time to
Make Clocks
Time flies, take time to smell the flowers, don't let time pass you by, I don't have enough time, it's time to go, it's about time that happened.
Well, you get the point. Everyone has time, needs time, and wants more of it. And now it's time to make clocks!
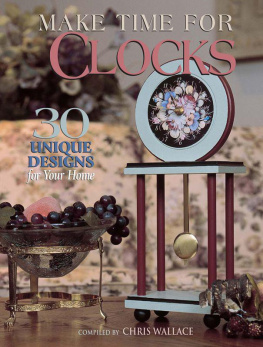
We know the time of day by looking at a clock, so it makes sense to create clocks for each room of our living spaces. In this book there's a great mix of projects for any skill level from beginner to advanced. You'll find many new ideas using innovative techniques by some of the most respected and talented designers and artists.
A clock can be made out of anything that can have a hole drilled into it. It can be made from an item you already have, a yard sale find, or something you purchase from a craft store. The clock faces, movements, hands, and numbers also can be found in craft stores, and the instructions for attaching any clock piece to any type of surface is shown very clearly on the back of the packaging. With so many different types of surfaces, movements, hands, faces, numbers and bezels, you are sure to find something that is just right for you.
Working with all of these wonderful designers was truly a joy. When the clocks began to arrive to be photographed, it was just like Christmas. Of course, the best part is being able to share them with you.
Special thanks to Hansen's TV Appliances & Home Furnishings of Waupaca, Wisconsin, who graciously allowed us the use of their store for photography purposes.
INTRODUCTION
Basic Information and Definitions of Terms
Wood and Moisture
Content
The pine and basswood products used throughout this book were kiln dried to a 68% moisture content. It is important to use wood products that have only 68% moisture content so the wood will not crack or warp in a home environment. The time spent creating these timepieces is valuable, and the pieces created will become heirlooms for future generations.
Preparing and Sealing
Wood Surfaces
During the manufacturing process, nails are sometimes used. The process leaves a hole that needs to be filled with putty. After filling holes, let dry, then sand lightly to smooth the surface. The wood product is now ready for sealing.
Some projects use techniques that might require sealing the wood after a beginning step, such as wood-burning. Some projects use painting techniques in which the designer wants to paint directly on the raw wood due to better results obtained for a particular technique. Unless otherwise directed, most wood surfaces should be prepared with a wood sealer before painting. Some wood sealers penetrate the wood, while others sit on top of the wood. One coat of wood sealer is all that is needed to seal the wood. Regardless of which type is used, it will be necessary to lightly sand with fine grade sandpaper after the wood sealer is dry. Always sand in the direction of the grain of the wood.

Batteries Needed
All clock movements will need a battery to function. Check package for battery size.
Glossary of Terms
Basecoat
To give an opaque coating to a surface, use a large, flat brush or sponge brush to smoothly apply a coat of paint. If a second coat is needed, always let the paint dry completely between coats.
Comma Stroke (Round Brush)
With bristles fully loaded, press bristles onto surface so that the end of brush rounds out. Slowly begin pulling the stroke and release pressure, letting bristles return to original shape, lift off surface.

Dots
Dip stylus, toothpick, or wooden end of brush into fresh paint and touch surface to create dot. For descending dots, load only once. For dots that are uniform size, dip tool into paint after each dot.
Double Load
With a different color of paint on each half of a slightly damp flat brush, stroke over and over in the same place on palette until the two colors merge in the brush center, creating a blend.

Dry Brush

Dip brush into paint. Wipe off almost all of paint onto paper towel. Brush over surface with little or no pressure. Color may be intensified by dry brushing over the same area, letting each coat of paint dry between applications.
Floating Color
Dip a flat brush in water and remove excess water by blotting on a paper towel. Pick up paint on one corner of the brush and blend back and forth on palette in one spot until color moves gradually across bristle to clear water on opposite side of brush.


