First Time Fabric Art
Step-by-Step Basics for Painting and Printing on Fabric

2015 Creative Publishing international, a member of Quarto Publishing Group USA Inc., 400 First Avenue North, Suite 400, Minneapolis, MN 55401, www.creativepub.com.
All rights reserved. No part of this work covered by the copyrights hereon may be reproduced or used in any form or by any meansgraphic, electronic, or mechanical, including photocopying, recording, taping of information on storage and retrieval systemswithout the written permission of the publisher. Due to differing conditions, materials, and skill levels, the publisher and various manufacturers disclaim any liability for unsatisfactory results or injury due to improper use of tools, materials, or information in this publication.
This material originally appeared in the book The Complete Photo Guide to Textile Art (ISBN: 978-1-58923-505-2) by Susan Stein.
Digital edition published 2015.
Digital edition: 978-1-62788-261-3
Softcover edition: 978-1-58923-873-2
Visit craftside.net
CONTENTS
Painting on Fabric
Fabric paints make altering and decorating fabric very quick and easy. Fabric paints give much the same results of dyes but without the time, formulas, chemicals, and unpredictability associated with dyeing. The hand of the fabric may change with paints, as they are bonded to the fabric with adhesives, rather than reacting directly with the fibers like dye will. There are many brands and types of fabric paints, so ask friends about their favorites and test any you might be considering for a project.
Generally, there are four kinds of paint. One is a very thin, transparent paint, which looks very much like dye when it is applied. It can be used for color washes and effects where bleeding and blending are desired. Dye-na-Flow is the kind used in the samples here. A second type of paint is slightly thicker but still transparent so it is more controllable and can be used for stamping, screen printing, and coloring black and white print fabrics. Textile Color and Setacolor are good brands to try. Both these paints and Dye-na-Flow work for sun-printing, but none can be used on dark fabric. Opaque paints cover what is underneath and can be used for stamping, screen printing, resist techniques, and on dark fabrics. Neopaque is an excellent choice. Metallic paints are lustrous and beautiful on dark fabrics, as well as light ones, and cover what is underneath. Lumiere, a metallic paint, comes in lots of great colors. Be sure to thoroughly mix metallic colors before using.
If you are sponging or stamping with opaque paints, you can let them dry and wash over them with thin transparent paint. Or, if you do a wash with thin paint and let that dry, you can stamp or print on top with opaque paint. After all paints dry, heat set with an iron following manufacturers directions. An alternative to ironing is placing the fabric in the clothes dryer on high for 30 minutes or simply allowing the paint to cure for two weeks before washing. After setting, the paint is washable, dry cleanable, and permanent. Wash all fabrics before painting to remove sizing, unless you are using prepared-for-dyeing fabrics. Paints will work on all fibers, since the color bonds to the surface rather than reacting with the fibers. You might even want to paint over some ugly fabric from your stash.
There are many ways to apply paint, and it is fun to try the what if approach to painting. Equipment requirements are minimalsponge brushes, sponges, bubble wrap, aluminum foil, paper towels, a plastic table cover, spray bottle, plastic cups, and an apron will get you through many hours of play. Remember that paints will pattern themselves on the fabric even if you dont intentionally manipulate the processwrinkled plastic under the fabric will add lines, wayward threads will absorb paint, ironing a piece dry on parchment paper will create a ribbed pattern, an air bubble under the fabric will make itself known when the fabric is dry.
YOU WILL NEED
heavy duty aluminum foil
PFD (prepared-for-dyeing) or other light-colored fabrics
Dye-na-Flow paint by Jacquard
sponge brush
bubble wrap
coarse salt
non-hardening sponge
Neopaque and Lumiere paints by Jacquard
rubber brayer
leaves
plastic-lace or bamboo placemats, lengths of strings, rubber bands or other dimensional objects
flat-bottomed containers
Aluminum Foil
Soft stripes can be made by placing accordion-pleated heavy duty aluminum foil beneath the fabric.
Accordion-pleat a piece of aluminum foil. Set foil on protected work surface and top with a piece of fabric.
Spray the fabric with water. Use a sponge brush or pipette to apply one color of thin paint to the peaks and another color in the valleys. Color blending will occur as paint migrates and bleeds. (Here is where you get to watch the paint dry.)
Bubble Wrap
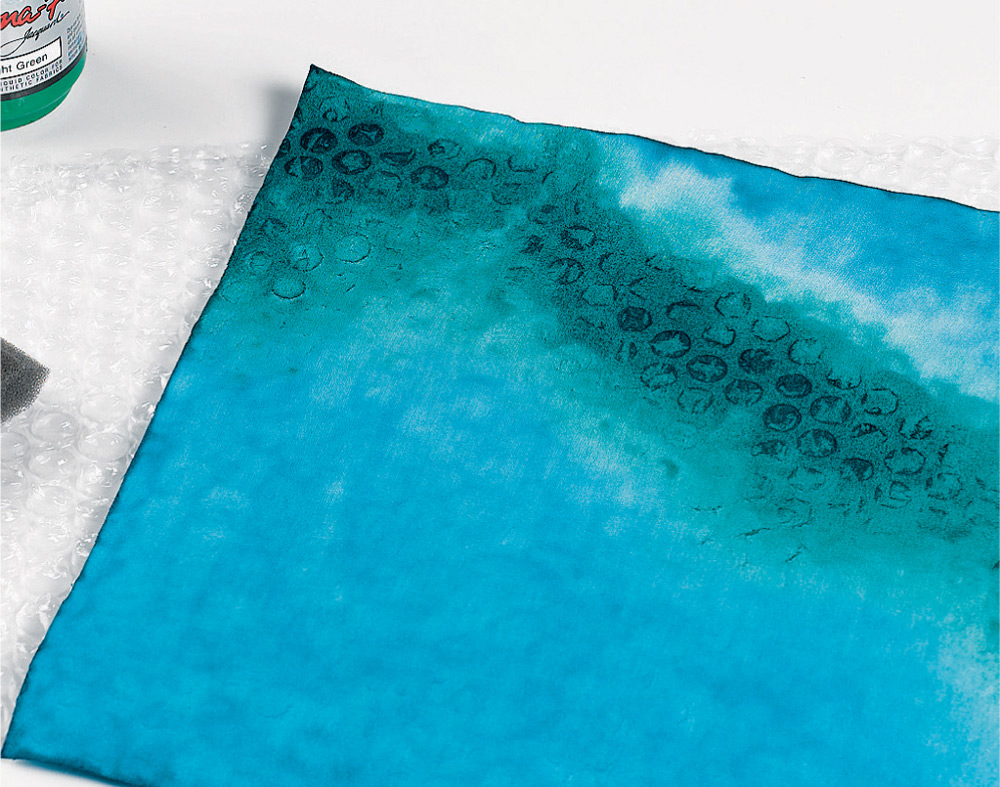
Bubble wrap provides a cheap and wonderful pattern-making device when used with thin paint.
Lay bubble wrap on a protected work surface.
Place a piece of damp fabric over the bubble wrap and dab paint on fabric with a sponge brush. Use plenty of paint. When you see a pattern you like, dry the fabric with a hair dryer while it is still on the bubble wrap to preserve that amount of patterning.
Place the completed bubble wrap/fabric in a location where it will dry fairly fast.
Salt
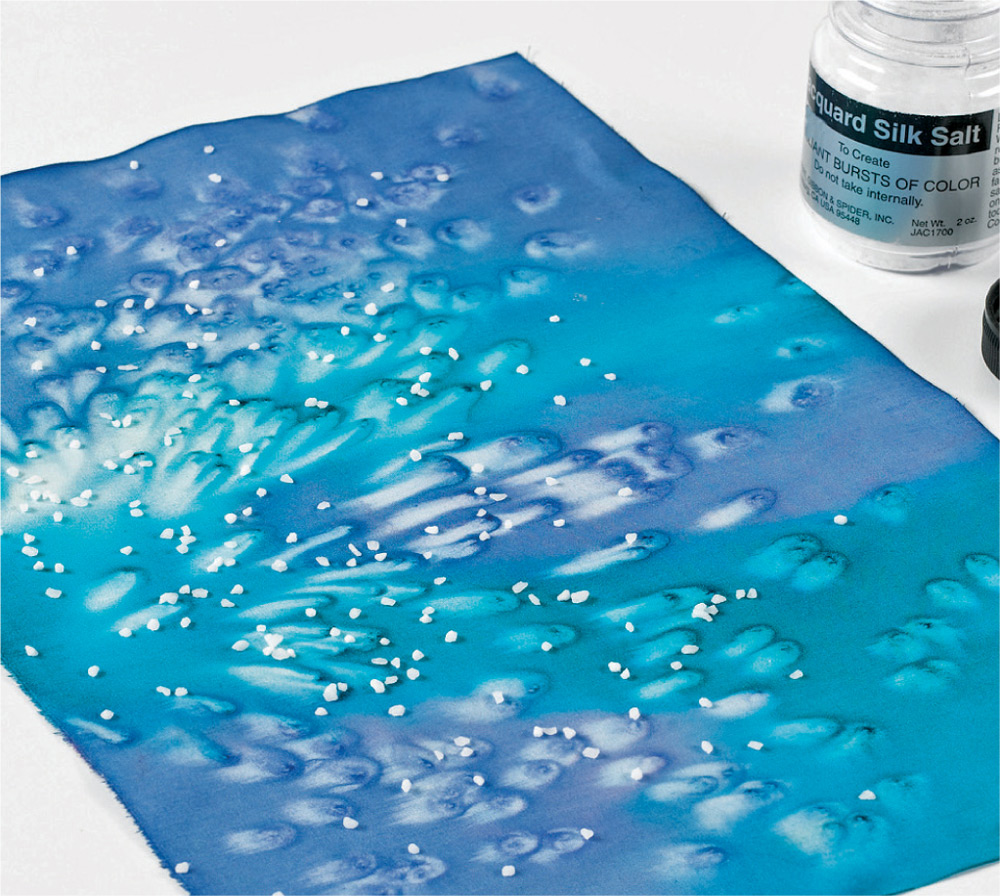
Coarse salt of any kind will make fantastic designs on wet painted fabric, and works best on smooth-surfaced fabrics, such as pima cotton, sateen, or habotai silk.
Set fabric on protected work surfaces. Spray the fabric with water.
Paint fabric with two or three colors of thin paint.
Sprinkle salt over the wet surface and leave the fabric to dry (the hard part). This pattern-making process will take at least 15 to 30 minutes to start working.
When the fabric is completely dry, simply brush the salt away.
Sponges
Use a non-hardening sponge, like a cosmetic or sea sponge, to apply opaque or metallic paint to a light colored fabric. Sherrill Kahn taught me this fun method, which makes a great background for other embellishments.
Protect work surface with plastic. Load a sponge by dipping it into the paint and then tapping it on the plastic table cover to force paint into the sponge pores.
Place fabric on clean work area. Dab the sponge onto the fabric until the sponge begins to dry; reload the sponge with paint and continue.
Add another layer of interest. Use as many paint colors as you like and vary the sizes of your sponges. Use smaller sponges to make additional marks on top of the first sponged-on patterns.


