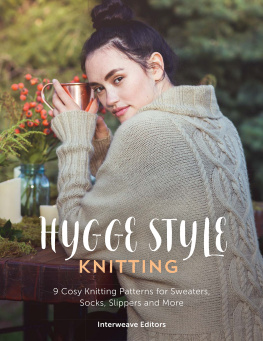
Fall and winter are are wonderful seasons because they give us the chance to wear wool. This is something I tell myself every year!
This book is the sixth volume of my Everyday Knitwear series. Im truly grateful to the many knitters who have made my designs, and I will be happy to keep designing new things for you.
In this volume, Ive added expanded sizes, with garment and sleeve lengths that you can adjust for yourself. Ive also added a number of neck-down styles. These projects employ some fun techniques that youre sure to enjoy.
The influence of the Internet has given me the opportunity to see my designs made by knitters around the world, which makes me very happy. Im looking forward to new influences and new discoveries.
Even if you knit the same garment as another knitter, your choices of color and yarn will create a new and perfect finished item all your own. Youll be convinced that hand knitting is a truly amazing art.
Its been my great dream that this book should appear in English. My grateful thanks to those who were involved in making it come true.
In these cool-weather seasons, wishing you enjoyable knitting,
michiyo
UNDERSTANDING THESE PATTERNS
The garments and accessories in this book were designed by michiyo, who uses one name (in lower case) professionally. Shes known in Japan for her casual yet chic designs, often in simple shapes and easy stitch patterns. We hope youll enjoy trying them.
BEFORE YOU BEGIN, BE SURE TO READ THIS SECTION
These patterns probably look different from the knitting and crochet patterns youre used to. Theyre translated from Japanese, with most of the original format intact. Read through this introduction before you tackle one, and read through your selected pattern as well. Youll find that the Japanese format is a logical, compact way to present a lot of information.
The designs are not difficult, and youll be in good shape if you have some experience with sweater construction. The written instructions are minimal, and most of them are incorporated into the graphic parts of the pattern. Japanese craft publishers tend to assume that you know what youre doing. You may find that you have to make a left front as a mirror image for a right front, for instance, without separate guidelines for both sides.
Most importantly, you should be comfortable knitting from charts, whether knit or crochet. Japanese designs dont provide stitch patterns in words. The chart-phobic knitter should probably give this book a pass.
Some of the stitch symbols may be familiar, and all of them are defined on . These symbols are used throughout the book, and are not repeated in each pattern. For the crochet charts, the basic stitches are illustrated, then used in various combinations.
Although this book was written for Japanese knitters, every attempt has been made to transform it into a tool that Western knitters can use as they learn the ways of this singular type of knitting. Weve added sizes to many of the patterns, yarn data to help with yarn substitution (), detailed written explanations, a table of stitch symbols (please note that keys to the symbols are not repeated in each pattern), and other enhancements to help introduce you to the wonderful world of Japanese knitting and crochet.
Youll see that each pattern includes:
A section of text at the top, with some of the key information, such as gauge and finished size
Schematics: a drawing for each part of the garment, with important measurements and shaping info
Detail Illustrations: usually finishing instructions, sometimes a technique
Charts for the stitch patterns. Often theres more than one, and colorwork is also charted.
Heres whats in the block of text:
Yarn requirements: the original yarn is given first, and thats the yarn in the photograph. All yarns used in the book are manufactured by Hamanaka and are not widely available outside Japan. To help with substitution, weve included a table of yarns on that provides basic information: approximate weight, fiber content, and put-up (yards/meters per ball). The next line, Substitution, gives the total yards/meters required for each size and color. The original amounts are increased by about 10% to allow for differences in knitting styles and an overall fudge factor. Since these are approximations, you may want a bit extra to be safe.
Needle and hook sizes: U.S. sizes are given first, followed by metric and Japanese sizes. Keep in mind that the U.S. sizes are an approximation; there isnt a one-to-one correlation to Japanese needle sizes. Be sure to use the size that gives you gauge.
Gauge: Gauge is normally given over 10cm or 4 inches for the main stitch pattern. If the design uses more than one stitch pattern, you may find more than one gauge, or gauge over a particular motif.
Finished measurements: The measurements here are the actual finished measurements of the piece. Use your best judgement to choose the size that will fit you with the ease you preferdont just assume that youre always a Medium. The schematics provide much more detail about the finished measurements of each piece of the design. Be sure to check garment and sleeve lengths, which tend to be shorter in Japan. Try making a photocopy and using a marker to highlight the numbers relevant to your size. For practice, you might want to start with an item in just one size, like bag W.
Cm-to-inches conversions: Each pattern includes a table of numbers, in alternating gray and white rows. The gray rows are centimeters, and the white rows are inches. The measurements on the schematics are in centimeters. Find the centimeter measurement on the schematic (for instance, 53/61cm across the back in pattern A, for sizes SM and LXL) and look up the corresponding inches measurement in the table (for pattern A, 20 in/24 in). This was done to make the schematic a bit less messy, without two sets of measurements for every dimension.
Instructions: This section contains abbreviated instructions, which are basically a summary of the construction. Details, like stitch counts and measurements, are mostly incorporated into the schematics. For some patterns, we expanded the instructions when it helped to clarify the pattern.
Schematics
The schematics are drawings of the pieces youll be making. Around the drawings, youll see information about measurements, stitch counts, stitch placement, color placement and shaping. In a way, the schematics show you what you need to do. Before you start a garment, study the schematics and be sure to locate the following information
Look for an arrow that shows the direction of work. Some of these garments are bottom-up, some are top downcompare pattern A ().
Identify which piece is which; theyre labeled. Be sure you can see which stitch pattern fits where. In pattern A, for instance, the fronts and back are in stockinette, the collar is in stitch pattern A, and the sleeves are in stitch pattern B. Only the right front is illustrated; the designer assumes that you can create the left front as a mirror image
A line across the schematic means pay attention, because something happens there. It may be a change of stitch pattern (from ribbing to stockinette, say), it may be a change of needle or hook size, it may be another yarnread the information on the schematics to be sure.
If the lines for the side edges of the schematic are solid, as with pattern A, the garment is worked in pieces and sewn together. If the lines are dotted, as with pattern B, those parts are worked in the round.
Next page
