Table of Contents
About This Book
This short book has lots of pictures. This is because most of us are visual learners. Ive also chosen to include many screen shots to make it easy for the reader to skip through the images and get an idea of the process. Ive found that images provide a quick way for the learner to grasp the process. Lots of images also make it easy for you to find the step that will help you most. Images make it easy for learners of different ages to grasp the basic concepts. The images in the book can also help those that may not be reading this book in English.
Note From The Author
There are plenty of thinking map creation tools out there and most of them are very easy to use. There are some that work directly with Google Docs. Ive used many of them in class with students and during professional development with teachers. These tools are very easy to use and get the job done quickly, and for most situations, these are great tools to use.
Google Drawings is a versatile application for creating basic graphics. These tools are common across different applications that have been used for years. Google Drawings can be used to create thinking maps. To create thinking maps in Google Drawings they need to be created from scratch. This means every line and every shape has to be created on the drawing art board. So, why would we want to use Google drawings to create thinking maps from scratch if there are applications that can do it for us?
The answer is not in the use of the thinking map tool but on the skills learned during the creation of the thinking map. Years ago as I was teaching graphing concepts to my students the copier at the campus, fortunately, broke down and was not repaired for several weeks. It was fortunate because it afforded me the opportunity to learn something about teaching and how students learn.
I usually gave my students handouts of graph paper and had them solve problems. They usually did well but at times it was a difficult concept for some of them to understand. When I couldnt make copies of the graphs and graph paper I had students create their own graphs and graph paper using paper and ruler. Yes, this was a long time ago. It was tedious and it took them a long time to create and work on the graphs. I didnt know it at the time but this process of creating the graphs and graphing data was a perfect connection with the way we all learn. It brought the visual and kinesthetic components of learning together with the logical-mathematical and artistic.
The result of this was higher test scores on problems that dealt with graphs, data, understanding the relationship of data and interpreting the information on these graphs. It was a Eureka moment for me. I used this method for years after and found that students consistently received higher than average scores on that dreaded standardized test. This is one reason why I advocate for students to create their own thinking maps instead of using software dedicated to thinking maps.
Another reason to have students create their own thinking maps with Google Drawing is that it teaches them essential technology skills. The skills they learn during the creation of these graphics can be used across multiple applications like Microsoft Word, PowerPoint, Adobe Photoshop, Adobe Illustrator and dozens of other graphic and design applications.
As a teacher, I like to bundle the standards whenever and wherever possible. This is another way that we can bundle technology standards along with reading and writing standards. If the thinking map is used for science or math concepts then those can be bundled her too. Im sure we can bundle all the core concepts and thinking maps with one well-placed science activity!
Just because we are creating a thinking map from scratch doesnt mean we have to create one from scratch each time. The objective would be to create at least one and use that as the basis of future thinking maps. At the end of the lesson I demonstrate how to make a copy of this thinking map so it can be used several times.
Creating A Bridge Map In Google Draw
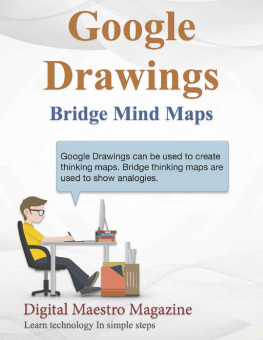
Bridge Maps are used to show analogies. In this lesson, we will learn to use Google Draw to create Bridge thinking maps. Google Draw is part of Google Docs, but we dont need to create a Google Doc to use Google Draw. We can create a Google Drawings document by going to this URL, https://drawings.google.com.
When the document is created, click on the untitled drawing document name and rename it. Well rename this document Bridge Map.
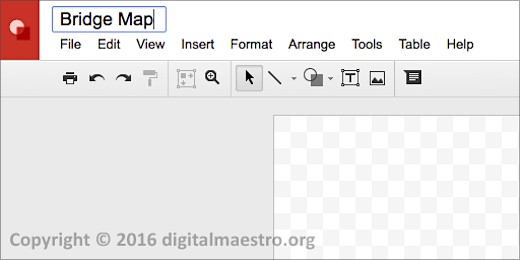
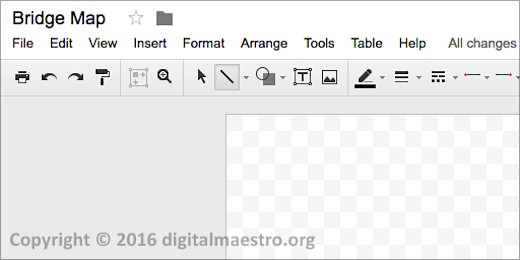
Bridge maps are very easy. They are a series of lines connected by triangles, or bridges. Lets begin by creating the first line. Click on the line tool in the button bar and select the first line option.

Begin drawing a line on the document. Its pretty easy to draw a line, but sometimes we need help. Drawings can help us make a straight line by holding the Shift key. We will be using the Shift key several times in this lesson.

With the first line in place, we need the triangle that follows. We will use the same line tool. The line tool should still be active. We know its active because the mouse pointer is still a crosshair and the line button is a light gray.
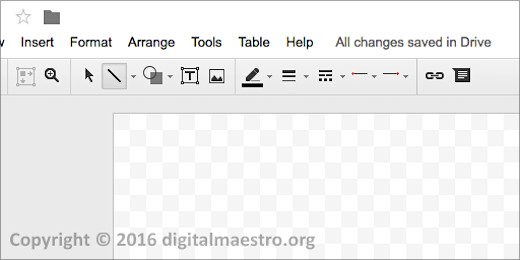
Click on the edge of the line and drag a line up at an angle. This is another time we can have Drawings help us create the triangle. Hold the Shift key and the line will snap to different angle positions. Move the line edge to the left and right to snap to different angles. Release the mouse first then the Shift key when the line is at the angle you want.

With the first line of the triangle in place, we can now repeat the process to create the other side. Matching the angle and the length of the line can be difficult. To make sure the line and angle are the same with less effort, we will duplicate the line. The line should still be selected.

If the line is not selected, click on the arrow tool in the button bar.
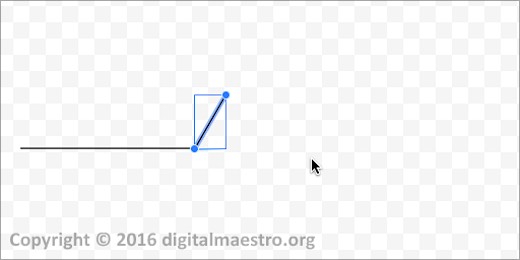
When the line is selected with the arrow tool, it will be bound by a box.
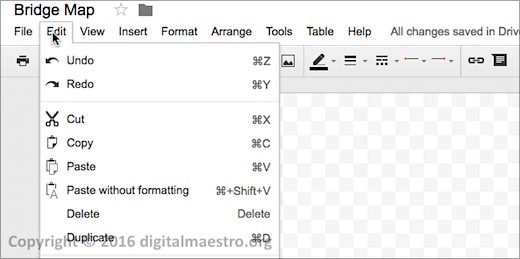
Click on Edit in the menu and select Duplicate.
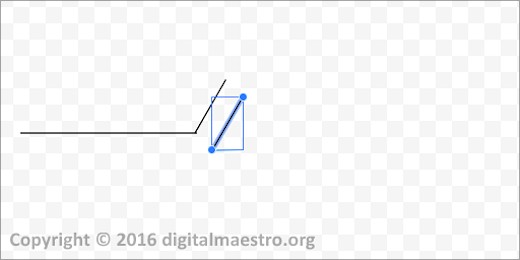
A copy of the line will be created and placed a little to the right.
With the line still selected, click Arrange in the menu and move your mouse pointer over the Rotate option.
Next page



![Jeanine Meyer [Jeanine Meyer] - HTML5 and JavaScript Projects: Build on your Basic Knowledge of HTML5 and JavaScript to Create Substantial HTML5 Applications](/uploads/posts/book/120565/thumbs/jeanine-meyer-jeanine-meyer-html5-and.jpg)
![Prateek Mehta [Prateek Mehta] - Creating Google Chrome Extensions](/uploads/posts/book/120559/thumbs/prateek-mehta-prateek-mehta-creating-google.jpg)
