Publisher: Amy Marson Creative Director: Gailen Runge Editors: Lynn Koolish and Monica Gyulai Technical Editors: Debbie Rodgers and Gailen Runge Cover/Book Designer: April Mostek Production Coordinator: Tim Manibusan Production Editors: Jessica Brotman, Jennifer Warren, and Nicole Rolandelli Illustrator: Jessica Zimmerman Photo Assistant: Carly Jean Marin Instructional photography by Diane Pedersen, unless otherwise noted Published by C&TPublishing,Inc., P.O.Box1456, Lafayette,CA94549 Dedication To all of my students who are willing to explore, create, and ask the question: What would happen if...? Acknowledgments To Joanna Rose, for her generosity in creating the show Infinite Variety: Three Centuries of Red and White Quilts. To everyone at McCalls Quilting who helped get this all started and kept it going. To everyone at BERNINA of America, Inc. for their support and the use of the BERNINA 750 QE, as well as to Linda Fellows and her staff at The Bobbin Case in Rochester, New York. A special thank-you to the following companies who supplied fabric for the projects in this book: ClothworksJoyce Cronkhite Michael Miller FabricsChristine Osmers RJR FabricsDemetria Hayward Studio E FabricsScott Fortonoff and Linda Galvin Windham FabricsLaura Jaquinto, Nell Timmer, and Crystal Nilpilrom To Marti and Richard Michell for their support and for their wonderful products. To Donna Lamb and the staff at Quilting by the Lake for providing a place to learn and explore ideasschweinfurthartcenter.org.
To everyone at C&T Publishing who worked on this project, thanks for all your support and encouragement. Finally, to Ray Pool, for his support and encouragement over the years and throughout this project, and especially for supplying food and drink at critical moments.  PREFACE The idea for this book was sparked in 2011 by the New York exhibition Infinite Variety: Three Centuries of Red and White Quilts. Held at the Park Avenue Armory, a grand building that dates from the Gilded Age, the exhibition featured more than 600 quilts from the collection of Joanna Rose. A sense of excitement and expectation led up to the show, and I was lucky to be there when the doors opened. We gasped when we glimpsed at what was to come!
 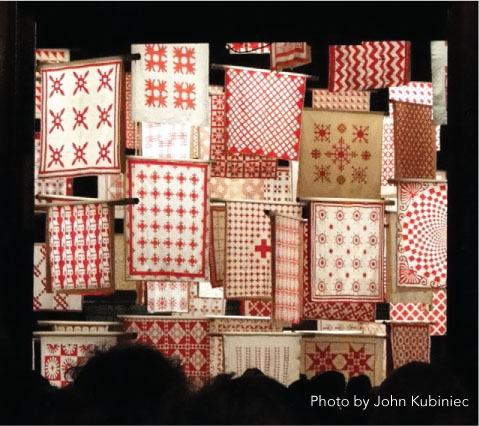 Sheer magicthe view as the doors opened at the Park Avenue Armory We entered a massive space that had been transformed into a cathedral of quilts.
I was so captivated that I spent the entire day taking in the array and later returned to the show several times. One day while staring at a quilt, I realized that what appeared to be circles were actually Drunkards Path blocks arranged to look like red circles floating on a white background. 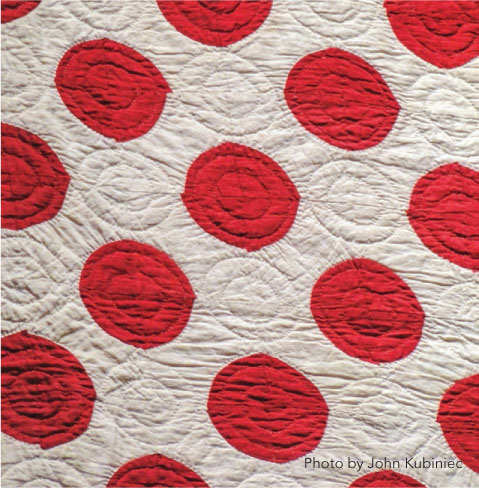 Drunkards Path blocks arranged to look like circles My mind started to race What else could you do to change the block up a bit? My answer came at 3 A.M., when I woke with a vision of a Drunkards Path block with a half-square triangle in the corner. I sketched it out on a nearby envelope, and in the morning I drafted the block and began to play around with it. The result was my quilt Infinite Possibilities, which appeared in the March/April 2013 issue of McCalls Quilting.
 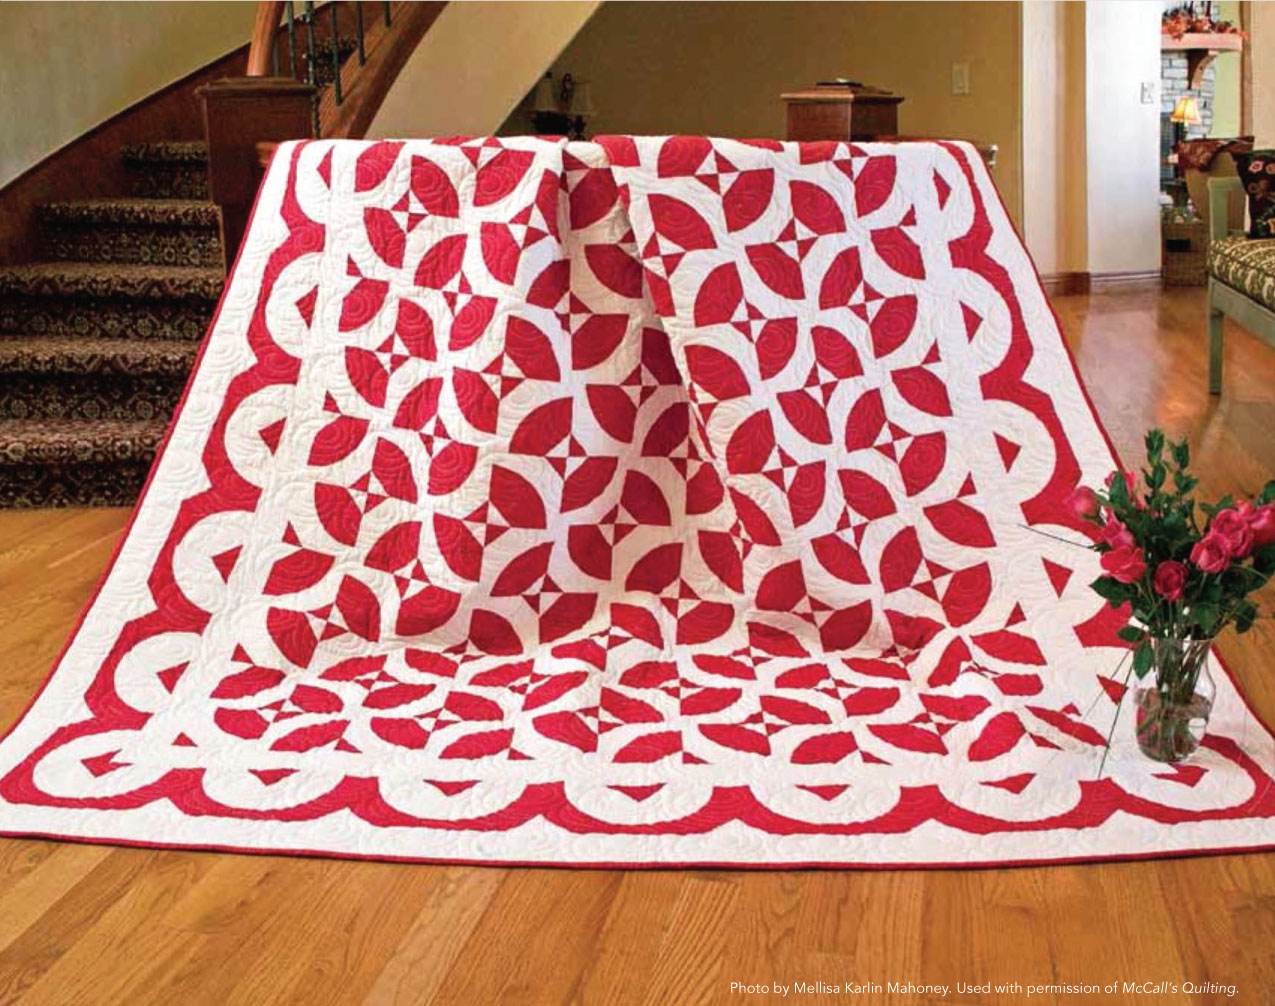 McCalls Quilting, March/April 2013 I thought I had come up with something brand-new, but this variation has been around for a long time.
I soon found other variations of the block and began to figure out easier ways to construct them. I continued to play with the blocks, and from those experiments, combined with the efforts of my students, this book was born. Play! Create! Enjoy! 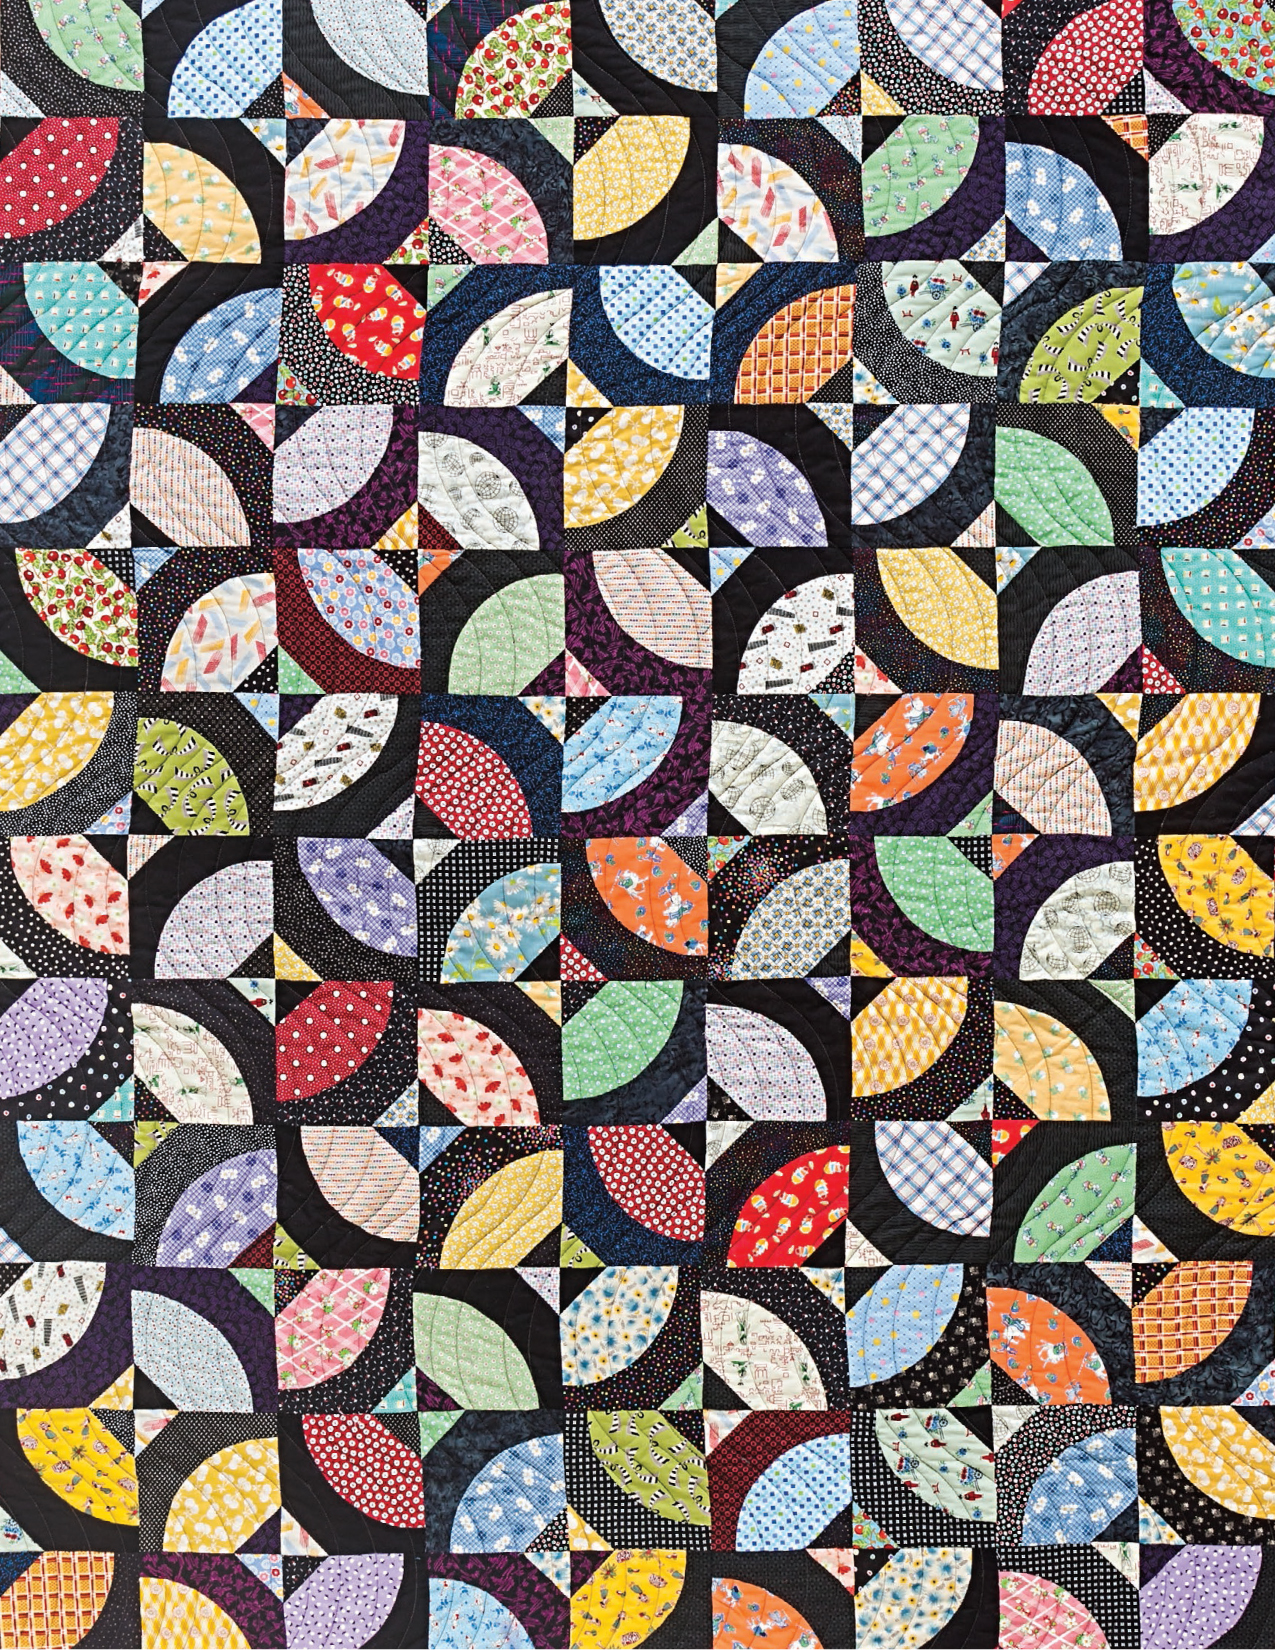 introduction All of the quilts in this book are built on variations of the Drunkards Path block. Some have been around for a long time, and to those I am merely applying modern cutting and piecing techniques. Others have been created and developed by my students as we have played with this versatile block.
  At first glance, a quilt might look very complex and difficult, but I break down the steps into building blocks.
You will be instructed to sew together traditional block units and then trim them using templates. This approach enables you to make complex-looking blocks involving many pieces and curves with relative ease. If you detest curved piecing, I hope these patterns will entice you to give it a try and that my techniques will help you conquer your fears. If you already love curved piecing, the variations and patterns will help you explore new design possibilities. Quilters near and far have struggled to sew curves. You may have even tried and screamed, Never again! I am here to say, Never say never.
The second quilt I ever made included 3 Drunkards Path blocks. They were bears to make, and the small size didnt help. I wasnt sure I would ever sew curves again. But over time I did more curved piecing, and somewhere along the way my fear of curves turned into a love of curves. When I start a class, I tell my students that curved piecing is easy. I immediately get those looksstudents watching with disbelief over the tops of their eyeglasses.
When I say, I only use three pins, I get more looks, accompanied with muttering. But I turn the doubtful into believers, as I hope to do here with this book. So come and explore curved piecing; make the block variations. Play around with these variations, make a few blocks for practice, throw them up on a design wall, and see what you can create. You will hone your curved-piecing skills and also get your mind thinking about what you might do. Feel free to adapt the patterns, swap out one variation for another, and combine multiple variations in a quilt.
Have fun, play, and always ask yourself: What would happen if...?  OF THE TRADE The right tools make it easier to do good work. In addition to basic sewing tools, here are some tools I found especially helpful when giving the Drunkards Path block a new spin. Rotary Cutters A good rotary cutter with a sharp blade is a must when working with templates. You can easily cut through 46 layers of fabric at once with a good, sharp blade. A 45mm rotary cutter works well with the Drunkard Path templates used in this book.
 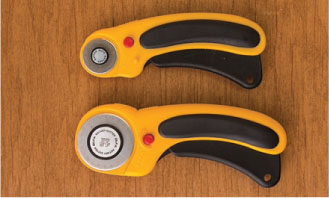 Olfa 45mm and 28mm rotary cutters Pins For most of my piecing, I like to use pins with fine, thin shafts that wont distort the fabric.
  Olfa 45mm and 28mm rotary cutters Pins For most of my piecing, I like to use pins with fine, thin shafts that wont distort the fabric.
I prefer 0.4mm Clover Patchwork Pins when I need a shorter pin and thin Clover Flower Head Pins when I need a longer one. Finally, I like to use a specialty pin, the Clover Fork Pin, when I am butting up seams and trying to match corners or points exactly. Although not critical to success, these tools are extremely helpful. 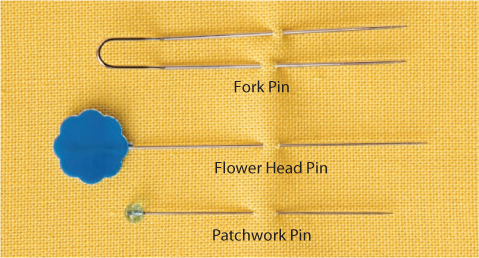
Next page

 PREFACE The idea for this book was sparked in 2011 by the New York exhibition Infinite Variety: Three Centuries of Red and White Quilts. Held at the Park Avenue Armory, a grand building that dates from the Gilded Age, the exhibition featured more than 600 quilts from the collection of Joanna Rose. A sense of excitement and expectation led up to the show, and I was lucky to be there when the doors opened. We gasped when we glimpsed at what was to come!
  Sheer magicthe view as the doors opened at the Park Avenue Armory We entered a massive space that had been transformed into a cathedral of quilts.
 Drunkards Path blocks arranged to look like circles My mind started to race What else could you do to change the block up a bit? My answer came at 3 A.M., when I woke with a vision of a Drunkards Path block with a half-square triangle in the corner. I sketched it out on a nearby envelope, and in the morning I drafted the block and began to play around with it. The result was my quilt Infinite Possibilities, which appeared in the March/April 2013 issue of McCalls Quilting.
  McCalls Quilting, March/April 2013 I thought I had come up with something brand-new, but this variation has been around for a long time.
 introduction All of the quilts in this book are built on variations of the Drunkards Path block. Some have been around for a long time, and to those I am merely applying modern cutting and piecing techniques. Others have been created and developed by my students as we have played with this versatile block.
  At first glance, a quilt might look very complex and difficult, but I break down the steps into building blocks.
 OF THE TRADE The right tools make it easier to do good work. In addition to basic sewing tools, here are some tools I found especially helpful when giving the Drunkards Path block a new spin. Rotary Cutters A good rotary cutter with a sharp blade is a must when working with templates. You can easily cut through 46 layers of fabric at once with a good, sharp blade. A 45mm rotary cutter works well with the Drunkard Path templates used in this book.
  Olfa 45mm and 28mm rotary cutters Pins For most of my piecing, I like to use pins with fine, thin shafts that wont distort the fabric.