Pattern Services and Revisions If you are an Annies customer and have a question about the instructions on a pattern you have purchased, please visit: http://www.anniescatalog.com/pages/customer_care/pattern_services.html 
 Table of Contents
The patterns in this book were all made and written as if the loom was being worked in a clockwise direction, so all patterns start at the starting peg on the loom and are worked to the left as the loom is held facing you. However, any pattern in this book can be worked in the counterclockwise direction by simply following the patterns as written.
Materials
Knifty Knitter looms from Provo Craft* Loom tool Crochet hook Yarn or tapestry needle
*Photographed items were designed using Knifty Knitter circle looms; other circular looms may be used, but the gauge may differ slightly.
Casting On
Purl Cast-On Method
E-wrap to one less than the desired number of stitches. Bring the working yarn between the last wrapped peg and the next empty peg to the front of the loom, and then around the far edge of the next peg into the center of the loom (Photo 1).
Purl on the return row.
E-wrap Cast-On Method
Make a slip knot about 6 inches from the end of the yarn.
E-wrap Cast-On Method
Make a slip knot about 6 inches from the end of the yarn.
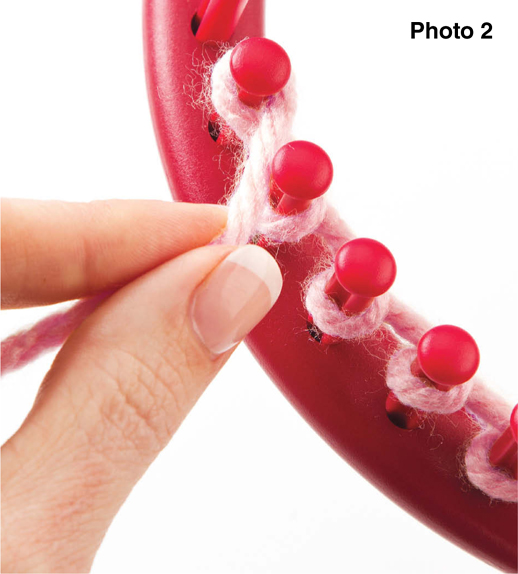
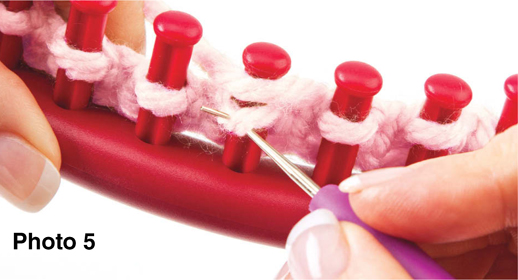
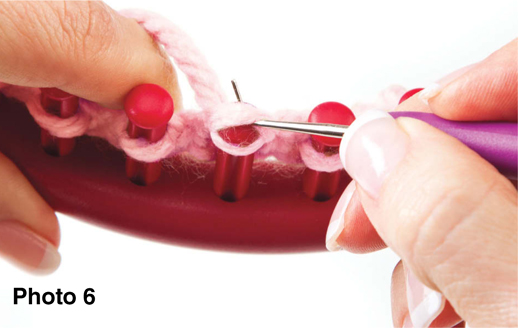
Place it on peg 1. Starting from the inside of the loom, bring the working yarn between pegs 2 and 3 to the outside of the loom. Continue wrapping peg 2, bringing the working yarn between pegs 2 and 1 to the inside of the loom. The yarn will cross over itself on the inside of peg 2 as it travels to peg 3. Continue wrapping the pegs until the desired number of pegs have loops on them (Photo 3). 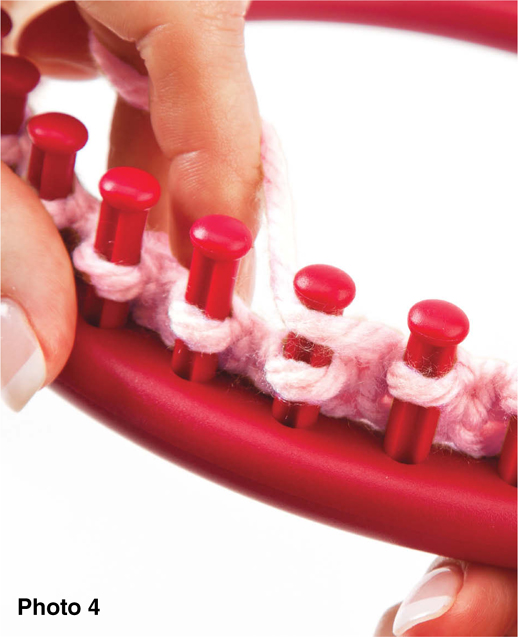 Bring the yarn slightly behind the peg, forming a little hook around the peg, and pull the lower stitch over the working yarn and off the peg (Photos 5 and 6).
 Move working yarn to next peg and repeat.
Purl Stitch
Wrap one loop on number of pegs as directed in the pattern.
Purl Stitch
Wrap one loop on number of pegs as directed in the pattern.
Lay your working yarn across the front of the pegs, just below the first wrapped loop (Photo 7).  Using your knitting tool, reach down through the wrapped loop on the first peg and pull the working yarn up through the loop, forming another loop (Photo 8).
 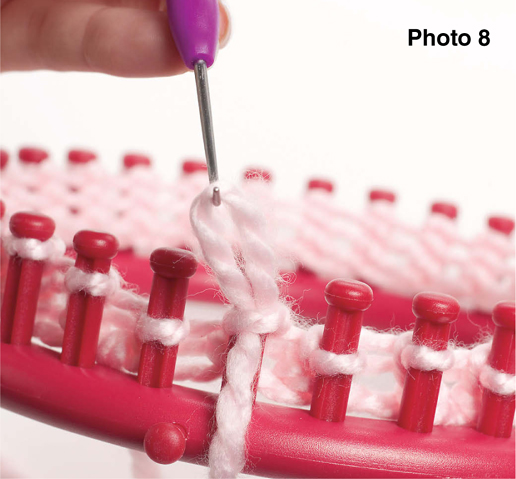 Pull the original wrapped loop off the peg, and place the newly formed loop on the peg. Tug gently on the working yarn to secure the loop on the peg (Photo 9).
 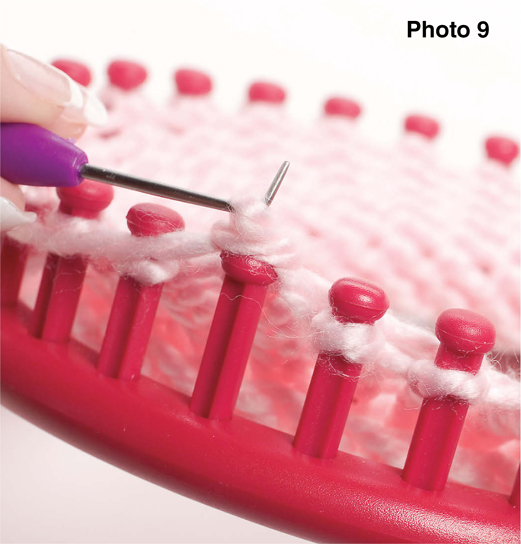 Move to the next peg and repeat stitch as called for in the pattern.
Knit 2 Together (k2tog)
Move the loop from one peg onto the adjacent peg.
Knit 2 Together (k2tog)
Move the loop from one peg onto the adjacent peg.
Knit both loops over the working yarn to knit the two together.
Yarn Over (yo)
Run the working yarn in front of the empty peg left by a k2tog or a space left by moving stitches away from each other to increase. On the next row, this strand will be knit or purled according to the pattern.
Bind Off
Gather Bind-Off Method
Once the piece reaches the desired length, wrap your working yarn around the loom one and a half times; cut the yarn. Using a yarn needle, thread the working yarn through each loop on the loom.

Thread the working yarn through the loop to the left of the holding peg a second time.

Thread the working yarn through the loop to the left of the holding peg a second time.
Remove the loops from the loom and gently tug on the yarn tail until the piece gathers tightly together. Using the needle, secure the working yarn on the inside of the piece (Photo 11). 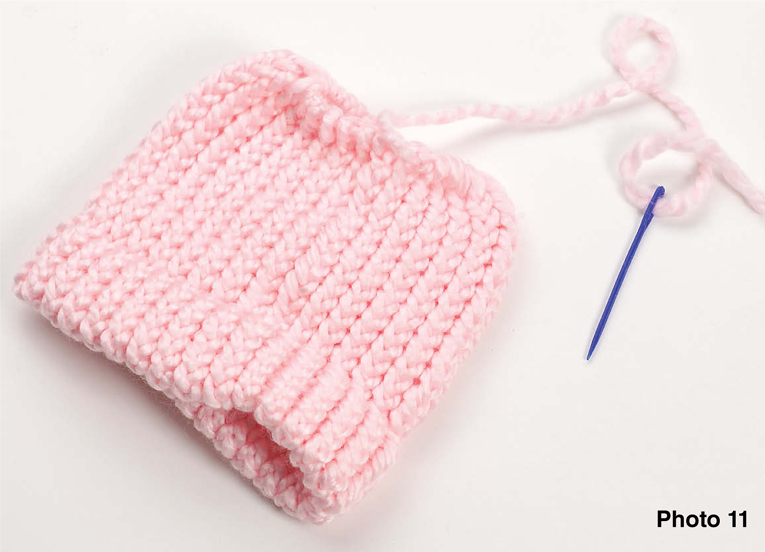 Turn the piece inside out and weave in the ends.
Flat-Piece Bind-Off Method
Work piece until desired length as directed in pattern. Turn and slip the first stitch as if to start another row (Photo 12).

Knit or purl the next stitch in the row as per pattern.
Take the stitch loop just formed and place it on the peg with the previous stitch (Photo 13). 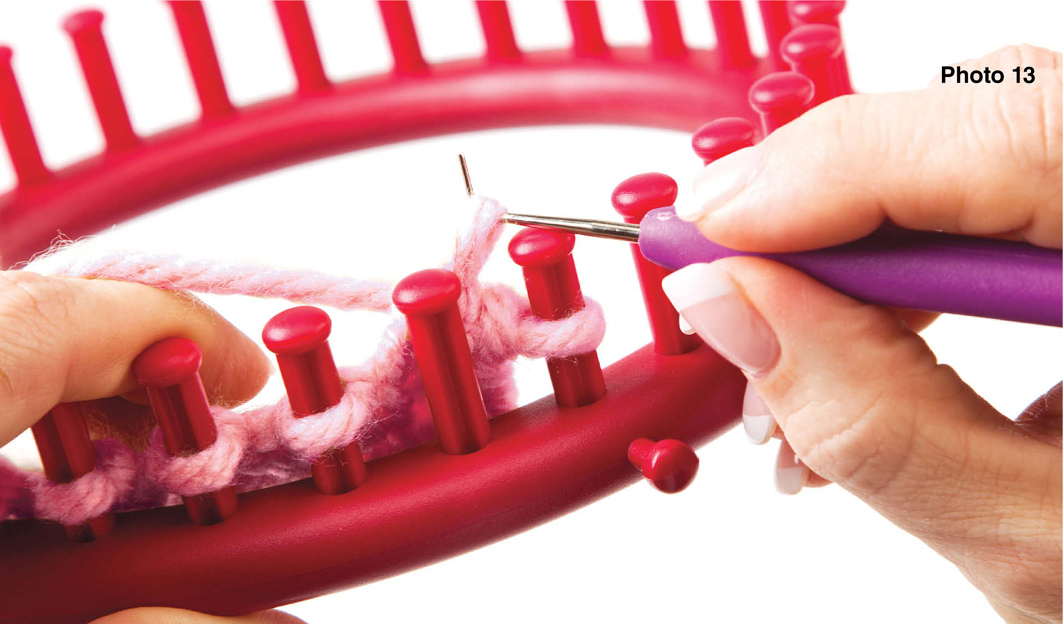 Knit the stitch over. Place the stitch back on the peg from which it was moved (Photos 14 and 15).
 Move to the next stitch in the row and repeat from step 3. Continue in this manner across the row.
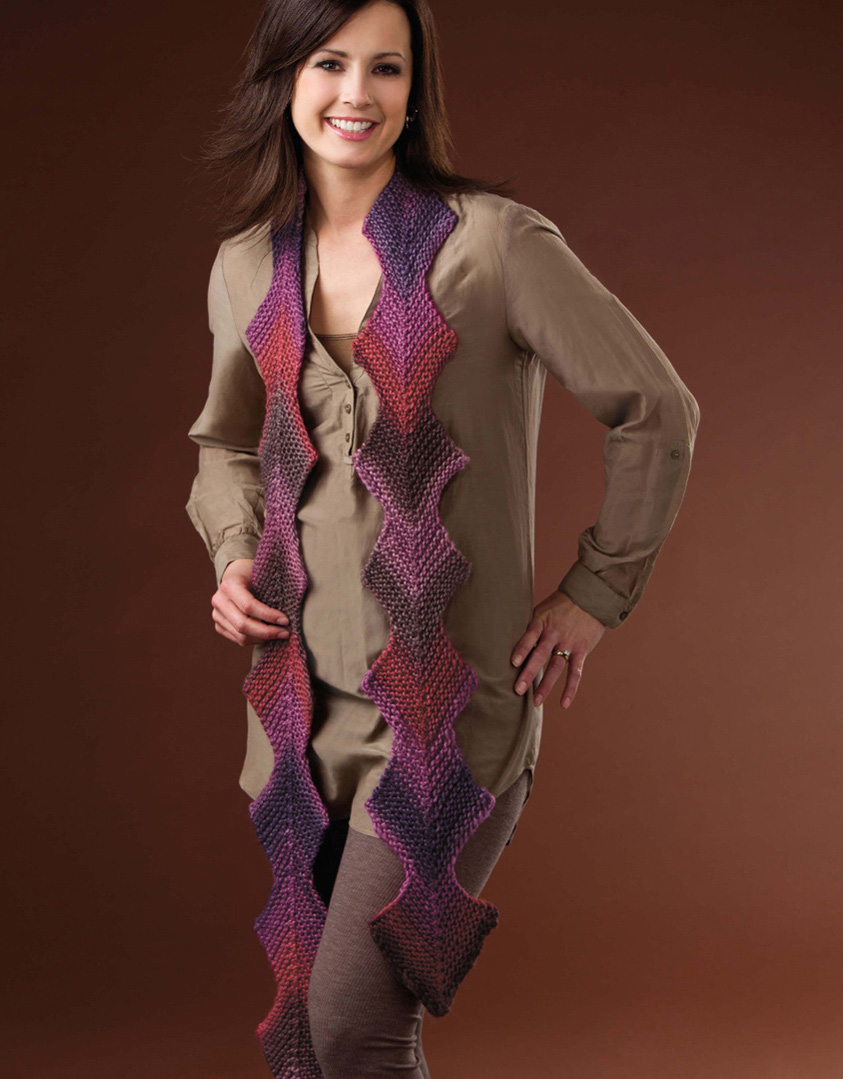
  Mitered squares are a great way to show off self-striping yarns.
The technique is simple and yields beautiful results.
Skill Level









 Table of Contents
 Purl on the return row.
  Bring the yarn slightly behind the peg, forming a little hook around the peg, and pull the lower stitch over the working yarn and off the peg (Photos 5 and 6).
 Move working yarn to next peg and repeat.
 Using your knitting tool, reach down through the wrapped loop on the first peg and pull the working yarn up through the loop, forming another loop (Photo 8).
  Pull the original wrapped loop off the peg, and place the newly formed loop on the peg. Tug gently on the working yarn to secure the loop on the peg (Photo 9).
  Move to the next peg and repeat stitch as called for in the pattern.
 Thread the working yarn through the loop to the left of the holding peg a second time.
  Turn the piece inside out and weave in the ends.
 Knit or purl the next stitch in the row as per pattern.
  Knit the stitch over. Place the stitch back on the peg from which it was moved (Photos 14 and 15).
 Move to the next stitch in the row and repeat from step 3. Continue in this manner across the row.
  Mitered squares are a great way to show off self-striping yarns.

