Getting Started
If you have a few skeins of yarn on hand, you are ready to get started with arm knitting! In this section, youll find everything you need to make the classic infinity scarf in three different stitches. Once you get comfortable with the basics, learn how to take your projects to the next level with techniques for color work, adding embellishments, and more!

Casting On
When working arm knitting projects, always use the yarn from the outside of the skein, even if its a center-pull ball, so the yarn does not become knotted as youre working.
In arm knitting, you almost always work more than one strand at a time, and each strand is taken from its own skein. Hold the strands together and treat them as one as you work. The photos here show three strands being treated as one.
Tip
When casting on, it is always better to have too much tail yarn than too little. When in doubt, leave a long tail when casting on so you never have to worry about running out!
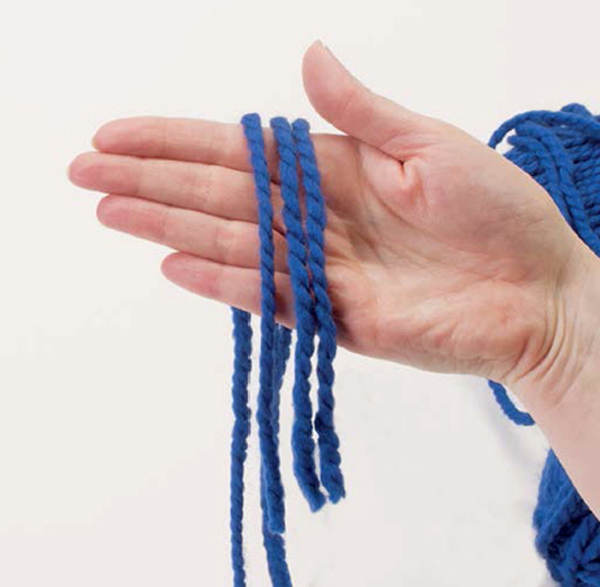
1| Prepare the strands. To work with three strands, start with three skeins of yarn. Pull a strand from the outside of each skein and even up the ends.
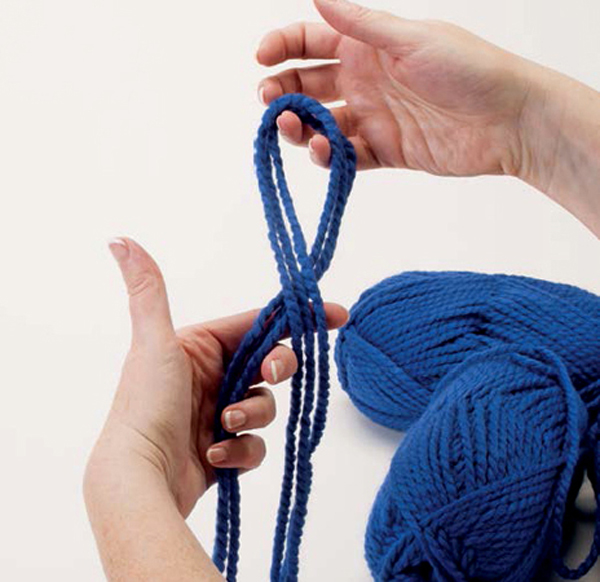
2| Start the slip knot. Measure in 12 yd. (100200cm) from the ends of the strands and form a slip knot. Start by forming a loop with the strands. Then twist it so the strands cross at the bottom.
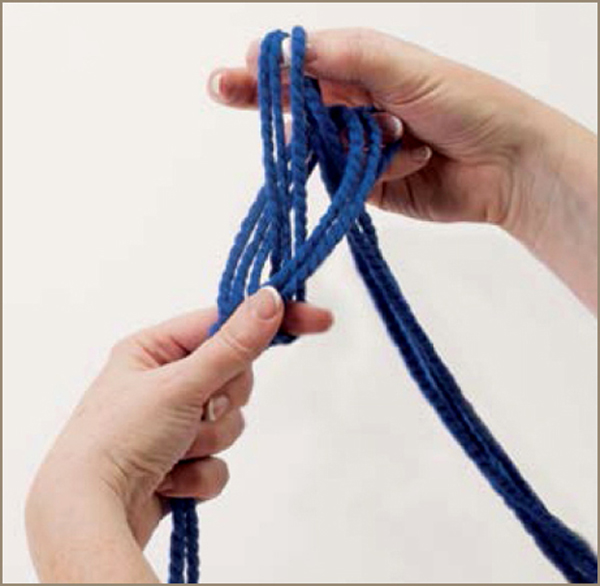
3| Complete the slip knot. Reach through the loop, grab the top set of strands, and pull it through, forming a new loop. Tighten the knot by gently tugging on the loose ends. Slide the loop of the slip knot onto your right wrist and tighten it slightly. Keep the loop loose enough to slide up and down your arm as you work.
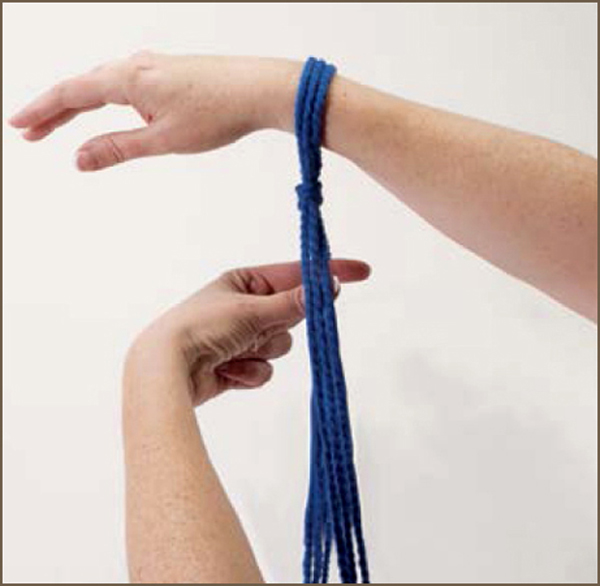
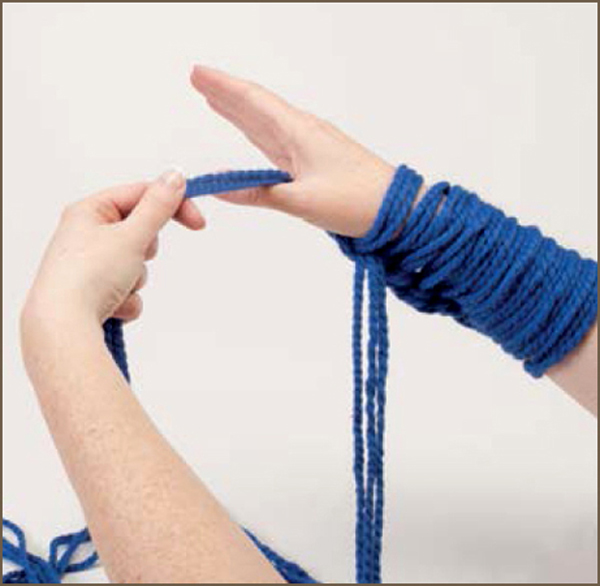
4| Prepare the strands. The set of strands attached to the skeins is the working yarn and the set of strands hanging loose is the tail. Position the working yarn farthest from you and the tail closest to you. Insert your left thumb and index finger between the two sets of strands and spread your fingers apart.
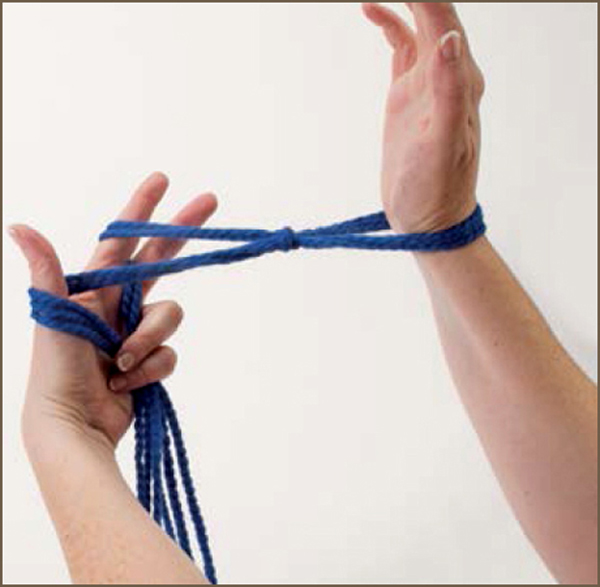
5| Form a V. Pull the slip knot down over your palm between your thumb and forefinger, forming a V shape with the yarn. Grasp the loose strands with the remaining fingers of your left hand.
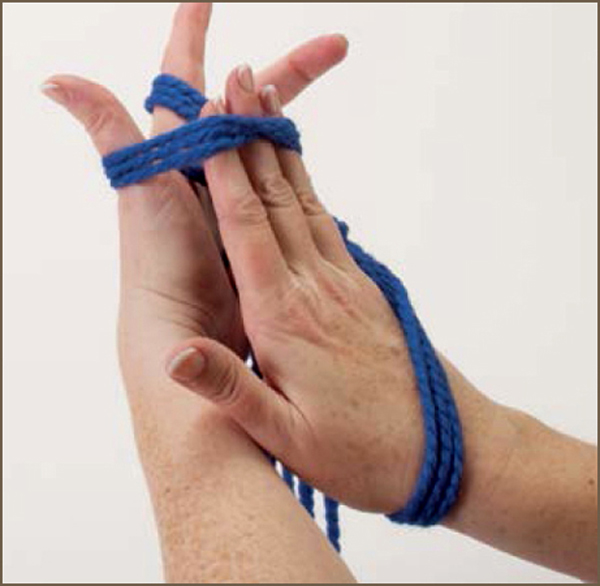
6| Go through the first loop. Holding the yarn strands in place on your left hand, insert your right hand through the loop on your left hand that is closest to you (the one around your thumb). Put your hand through the loop from front to back, going away from your body.
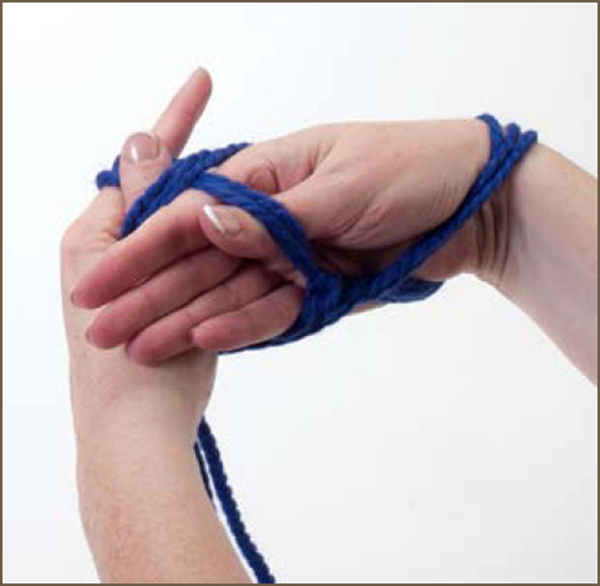
7| Go through the second loop. Insert your right hand through the loop on your left index finger from back to front, going toward your body. Push this loop up on your wrist and let go of the strands in your left hand
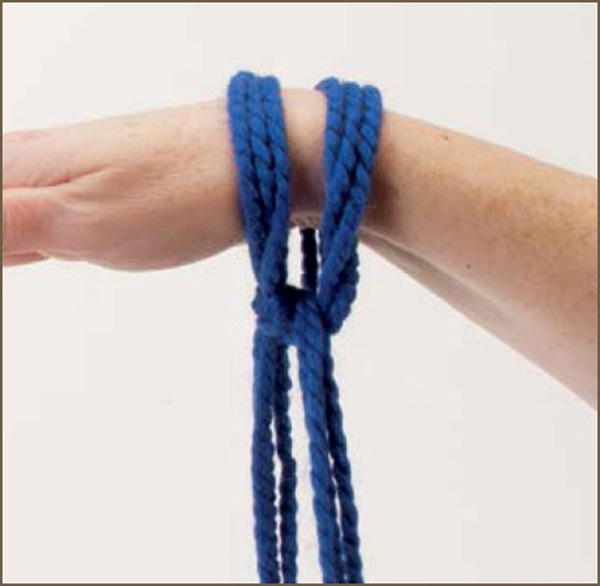
8| Finish the second stitch. Tighten the loop slightly by tugging gently on the tail end. You now have two stitches on your right arm (the slip knot counts as the first stitch). Repeat steps 48 to cast on the number of stitches indicated for your desired pattern.
Plain Stitch
This is the classic stitch used for arm knitting. It will create a smooth side and a knotted side to your project. To start, cast on the indicated number of stitches to your right arm.
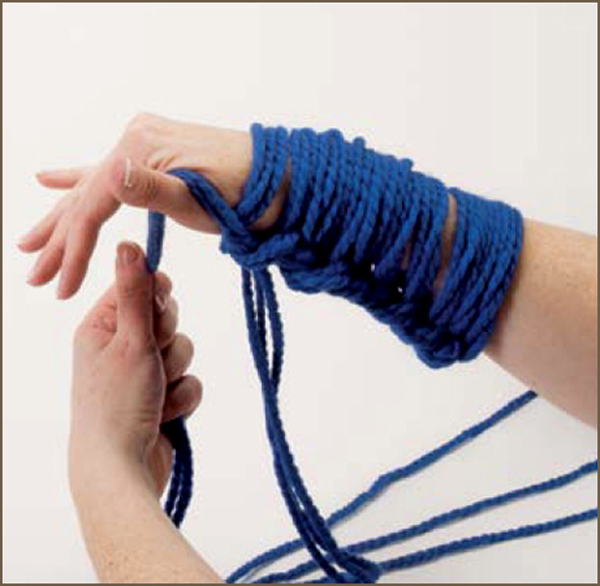
1| Loop the yarn. Take the working yarn and loop it over your right thumb from front to back (away from your body). Grasp the working yarn with the fingers of your right hand to hold it in place around your thumb.
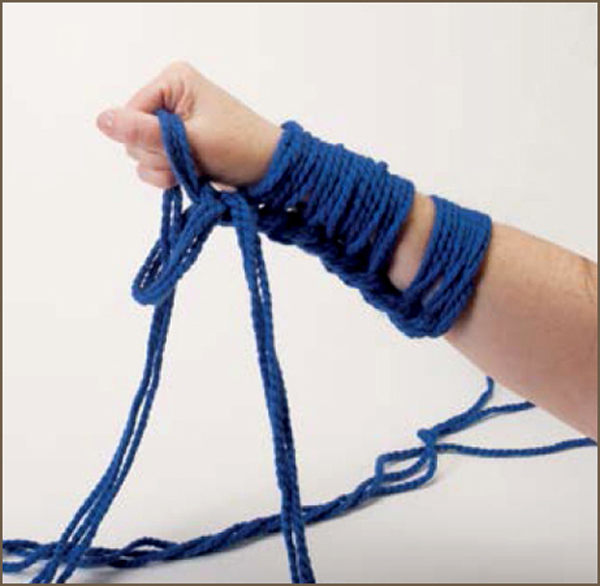
2| Pull off a stitch. Pull the first loop on your right arm (the one closest to your hand) over your right hand and let it go. Continue to hold the working yarn in place on your right thumb.
Tip
Starting each stitch by wrapping the yarn around your thumb is a great way to learn and remember where the working yarn should be positioned as you work. Once you understand this, you will no longer need to wrap the working yarn around your thumb to position it properly.
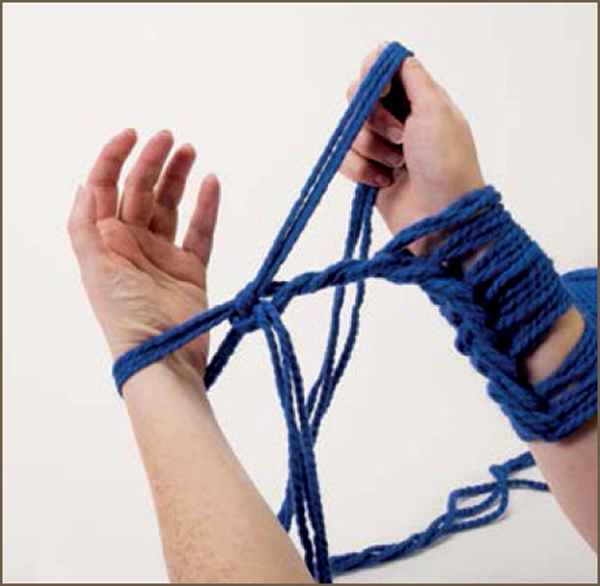
3| Transfer the loop. Transfer the loop on your right thumb to your left arm, twisting the loop clockwise to bring the working yarn close to you. Tighten the loop slightly by gently tugging on the working yarn. Repeat steps 13 to move all the stitches from your right arm to your left. This completes the first row.
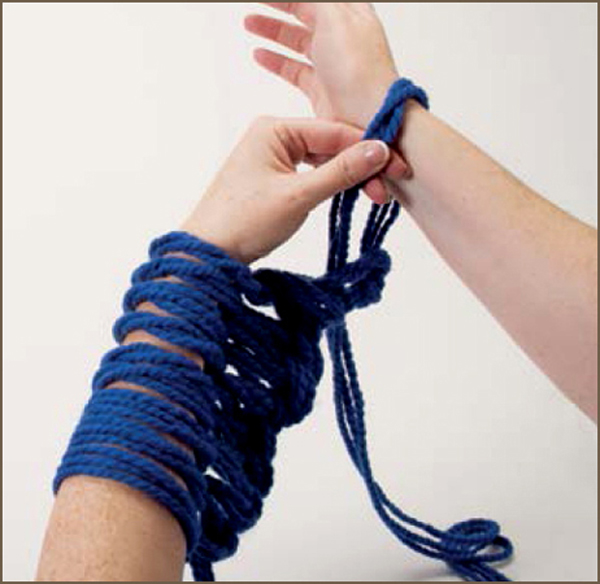
4| Make the second row. To make a second row, use the same method to transfer the stitches from your left arm to your right. Twist the loops counterclockwise when transferring them to bring the working yarn close to you. Repeat until you have moved all the stitches from your right arm to your left. This completes the second row.
Tip
In Plain Stitch, the plain, smooth side of the work (the loop side) always faces toward you, while the knotted side always faces away from you.
Twisted Stitch
If youre looking for something a little more decorative than Plain Stitch, Twisted Stitch is for you. This technique causes the legs of each stitch to cross, creating a very pretty effect that is simple to achieve. This method will make slightly tighter stitches, so there will be less open space in your finished project. To start, cast on the indicated number of stitches to your right arm.
