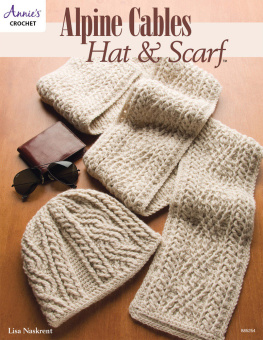
Bipes - Learn to Knit on Long Looms
Here you can read online Bipes - Learn to Knit on Long Looms full text of the book (entire story) in english for free. Download pdf and epub, get meaning, cover and reviews about this ebook. City: Berne;IN, year: 2018, publisher: Annies, genre: Home and family. Description of the work, (preface) as well as reviews are available. Best literature library LitArk.com created for fans of good reading and offers a wide selection of genres:
Romance novel
Science fiction
Adventure
Detective
Science
History
Home and family
Prose
Art
Politics
Computer
Non-fiction
Religion
Business
Children
Humor
Choose a favorite category and find really read worthwhile books. Enjoy immersion in the world of imagination, feel the emotions of the characters or learn something new for yourself, make an fascinating discovery.

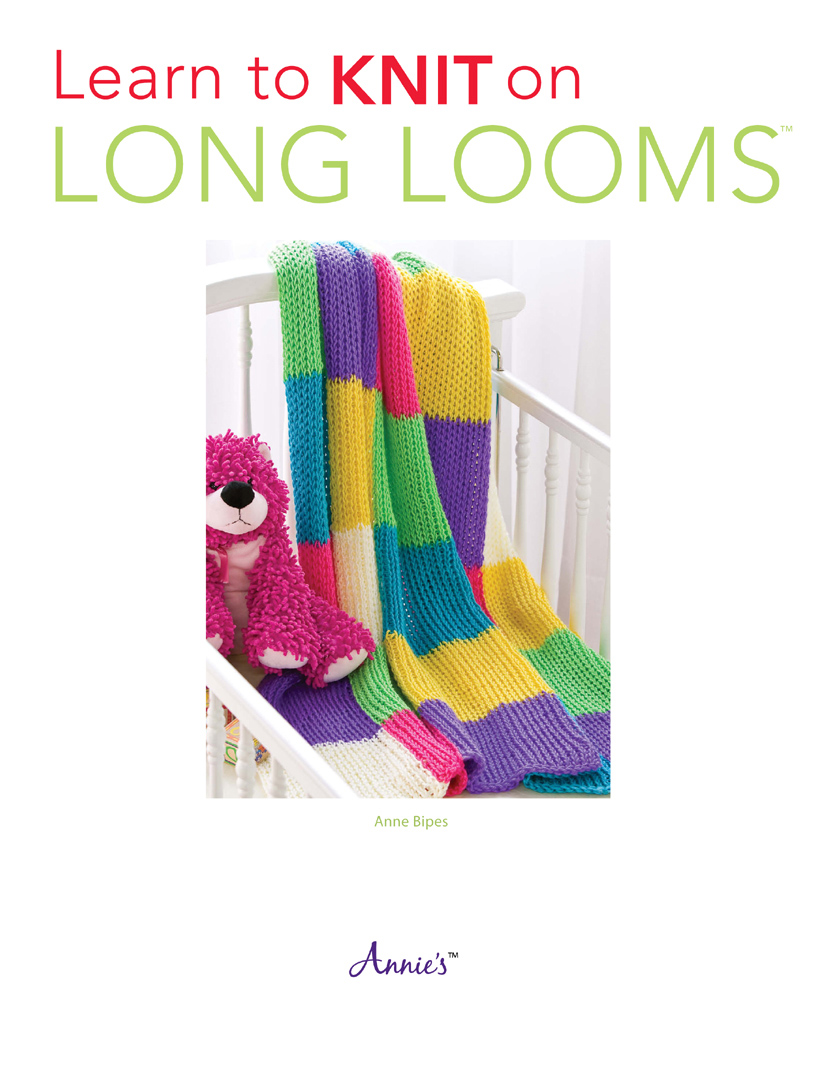
- Book:Learn to Knit on Long Looms
- Author:
- Publisher:Annies
- Genre:
- Year:2018
- City:Berne;IN
- Rating:5 / 5
- Favourites:Add to favourites
- Your mark:
Learn to Knit on Long Looms: summary, description and annotation
We offer to read an annotation, description, summary or preface (depends on what the author of the book "Learn to Knit on Long Looms" wrote himself). If you haven't found the necessary information about the book — write in the comments, we will try to find it.
Bipes: author's other books
Who wrote Learn to Knit on Long Looms? Find out the surname, the name of the author of the book and a list of all author's works by series.


Learn to Knit on Long Looms — read online for free the complete book (whole text) full work
Below is the text of the book, divided by pages. System saving the place of the last page read, allows you to conveniently read the book "Learn to Knit on Long Looms" online for free, without having to search again every time where you left off. Put a bookmark, and you can go to the page where you finished reading at any time.
Font size:
Interval:
Bookmark:
If you are an Annies customer and have a question about the instructions on a pattern you have purchased, please visit:
http://www.anniescatalog.com/pages/customer_care/pattern_services.html
Anchor peg: The small peg at the end of the loom that is at a 90-degree angle to the loom. The beginning tail of the yarn is tied to this peg to hold it while the first several rows are being knit. After that, the beginning tail can be removed from the anchor peg.
Bind Off: Removing the knitting from the loom by finishing and securing each stitch in the row.
Cast On: The first wrap of the loom to put a single loop of yarn onto each peg.
Knit Off: Generally, a knit stitch is made by bringing the bottom loop on the peg up and over the top loop and 0off the peg toward the center of the loom. Sometimes, a knit stitch is made by bringing the bottom loop over two or more top loops, or by bringing two or more bottom loops over the top loop.
Peg pairs: Two parallel pegs equidistant from the anchor peg.
Remove Knitting From the Loom: Taking the knitting off the loom, leaving a row of live stitches that have a strand of scrap yarn running through them.
Scrap Yarn: A piece of yarn that is not part of the project itself, but is used to hold live stitches temporarily. It is best if the scrap yarn is a different color than the project color, smooth in texture and a larger diameter than the project yarn.

Tail: The cut end of yarn not part of the knitting. The beginning tail is the first 6 inches or so before the yarn is used to cast on or continue the knitting. The ending tail is the last 6 inches or so after the last stitch or bind off.
Wrap the Loom: To put the yarn on the pegs in a certain order until all pegs have a new loop on them. For some stitch patterns, all pegs are wrapped in one pass of the loom. For others, the yarn goes from top to bottom back to the top again before all pegs are wrapped.
Make a slip knot about 5 inches from the end of the yarn and put it on an anchor peg at one end of the loom.
Wrap the yarn around the outside of the pegs on the loom, first peg on the left, second peg on the right, third peg on the left, fourth peg on the right, etc., for as many peg pairs as the pattern indicates.
Bring the yarn straight across to the other side of the loom.
Continue wrapping in a Z pattern back to the beginning, using the pegs that are not yet wrapped.

Lay a piece of scrap yarn over the wrapped yarn. Let the tails of the scrap yarn hang between the wrapped yarn and the loom. The scrap yarn tails can be tied together so it stays in place.

Push the wraps down on the pegs so there is space to put another wrap of yarn above them on the pegs. Unless otherwise specified, each yarn wrap goes above the existing wrap on the pegs.
The cast on is complete. The next wrap of the loom is the first row, in the stitch pattern indicated in the project instructions.
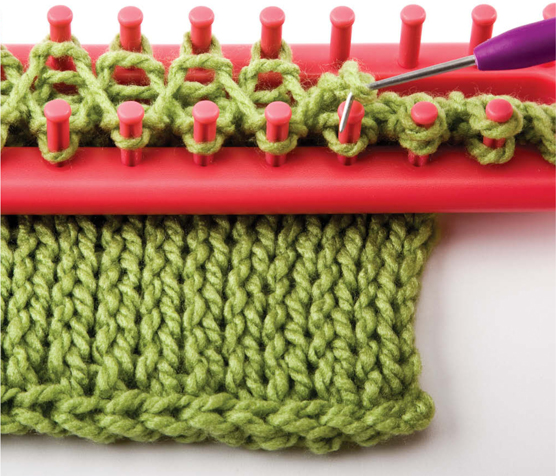
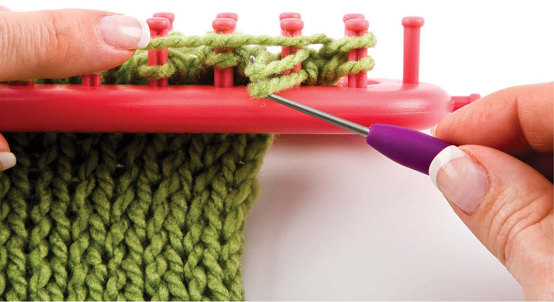
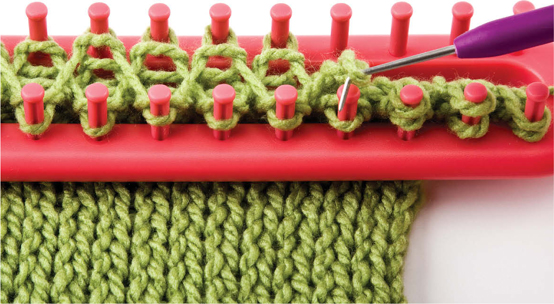
Start at the edge of the knitting opposite the beginning tail. Untie the scrap yarn.
Put a slip knot loosely on a crochet hook.
Insert the crochet hook into the first loop on the scrap yarn.
Wrap the working yarn around the crochet hook, and pull it through the two loops on the hook.
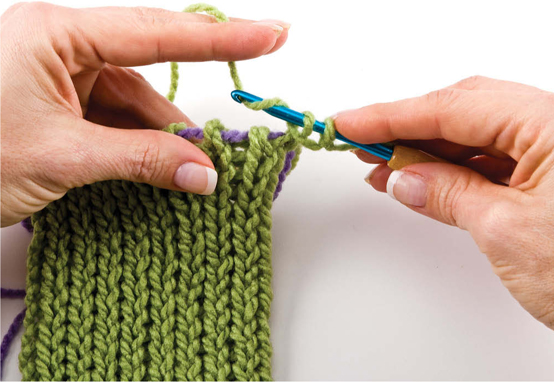
There will be one loop left on the crochet hook.
Insert the crochet hook into the next two loops on the scrap yarnthey cross over each other. Wrap the working yarn around the crochet hook and pull it through the three loops on the hook, leaving one loop left on the hook.
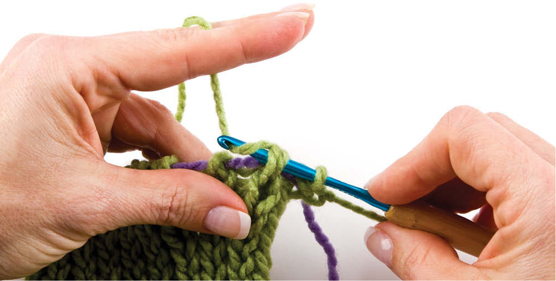
Continue across the width of the knitting.
The last stitch is made with the single loop left on the scrap yarn.
Cut the working yarn, leaving a 6-inch tail. Make one more crochet stitch. Then, wrap the crochet hook with both the working yarn and the beginning tail, pulling them both all the way through the loop on the hook. Pull gently on the working yarn tail to close the loop against the knitting.
Gently pull the scrap yarn free from the knitting.
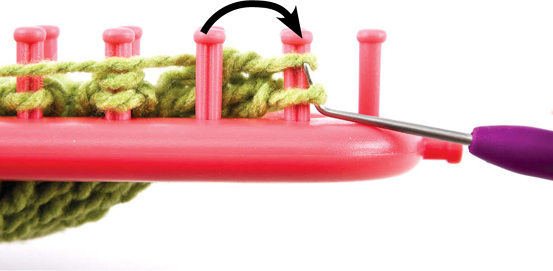
With the working yarn on the right end of the loom, bring the loops from the far side of the loom to the near side.
The loom will have no loops on one side and two loops on the other side.
Bring the working yarn to the left in front of the first two pegs, and knit them off, bringing the two bottom loops over the top one loop.
Make sure the new loops are loose.
Take the second loop off the loom and put it on the first peg. Knit off the first peg.
Move the remaining loop to the empty peg on the left.
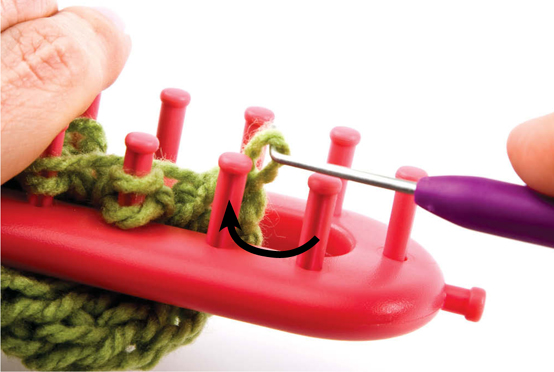
Knit the next peg as before, and then move it above the loop on the peg to the right. Knit off. Move the remaining loop to the empty peg on the left.
Continue across the width of the knitting.
When there is one loop left on the loom cut the yarn, leaving a 6-inch tail. Wrap the peg and knit off. Wrap the peg again and knit off, pulling the cut yarn end through the loop. Remove the loop from the loom and gently pull the tail to close the loop against the knitting.
With the working yarn on the right end of the loom, bring the loops from the far side of the loom to the near side.
The loom will have no loops on one side and two loops on the other side.
Cut a piece of scrap yarn 23 times longer than the width of the knitting and thread it into a blunt tapestry needle.
Starting at one end of the loom, bring the needle through the first loop on the peg, sliding the needle along the groove in the peg from the bottom to the top.
Thread the needle through each peg on the loom in order, sliding the needle along the groove in the peg from the bottom to the top.
Font size:
Interval:
Bookmark:
Similar books «Learn to Knit on Long Looms»
Look at similar books to Learn to Knit on Long Looms. We have selected literature similar in name and meaning in the hope of providing readers with more options to find new, interesting, not yet read works.
Discussion, reviews of the book Learn to Knit on Long Looms and just readers' own opinions. Leave your comments, write what you think about the work, its meaning or the main characters. Specify what exactly you liked and what you didn't like, and why you think so.