Contents
ACKNOWLEDGMENTS
Mom, Dad, Chris, and Melissa, thank you for your endless support of my creative endeavors. You have listened to me talk about all of my projects, even without understanding exactly what they are. I love you! Dan and Adrian, you are the two best friends a girl could ask for. Thank you for always encouraging me and listening during my moments of self-doubt. Farrah, Kylie, and Denisse, thank you for being my lifelong cheerleaders. I love you like sisters.
To Silvia Song: You always seem to know how to solve a problem, and youve taken care of me as if I were your little sister. You are such a talented designer, and I am always in awe of your brilliant, creative mind. To Emma Brooks: Youve always inspired me to work hard and hustle! Thank you for helping me understand the book world and agreeing to be a model in my photographs.
To Genevieve: I am so happy to have you by my side. Thank you for being my right hand, friend, and colleague. You helped make this book as beautiful as it could beputting more than you had to into every image and project and even graciously letting us shoot in your home. Thank you for believing in me and encouraging me as I worked on this book (I know I can be whiny!). To Melanie Riccardi: Thank you for being such a positive and calm presence in my life. I love that we have developed such an amazing relationship as friends and collaborators. Your photography perfectly captured my work and made it even better. Thank you from the bottom of my heart for your friendship and love. I also want to thank Jenny Morgan, for helping with the photo shoots: Your talent and personality make you a joy to work with.
To my editor, Angelin Borsics: Thank you for your help and guidance throughout the publishing process. Your expertise, patience, and involvement in every aspect of this book made it happen. I am also grateful to designer Stephanie Huntwork, production manager Kim Tyner, and production editorial director Mark McCauslin at Clarkson Potter, for making this book come together in a beautiful and timely manner.
To Ryan Miller at AutoCamp: Thank you for your generosityyou let us use your space in Russian River, and worked with us to make it happen on short notice. You even stepped in when we needed another male model! California is lucky to have such a cool camping experience.
To Mukesh Prasad: Thank you for always mentoring me and supporting my crazy wood-turning ideas. Youre the best adopted grandfather a girl could ask for! To Tanya Aguiniga: Thank you for being such a strong, independent woman in my life. Without your courageousness, I wouldnt have seen that its possible to be a successful maker and business owner.
A big thanks to everyone at MacBeath Hardwood for their friendly faces and for the generous discount on the wood used to make the projects in this book.
I am grateful to the product design department at Otis College of Art and Design for fostering my creativity and letting me be who I wanted to be even before I knew what that was for myself. And to Sweet Paul and The Makerie: Thank you for believing in me and my woodworking class; without you, Angelin might never have found me!
Last but not least, thank you to friendly strangers and fans of my work, for supporting me and tagging along on this crazy adventure. You guys are the best!
ABOUT THE AUTHOR
MELANIE ABRANTES teaches wood carving at workshops in Oakland, California. She sells her designs in small shops and retail stores nationwide, and her work has been featured in Domino, Dwell, Bon Apptit, and more. Visit her at melanieabrantes.com.
PERSONALIZING AND MAINTAINING YOUR PIECE
There are many options for personalizing and refining the small wooden block that youve transformed into something you love. Raw grain is beautiful, but its nice to know a few easy tricks for changing the color with paint or stain, or adding sweet details like monograms and motifs. Depending on how you plan to use your object, you may want to wax it or seal it to maintain its finish for years to come.
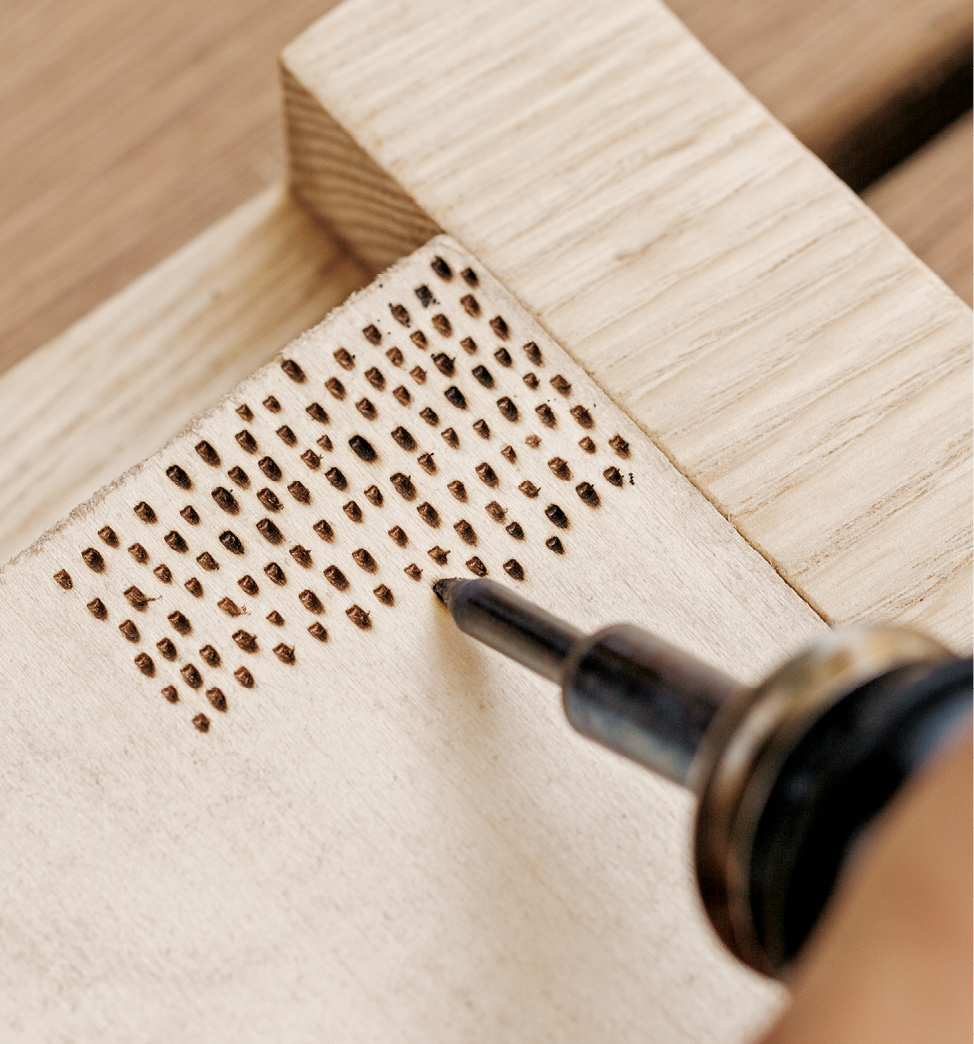
BURNING WOOD
Electric wood-burning pens (like the kind used for making the dots on the dice on ) come in in-expensive sets with different tips for creating effects such as dots, shading, and even calligraphy. Be sure to mark your design in pencil on your project before you begin, and practice on scrap wood first. Never burn over a varnish because the finish could catch fire.
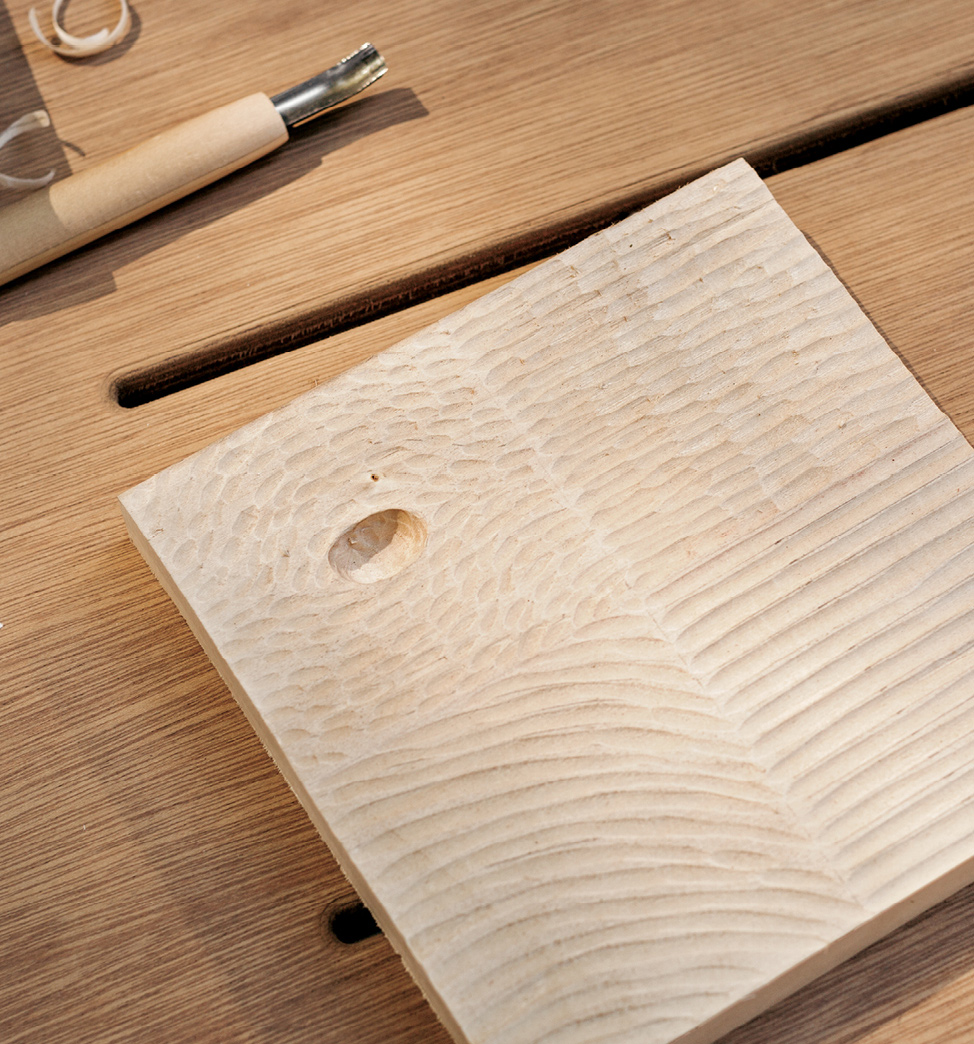
ETCHING
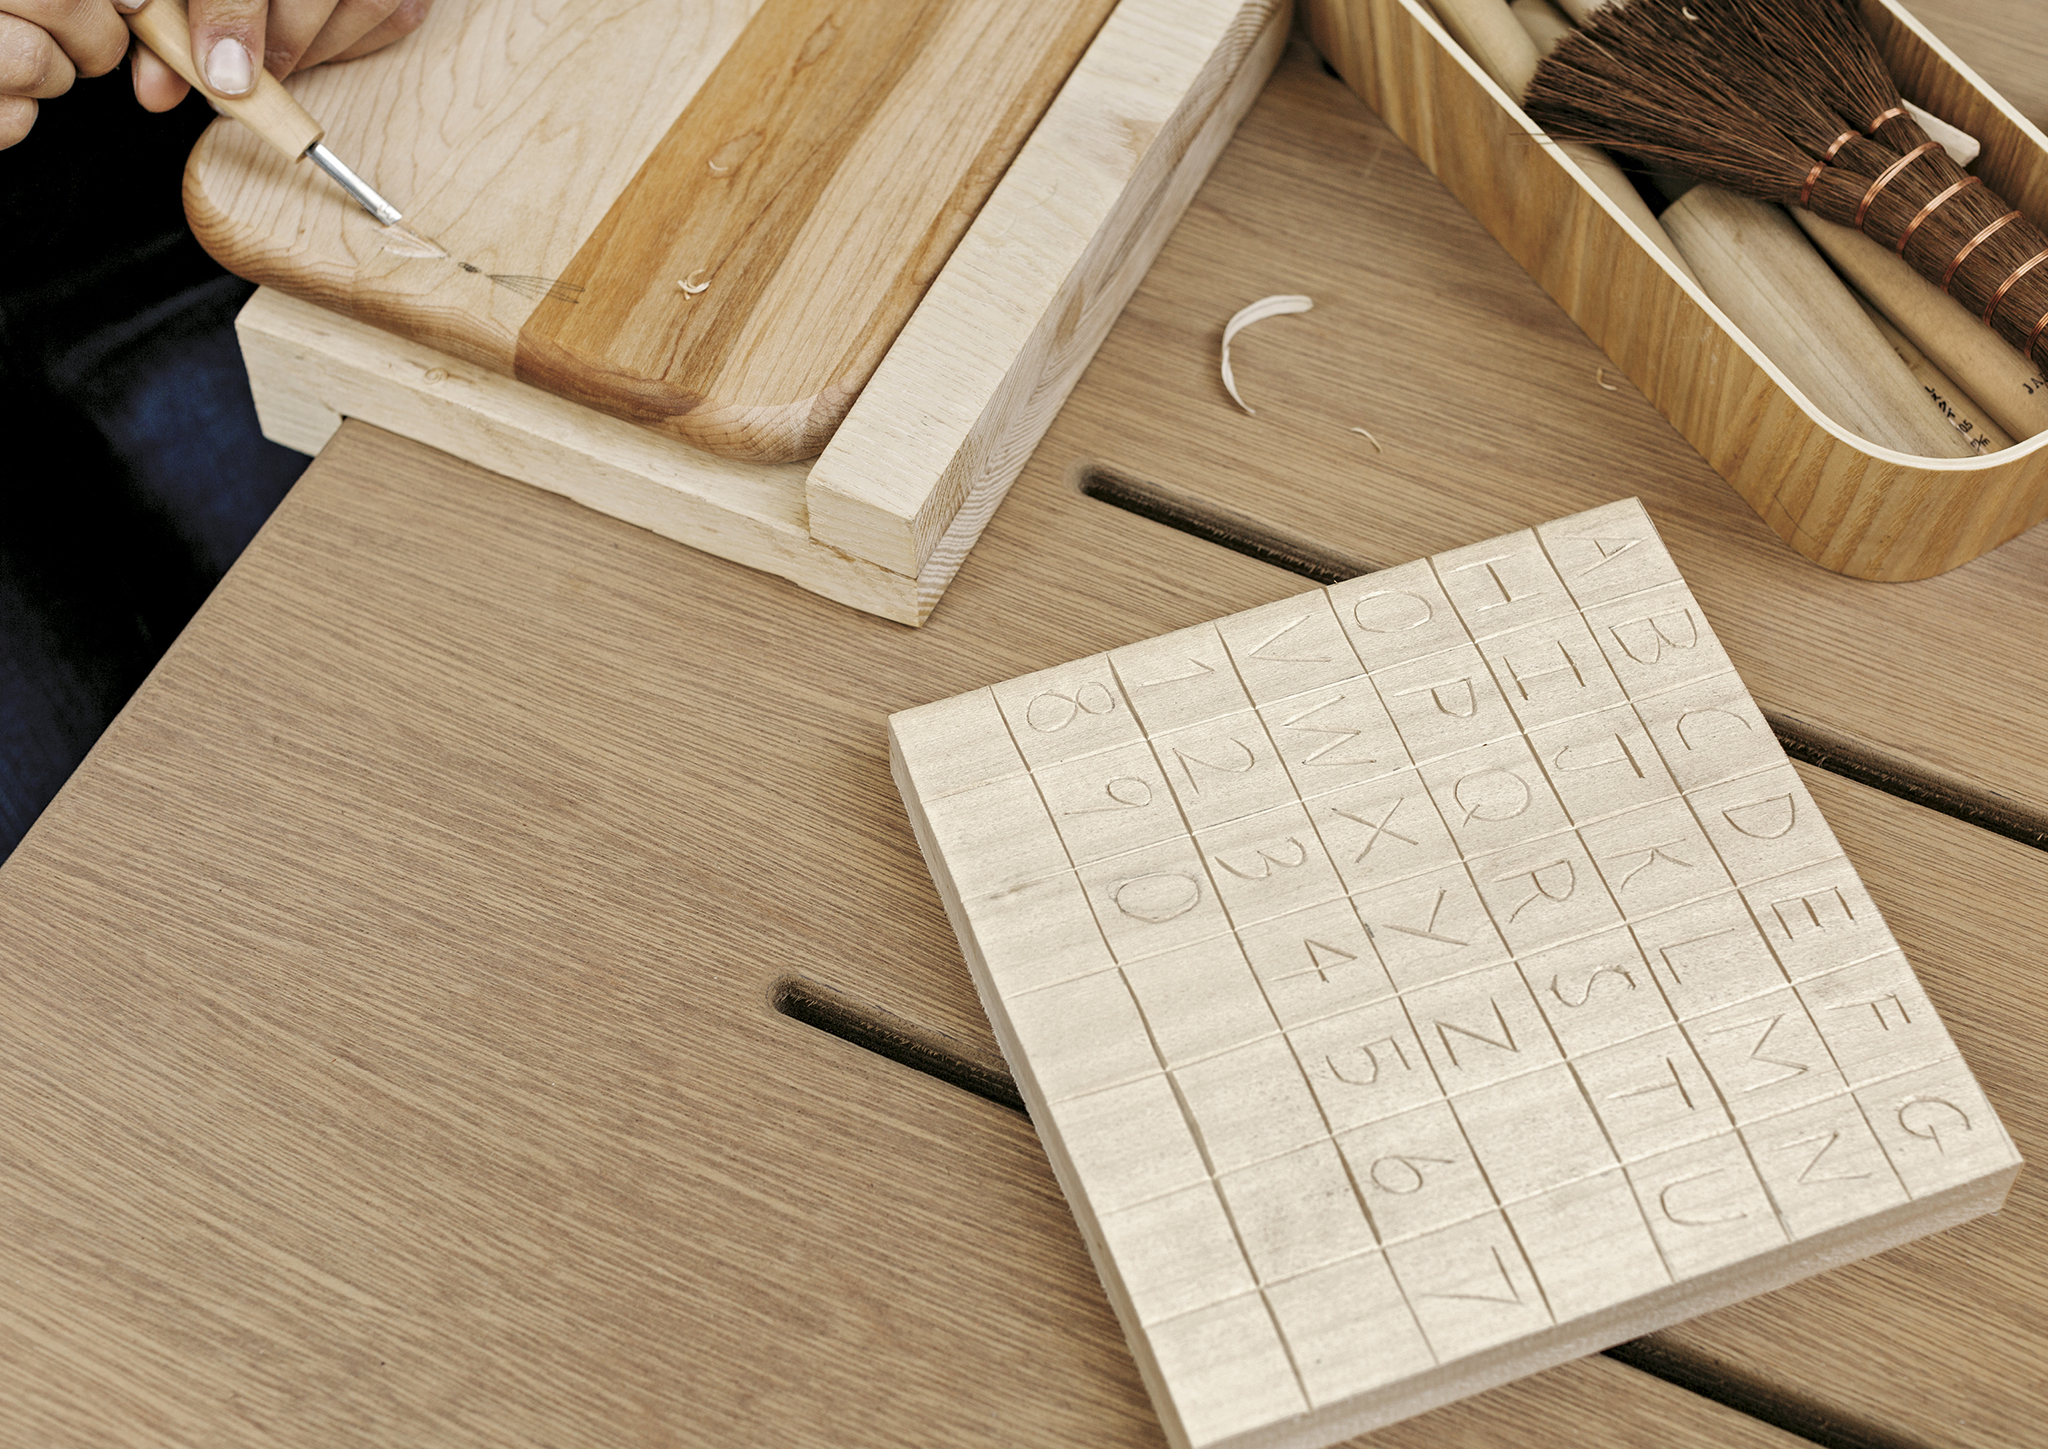
Use a spoon gouge to carve patterns and textures into the wood surface. Here, you see four different effects I created with just one tool: long straight lines, short straight lines, curves, and organic waves to mimic wood graining. As always, plot out the details with a pencil so you wont be sorry: draw first, cut once.
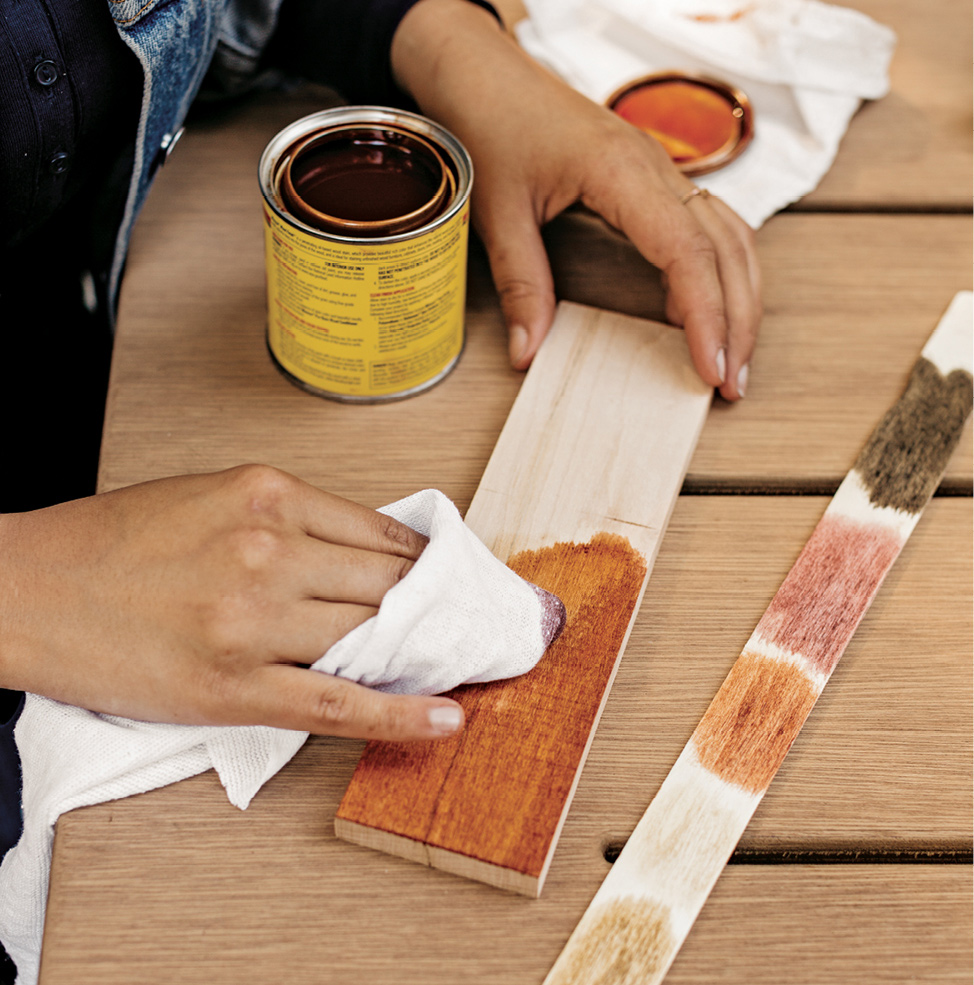
STAINING
Dont like the color of a wood? Stain it to something that suits your style. Changing the color of a wood is also a great way to elevate cheap scrap. I love to play with stain blocking: I stain half of my object a slightly darker color than the other half (its an idea similar to color blocking). If you have questions about a particular color youre trying to achieve, trust the experts at your local hardware store.
COATING
A water-resistant polyurethane coating is a good choice for items that will see heavy use, especially in the bathroom or the kitchen. Some brands offer one-step poly and stain coatings, so you can change the color of the wood and give it the protection that it needs at the same time (some are even available in a convenient spray can!). I recommend applying two coats for a rock-hard finish.
OILING
Once youve etched, burned, or stained the wood to your hearts content, youll probably want to condition it to prevent it from drying out. I keep mineral oil on hand for this task. (It must be labeled food grade if you apply it to kitchen items used for eating.) I also like to use tung oil, Danish oil, orange oil, and linseed oil. Be aware that the oil will darken the wood slightly, but it will keep your piece from warping or cracking. Apply one coat with a 100% cotton cloth (an old T-shirt should do the trick); rub in the oil using a circular motion. Allow the item to dry, at least 30 minutes or, better, overnight. Never put your wooden item in a dishwasher or soak it in water; instead, wash the item by hand with a mild soap, dry it, and reapply the oil when necessary.
SEALING
To preserve your piece and to create a stunning finish, apply two coats of a beeswax mixture. Because wax is very difficult to clean, youll need to dedicate a vessel for just this purpose. I use a small Crock-Pot that I found at a yard sale for five dollars, but an old pot set over a smaller pot of simmering water (to make a double boiler) will work fine.
In the pot, heat a 25/75 mixture of beeswax to mineral oil (make sure the latter is food-grade if you intend to apply it to kitchen items used for eating), stirring every 5 minutes until the wax becomes a smooth liquid. Add more oil to the beeswax mixture if you want a smoother wood butter, or add more wax if you prefer the texture of a paste.

