 COLORED PENCIL
 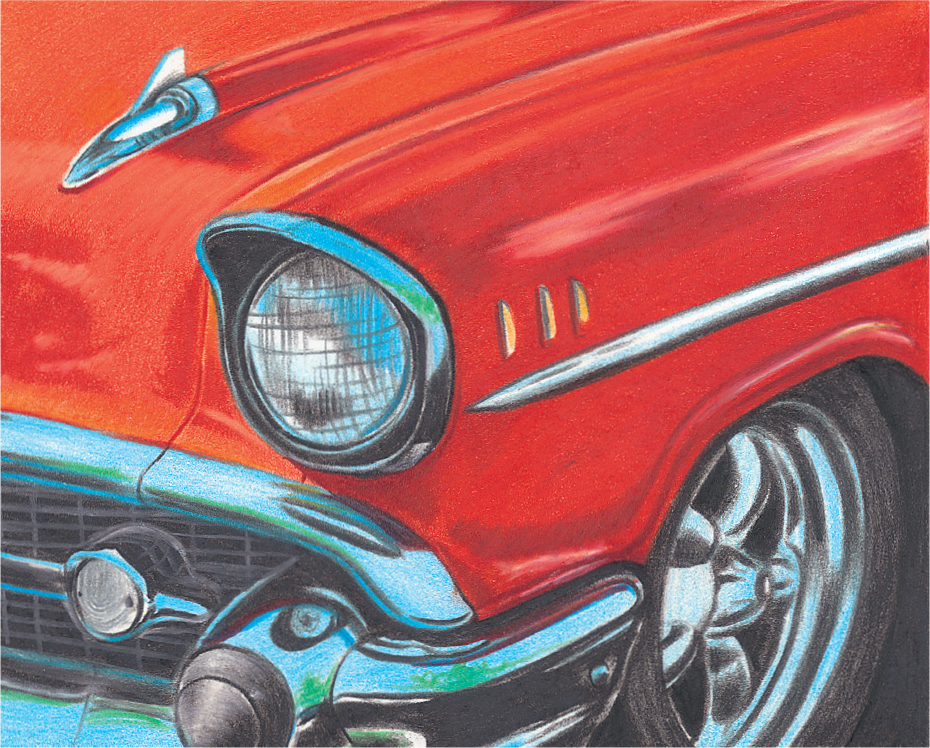 By Eileen Sorg
  2009, 2011 Walter Foster Publishing, Inc. Artwork 2009, 2011 Eileen F. Sorg.
All rights reserved. Walter Foster is a registered trademark.
This book has been produced to aid the aspiring artist. Reproduction of work for study or finished art is permissible. Any art produced or photomechanically reproduced from this publication for commercial purposes is forbidden without written consent from the publisher, Walter Foster Publishing, Inc.
Digital edition: 978-1-6005-8151-9
Softcover edition: 978-1-6105-9854-5 Designed by Shelley Baugh Project Editor: Meghan ODell Copyeditor: Stephanie Fitzgerald 3 5 7 9 10 8 6 4 2 CONTENTS INTRODUCTION Colored pencils have come a long way from the tools we remember using in grade school. Artists from around the world have picked up these little wood-encased sticks of pigment and taken gallery owners and the viewing publics breath away with their finely crafted works of art. Colored pencils have a multitude of great attributes to offer both the budding and seasoned artist. They are portable, inexpensive, non-toxic, user friendly, and for those interested in exploring their full range, absolutely indispensable. Artistic styles from loose and sketchy to fully developed photorealistic paintings can all be achieved through this medium. You are only limited by the boundaries of your own imagination and your willingness to try.
Having always considered myself a draftsman at heart, I have been hooked on colored pencils since being introduced to them many years ago. I am fascinated with the drawn line and the many ways in which a line can be used to describe the world around us. My curiosity and persistence have led me to develop the skills needed to express myself on paper and establish my own unique style. My intentions for this book are to teach you the basic skills needed to get started in colored pencil, and to give you the confidence to keep exploring. I hope these step-by-step lessons spark the same fire in you that began for me so long ago, and that you continue to pursue colored pencil to find your own artistic voice.  Driftwood Recovery Unit TOOLS AND MATERIALS Working in colored pencil requires very few supplies, and you may find that you already have many of the items described in this section.
As your skills progress you can add more tools to your arsenal and experiment with them along the way. Each project in this book lists the colors needed and provides color swatches, so refer to the individual projects for the colors used.  Pencils There are three basic types of colored pencils. I use wax-based pencils, but there are also oil-based pencils (which can be used with wax pencils) and water-soluble pencils (which have a gum binder that reacts to water, similar to watercolor paint). Each brand of pencil has its own characteristics that are worth experimenting with.
 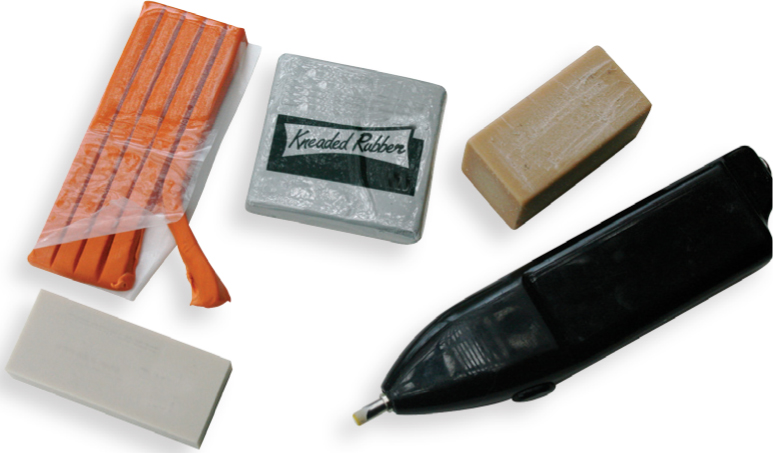 Erasers The success of erasing your colored pencil marks depends on two main factors: the color of the pencil line and the amount of pressure that was applied.
  Erasers The success of erasing your colored pencil marks depends on two main factors: the color of the pencil line and the amount of pressure that was applied.
Darker colors tend to stain the paper, making them hard to remove, and heavy lines are hard to erase, especially if the papers surface has been dented. I usually use a kneaded eraser (top center) and dab at the area to pick up the pigment; wall mounting putty (top left) is very useful when used the same way. For stubborn areas, use a battery-powered eraser (bottom right). Dont use rubber or vinyl erasers (bottom left) to remove colored pencil; the friction between the eraser and the paper can actually melt the wax pigment and flatten the texture of the paper. 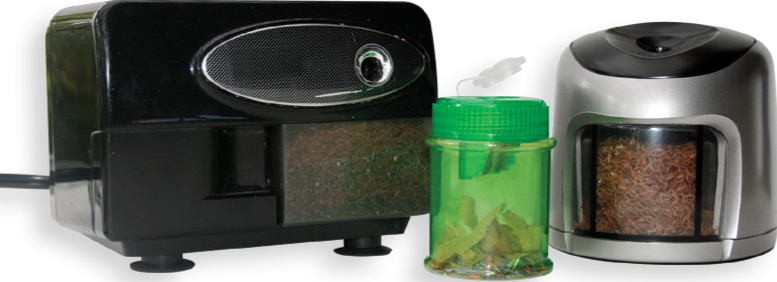 Sharpeners You can achieve various effects depending on how sharp or dull your pencil is, but generally youll want to keep your pencils sharp at all times. I rarely use handheld sharpeners (above center) because they have a tendency to break the pencil tips and shred the wood, but some artists like them.
I prefer a good electric sharpener with auto stop (above left) because it sharpens quickly and cleanly; the auto stop function prevents over-sharpening. If you plan to work outdoors, a battery-powered sharpener (above right) is your best bet. You can also use a sandpaper pad to refine a pencil point. 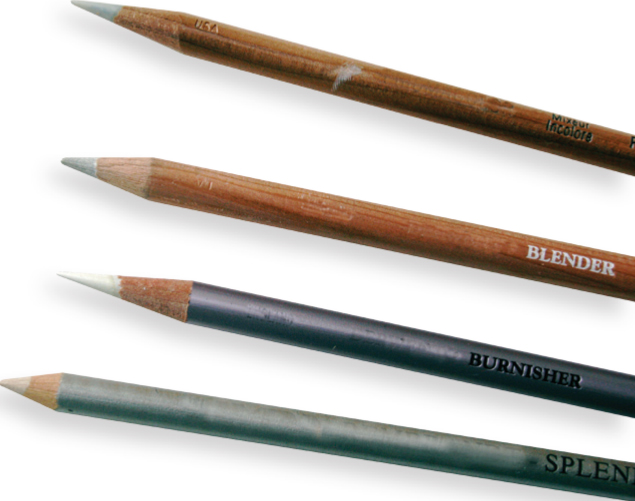 Colorless Blenders These tools are basically colored pencils without any pigment, and they are great for creating smooth, shiny blends. After applying two or more layers of different colors, work these pencils on top to blend the colors together. The surface of the paper will become a little slick after using a blender, so any colors you add over the blended layer will glide easily on the page.
This technique, called burnishing, is very useful for depicting shiny or wet surfaces. (See for more information on burnishing.) You can also use blending stumps (tightly wound rolls of paper) or colorless markers.  Paper Your choice of paper is the most important factor in how your work will turn out. Many papers will not hold up to the rigors of applying multiple layers of color, so it is worth taking the time to test a new paper before investing a lot of time in a project. If you are planning to use water-soluble pencils, make sure to use watercolor paper. For highly detailed work, I use hot-press watercolor paper, which has a very smooth surface thats ideal for creating delicate details.
For work that may need extra layers, I use a sand paper made for pastel artists. You may want to use a rougher paper with more tooth (or grain) for landscapes and other pieces that require built-in texture. Always use acid-free paper for your drawings and for mats when framing; otherwise the paper can yellow over time. For practice or drawing quick studies on location, youll want to have a sketch pad or sketchbook. You might also want to experiment with different colored papers and specialty papers. 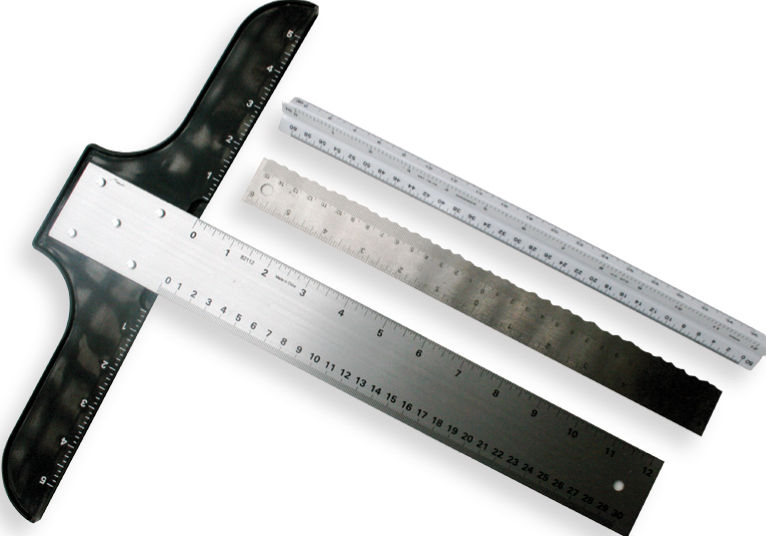 Rulers Use a ruler or T-square to mark the perimeter of your drawing area, ensuring that it is square before taping it to your drawing surface.
Next page


 COLORED PENCIL
  By Eileen Sorg
  2009, 2011 Walter Foster Publishing, Inc. Artwork 2009, 2011 Eileen F. Sorg.
 Driftwood Recovery Unit TOOLS AND MATERIALS Working in colored pencil requires very few supplies, and you may find that you already have many of the items described in this section.
 Pencils There are three basic types of colored pencils. I use wax-based pencils, but there are also oil-based pencils (which can be used with wax pencils) and water-soluble pencils (which have a gum binder that reacts to water, similar to watercolor paint). Each brand of pencil has its own characteristics that are worth experimenting with.
  Erasers The success of erasing your colored pencil marks depends on two main factors: the color of the pencil line and the amount of pressure that was applied.
  Sharpeners You can achieve various effects depending on how sharp or dull your pencil is, but generally youll want to keep your pencils sharp at all times. I rarely use handheld sharpeners (above center) because they have a tendency to break the pencil tips and shred the wood, but some artists like them.
 Colorless Blenders These tools are basically colored pencils without any pigment, and they are great for creating smooth, shiny blends. After applying two or more layers of different colors, work these pencils on top to blend the colors together. The surface of the paper will become a little slick after using a blender, so any colors you add over the blended layer will glide easily on the page.
 Paper Your choice of paper is the most important factor in how your work will turn out. Many papers will not hold up to the rigors of applying multiple layers of color, so it is worth taking the time to test a new paper before investing a lot of time in a project. If you are planning to use water-soluble pencils, make sure to use watercolor paper. For highly detailed work, I use hot-press watercolor paper, which has a very smooth surface thats ideal for creating delicate details.
 Rulers Use a ruler or T-square to mark the perimeter of your drawing area, ensuring that it is square before taping it to your drawing surface.