Learn How to Draw
Animals with Colored Pencils
For the Beginner
Jasmina Susak
And
John Davidson
~~~
Smashwords Edition
Learn to Draw
Book Series
JD- Biz Publishing
All Rights Reserved.
No part of this publication may be reproducedin any form or by any means, including scanning, photocopying, orotherwise without prior written permission from JD-Biz Corp and at http://JD-Biz.com . Copyright 2013
Smashwords Edition, License Notes
This ebook is licensed for your personalenjoyment only. This ebook may not be re-sold or given away toother people. If you would like to share this book with anotherperson, please purchase an additional copy for each recipient. Ifyoure reading this book and did not purchase it, or it was notpurchased for your use only, then please return to Smashwords.comand purchase your own copy. Thank you for respecting the hard workof this author.
All Images Licensed
By: Jasmina Susak and 123rf.com
Table of Contents
Learn How to Draw Animals with Colored Pencils forthe Absolute Beginner
Introduction:
Drawing with colored pencil is super easy ifyou use the right colors and have drawn a good sketch. Unlike thegraphite pencils, colored pencils cannot be easily erased, so wehave to draw carefully, particularly the darker areas. Always drawparts with colored pencil pressing down lightly and if it looksgood, color over the same area pressing down hard. Buy good brandof colored pencils and smooth paper. If you don't have a lot of sayred pencils, you can get more nuances with only one pencil, bycontrolling how hard you press when you draw. In the image belowI've drawn with one red pencil three nuances. In the first exampleI pressed hard, in the second I pressed normally and in the thirdexample I pressed lightly. Even more nuances can be created thisway:

Blending:
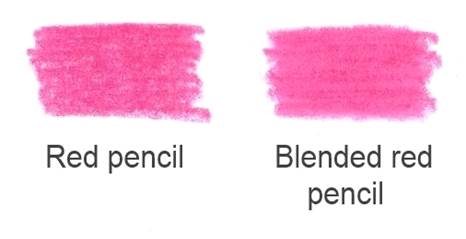
With colored pencils is difficult to make asmooth drawing, even when you draw on the smoothest paper, so youcan use a colorless blender or, like me in these tutorials, whiteand/or gray colored pencils. Be careful when blending the blackareas, don't go over them with white pencil because will get someyellow nuance. For blending the parts colored with black pencilrather use light or dark grey pencils. In the image below I want toshow you how it looks with normal red pencil without blending(left) and after adding a layer over with white pencil (right). Youcan see that the right example is smoother than the leftexample:
Mixingthe colors:
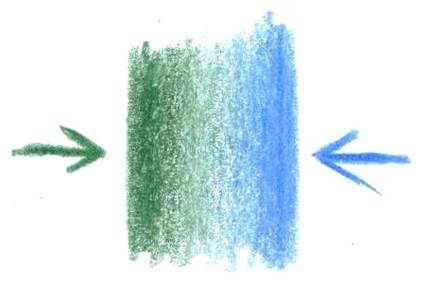
Some areas in drawing have to be blurry, forexample: something that's farther away, in water or something inmotion. These areas cannot have sharp edges and here we have tomake the things blurry, drawing the colors into each other. In theimage below, I've shown you an example of such a drawing. As I drewwith green pencil, I gradually reduced the pressing, and from otherside I drew with blue pencil draw it toward green also reducing thepressing of my hand. This way I achieved the blurry edge betweengreen and blue. See an image below and try the same with othercolors. Finally blend this all with colorless blender or with whitecolored pencil.
Drawingthe shadows:
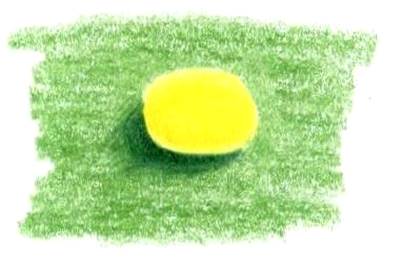
For making the shadows under anything use thedarker nuance of the shadowed area. In my example below you can seethat I used the dark green for shadow on the light green. Try thesame with other colors and use the darker nuance of that or pressharder. Also don't be afraid to use a black colored pencil forshadows on the brown or gray areas. For getting even better resultuse the darker nuance than used for shadow, and draw a thin linedirectly under the thing:
Proportionality:
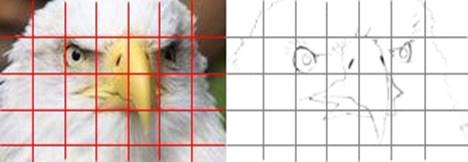
If you want to draw in realistic style, youshould make it proportionally. As a first, draw main lines with HBgraphite pencil and don't press hard because these lines have to beerased during the process. To get the good, proportional sketch, Irecommend you to use a grid, which almost every artist uses. Draw agrid over the reference photo and draw a grid on a paper. Draw thesame lines from squares of reference photo in the squares of yourpaper (see an example below):
Goldeneagle - drawing tutorial:
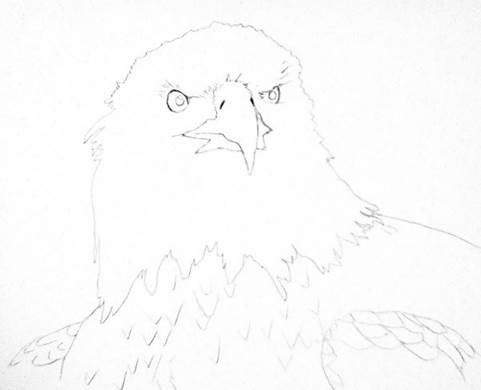
Let's start with golden eagle, which doesn'thave much color. As a first draw a main lines using grid:
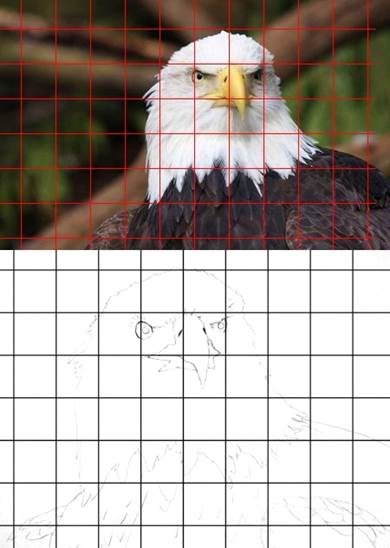
After erasing the grid your sketch shouldlook like the sketch below:
Black parts:
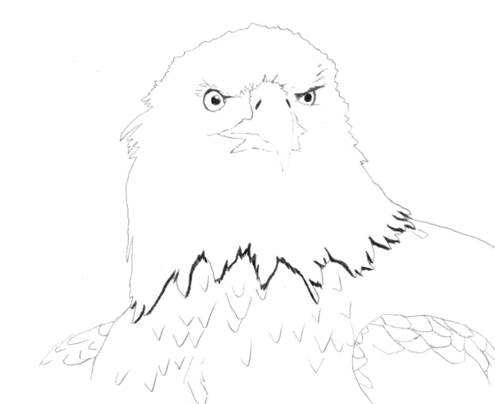
With black pencil draw the pupil, holes inthe beak and areas under the white feathers. Be careful becausethese black parts are visible even after erasing. Leave the whitecolor of paper untouched for shining of the eye. Just draw aroundthose parts with black and later with colored pencil.
Yellow areas:
With yellow colored pencil draw the iris, butdon't press hard and draw the beak leaving the middle almost whitebecause it get the most light and with darker nuance of yellow drawthe sides of the beak. Always draw with darker nuance under thefrontal bone, because these parts are always in shadow. If you haveonly one nuance of yellow colored pencil you can get more bychanging how heavy the shading is. You can achieve a stronger colorby pressing down lightly and coloring over the same area many timestill get an appropriate color.
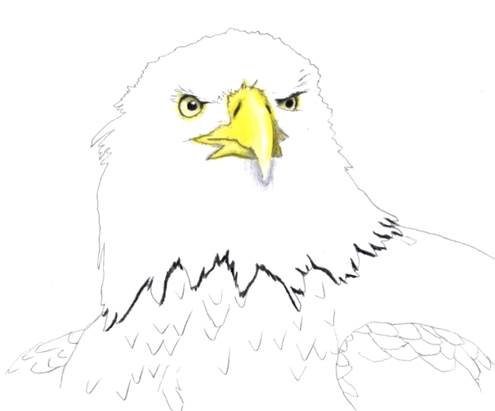
Now with light gray pencil draw the bordersbetween some feather and the areas under the frontal bone. Thiswill create shadows on the white feathers. Under the beak draw theshadow, which will add 3D effect to the beak as you can see on theimage below:


