Susak - How to draw with colored pencils on toned paper: in realistic style
Here you can read online Susak - How to draw with colored pencils on toned paper: in realistic style full text of the book (entire story) in english for free. Download pdf and epub, get meaning, cover and reviews about this ebook. year: 2015, genre: Home and family. Description of the work, (preface) as well as reviews are available. Best literature library LitArk.com created for fans of good reading and offers a wide selection of genres:
Romance novel
Science fiction
Adventure
Detective
Science
History
Home and family
Prose
Art
Politics
Computer
Non-fiction
Religion
Business
Children
Humor
Choose a favorite category and find really read worthwhile books. Enjoy immersion in the world of imagination, feel the emotions of the characters or learn something new for yourself, make an fascinating discovery.

- Book:How to draw with colored pencils on toned paper: in realistic style
- Author:
- Genre:
- Year:2015
- Rating:3 / 5
- Favourites:Add to favourites
- Your mark:
How to draw with colored pencils on toned paper: in realistic style: summary, description and annotation
We offer to read an annotation, description, summary or preface (depends on what the author of the book "How to draw with colored pencils on toned paper: in realistic style" wrote himself). If you haven't found the necessary information about the book — write in the comments, we will try to find it.
Susak: author's other books
Who wrote How to draw with colored pencils on toned paper: in realistic style? Find out the surname, the name of the author of the book and a list of all author's works by series.


How to draw with colored pencils on toned paper: in realistic style — read online for free the complete book (whole text) full work
Below is the text of the book, divided by pages. System saving the place of the last page read, allows you to conveniently read the book "How to draw with colored pencils on toned paper: in realistic style" online for free, without having to search again every time where you left off. Put a bookmark, and you can go to the page where you finished reading at any time.
Font size:
Interval:
Bookmark:
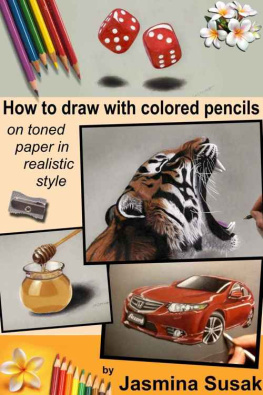
How to draw with colored pencils on toned paper in realistic style
Introduction:
Drawing on a toned paper can make your drawings look even more realistic, because when we draw with bright colored pencils it looks even more outstanding than when we draw with them on white paper. It's good to remember that the drawn areas can be little bit darker than they are on white paper, but we always can make them lighter with white colored pencils.
In this book with 4 drawing tutorials you can find a lot of tricks and tips that you can apply to your drawings. The most important is to keep practicing. Some artists draw area by area, some start from the darkest parts, some from the lightest ones. You have to find out what is the most appropriate for you. I'll try to keep it simple and helpful.
Few advices that I want to give you that might be helpful:
- The more detailed, the better drawing.
- Don't compare yourself with those who draw worse than you. This way you can be satisfied although you still have a lot to improve.
- Patience. If you just throw your pencil saying "It's not for me!" of course you won't develop and improve. If you want success you have to work on drawing with patience.
In this book we won't use much colors, only 2-3 colors per drawing, so that can be simple even for beginners.
We are going to make a strong contrasts on our drawings so they can look really realistic: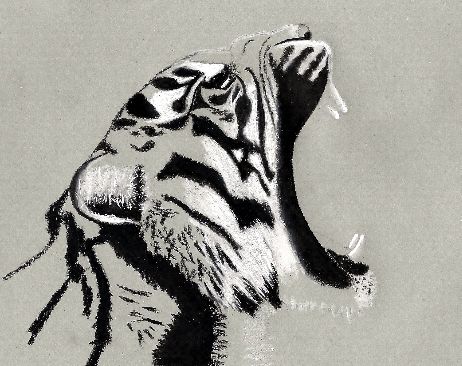
To make a 3D illusion with heavy shadows:
To make a things shining:

So let's get started.
Tools:
This book is about colored pencils, but I would recommend a white ink gel pen, which is very useful for drawing over already drawn dark areas. We can achieve it with white colored pencil, but it's really difficult, so this pen is great.
I would recommend a two types of colored pencils: for the thinner parts and hair use the harder colored pencils such is Faber-Castell and for creating a smooth textures (smooth surfaces, larger areas) use a soft colored pencil such is Prismacolors. It's easier if you use the smoothest paper. You can also use a colorless blender, but for blending the drawn areas you can use even a white colored pencil.
Using the grid method:
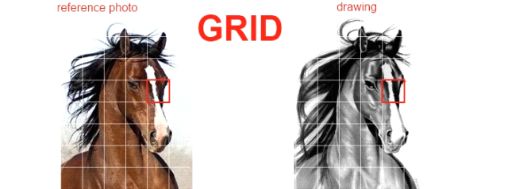
As a first you should always draw a sketch and make it as proportional as possible. Take time and patience for drawing a main lines, because it is a base of your drawing. If it's difficult for you to get a proportional sketch, you can use a grid method, which many artists use. In the next image you can see how it works, I've made one sample from my drawing. Draw a grid, with mechanical pencil using a ruler, over a reference photo and draw a grid on a blank paper. Draw a main lines from the squares of reference photo to the squares of your paper. Once you're finished with sketch, erase the grid lines.
Dice - drawing tutorial
As a first draw the main lines using a grid-method. In the next image you can see a sample that I've made about grid. If you are advanced drawer, you can use only 1-2 lines in your grid.
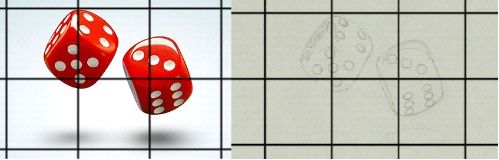
You should draw a grid and main lines with H graphite pencil, because it can be easily erased. If you press hard this lines will stay visible even under the colored pencils. So, press gently with pencil; you need this line only for orientation.
As you can see I'm drawing it on a grey paper which is little bit green, but you can choose any other color.
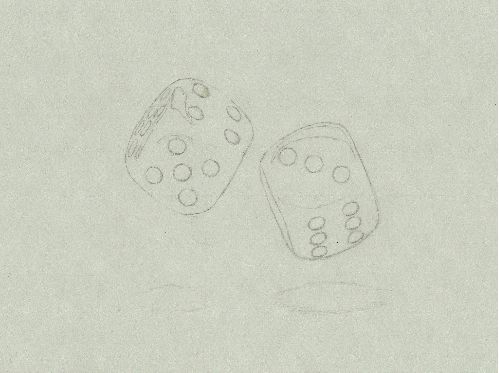
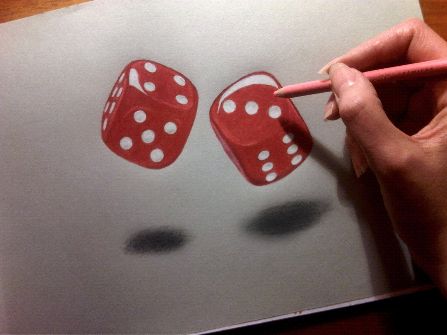
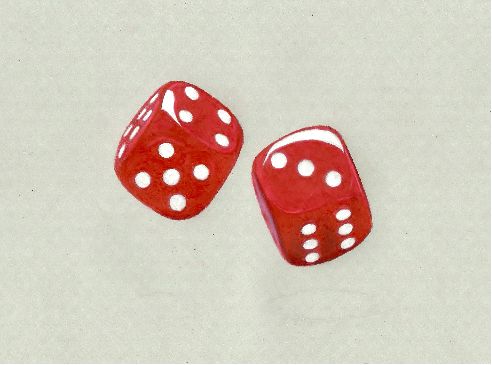
Let's start with white color, so you can see what are the benefits of drawing on a toned paper. With white colored pencil draw the spots and the shining on the dice.
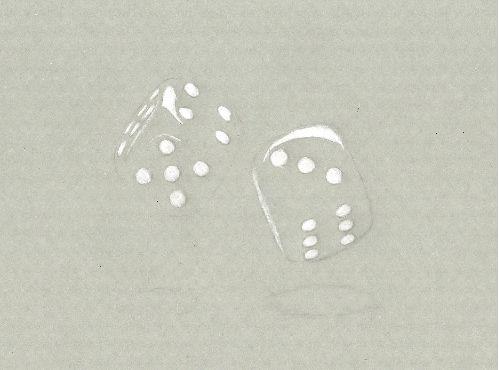
With red colored pencil draw all the red parts. This is not difficult, but has to be drawn carefully. I used Faber-Castell for the red parts next to do white areas, because Prismacolors are too soft for drawing such a precise parts.
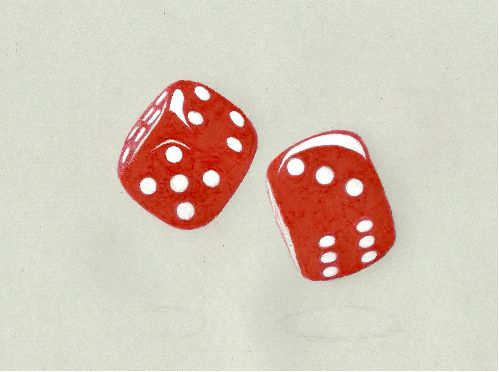
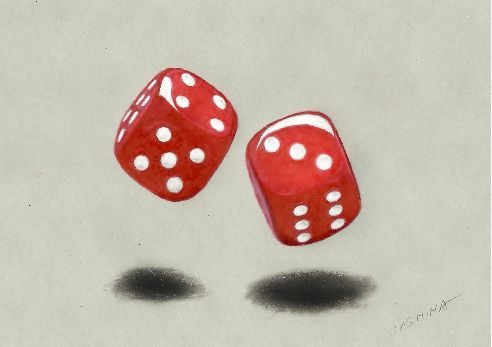
Now with dark red colored pencil draw the areas that are in shadow. You can see that in the next image.
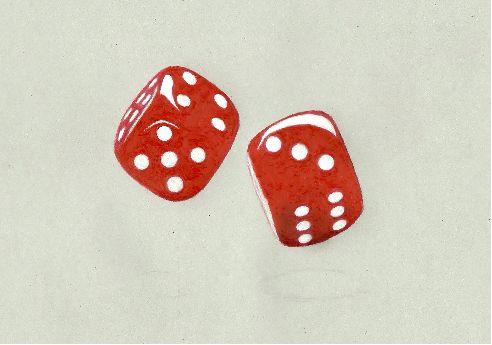
With white colored pencil go over the highlighted red areas, the edges and the parts affected by the light.
Start to draw a shadow under the dice with H graphite pencil and look at your drawing from far away so you can see how these shadows look. You can see that the shadows in the reference photo are not as strong as mine. I wanted to make it more 3D. You can also play with it. That's why I recommend to draw with graphite pencil first; dark colored pencils always leave trace after being erased. The dice on the left side is rolling higher in the air, so logically it has a smaller shadow than the dice which is closer to the say table. If you see that your shadows are on the right places draw them with dark grey colored pencil. Use the black colored pencil to draw in the middle of the shadow. The edges of the shadows draw with light grey pencil or use a colorless blender to make the blurry edges.
* * *
Red Car - Drawing Tutorial
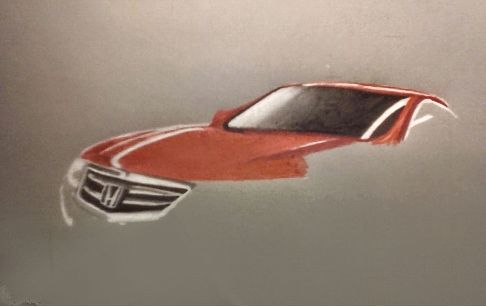
Let's draw the next drawing area by area. I have some grid drawn, but it's hardly visible and contains only few lines. If you are a beginner, you should use more lines in your grid and as you get more experienced you'll have to use less and after a lot of practicing, you won't even need that. So, this one I've drawn without sketching. The photo of this car has been taken in the night under the streets' lights. I started from the top and used a rose and white colored pencils for the edges of the car. I started a windshield from the highlighted areas and continued to draw it with light grey colored pencil. Gradually I started to use a dark grey and finally the black colored pencil. The lights that fall all over the car I drew with white colored pencils.
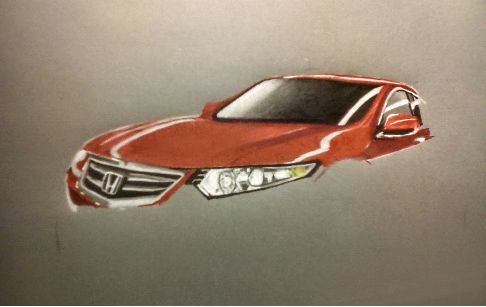
The lights on the car I drew with white, grey and yellow colored pencil, as you can see in the next image. The side of the car I started with dark red pencil.
Font size:
Interval:
Bookmark:
Similar books «How to draw with colored pencils on toned paper: in realistic style»
Look at similar books to How to draw with colored pencils on toned paper: in realistic style. We have selected literature similar in name and meaning in the hope of providing readers with more options to find new, interesting, not yet read works.
Discussion, reviews of the book How to draw with colored pencils on toned paper: in realistic style and just readers' own opinions. Leave your comments, write what you think about the work, its meaning or the main characters. Specify what exactly you liked and what you didn't like, and why you think so.