Jasmina Susak - How to Draw Realistic Portraits with colored pencils
Here you can read online Jasmina Susak - How to Draw Realistic Portraits with colored pencils full text of the book (entire story) in english for free. Download pdf and epub, get meaning, cover and reviews about this ebook. year: 2015, publisher: CreateSpace Independent Publishing Platform, genre: Home and family. Description of the work, (preface) as well as reviews are available. Best literature library LitArk.com created for fans of good reading and offers a wide selection of genres:
Romance novel
Science fiction
Adventure
Detective
Science
History
Home and family
Prose
Art
Politics
Computer
Non-fiction
Religion
Business
Children
Humor
Choose a favorite category and find really read worthwhile books. Enjoy immersion in the world of imagination, feel the emotions of the characters or learn something new for yourself, make an fascinating discovery.

- Book:How to Draw Realistic Portraits with colored pencils
- Author:
- Publisher:CreateSpace Independent Publishing Platform
- Genre:
- Year:2015
- Rating:3 / 5
- Favourites:Add to favourites
- Your mark:
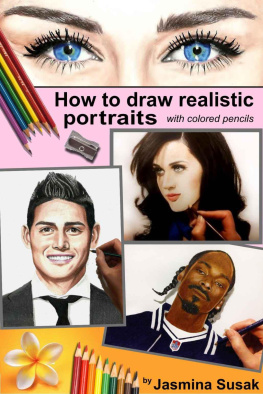
How to Draw Realistic Portraits with colored pencils: summary, description and annotation
We offer to read an annotation, description, summary or preface (depends on what the author of the book "How to Draw Realistic Portraits with colored pencils" wrote himself). If you haven't found the necessary information about the book — write in the comments, we will try to find it.
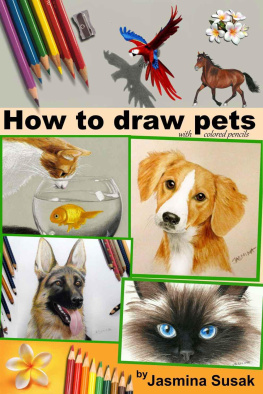
Four drawing tutorials with simple explanation, tricks and tips about drawing a life like portraits with colored pencils.
Jasmina Susak: author's other books
Who wrote How to Draw Realistic Portraits with colored pencils? Find out the surname, the name of the author of the book and a list of all author's works by series.


How to Draw Realistic Portraits with colored pencils — read online for free the complete book (whole text) full work
Below is the text of the book, divided by pages. System saving the place of the last page read, allows you to conveniently read the book "How to Draw Realistic Portraits with colored pencils" online for free, without having to search again every time where you left off. Put a bookmark, and you can go to the page where you finished reading at any time.
Font size:
Interval:
Bookmark:
How to draw realistic portraits with colored pencils
Introduction:
In this book with 4 drawing tutorials you can find a lot of tricks and tips that you can apply to your drawings. The most important is to keep practicing. Drawing a realistic portraits with colored pencils is very difficult. Some artists draw area by area, some start from the darkest parts, some from the lightest ones. You have to find out what is the most appropriate for you. You should play and experiment with colors, draw one over another and always use more pencils for the same area. I'll try to keep it simple and helpful.
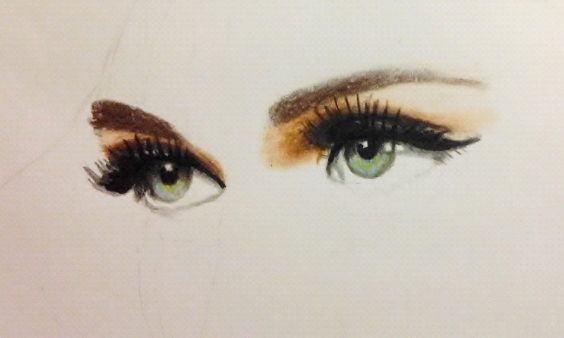
We are going to draw an eyes in the shadow:
To learn how to draw a tooth: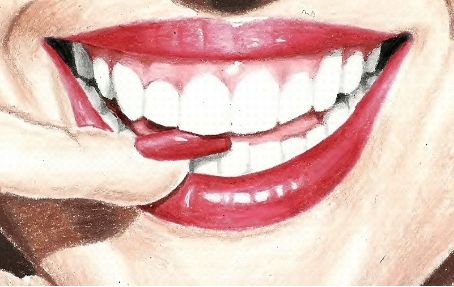
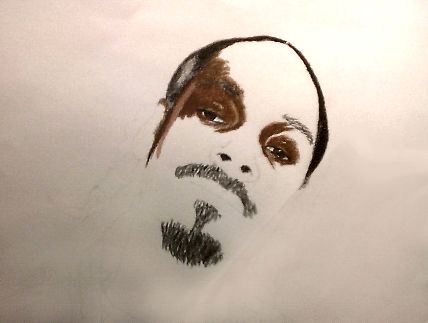
To make a black skin shining:
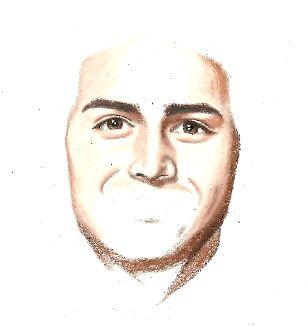
To learn how to blend colors one into another:
So, let's get started:
Tools:
I would recommend a two types of colored pencils: for the thinner parts and hair use the harder colored pencils such is Faber-Castell and for the skin use a soft colored pencil such is Prismacolors. It's easier if you use the smoothest paper. You can also use a colorless blender, but for blending the drawn areas you can use even a white colored pencil. You don't have to get all the existing nuances of colored pencils; learn to mix them up and create a colors that you don't even have. Of course it's easier if you can afford a bigger set of pencils.
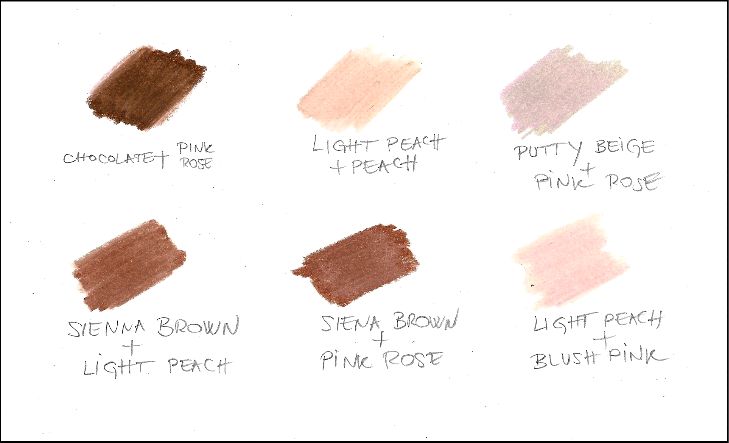
In the next image I've shown you how you can get the tones of skin with drawing the colors one over another, but of course, there are a thousands of combinations, you have to experiment with them:
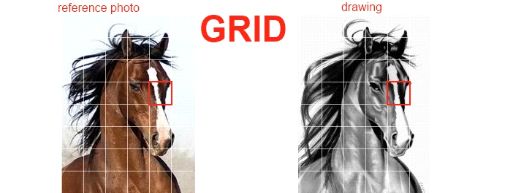
Using the grid method:
As a first you should always draw a sketch and make it as proportional as possible. Take time and patience for drawing a main lines, because it is a base of your drawing. If it's difficult for you to get a proportional sketch, you can use a grid method, which many artists use. In the next image you can see how it works, I've made one sample from my drawing. Draw a grid, with mechanical pencil using a ruler, over a reference photo and draw a grid on a blank paper. Draw a main lines from the squares of reference photo to the squares of your paper. Once you're finished with sketch, erase the grid lines. Don't press hard when drawing the grid because the grid can stay visible even after erasing.
First Drawing Tutorial:
A lot of you have been told me that you don't have a problems with sketch, but with shading, so I won't talk much about main lines. As we've already mentioned in the introduction, use a grid-method for creating a proportional sketch:
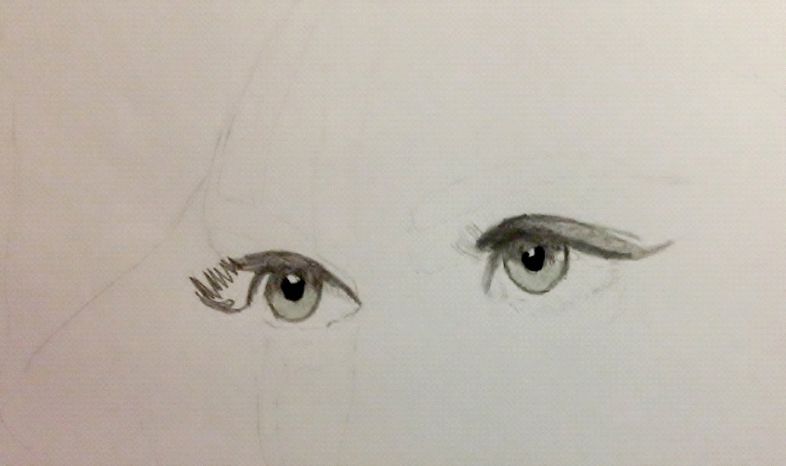
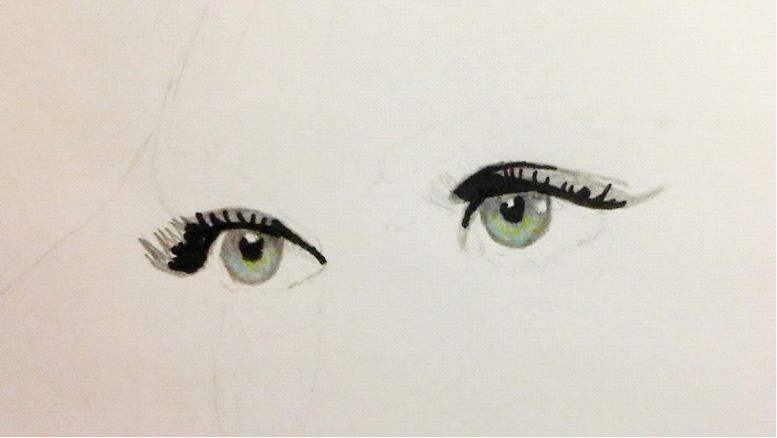
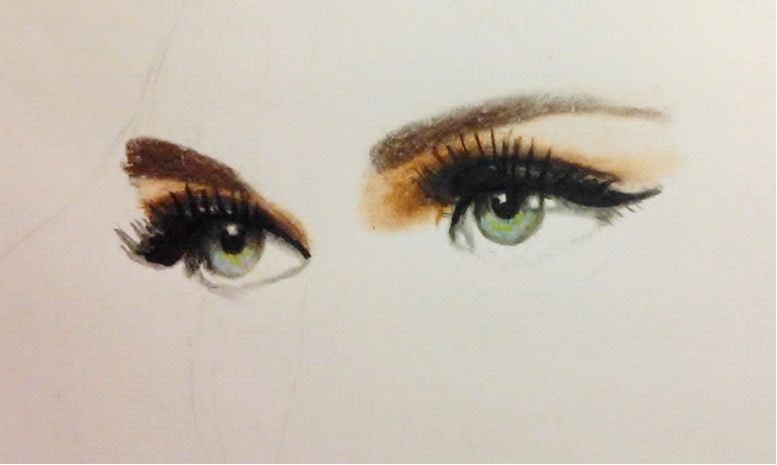
Let's start with eyes. With grey pencil draw the pupils, eyeliner and eyelashes. Leave the white color of paper for the shining on on the pupils.

If the pupils look good and on right place draw over them with black colored pencil pressing hard and go over the same area more times. Leave untouched the white spots over the pupils. These spots represent the reflections of the lights. With dark grey colored pencil draw the circles around the irises and try to make these circles as perfect as possible. With light grey pencil draw the irises.
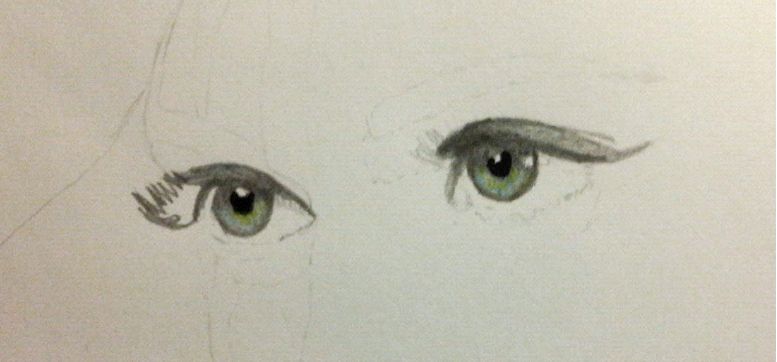
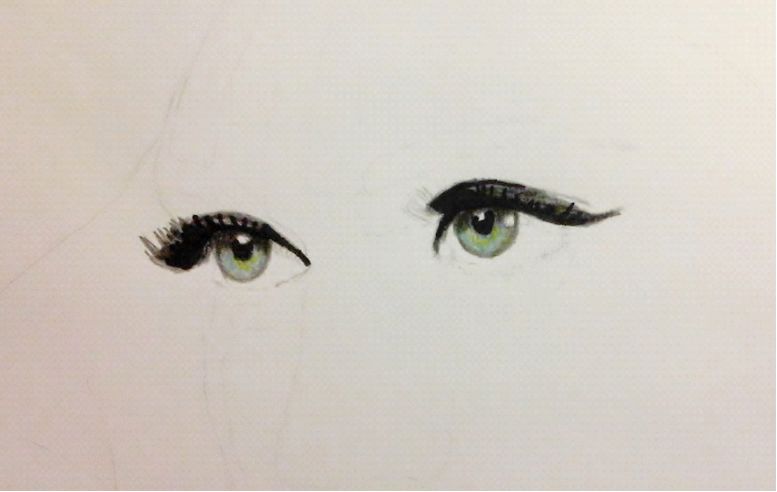
Now with blue and green colored pencils draw the irises over the previously drawn light grey base. Also leave other white spots untouched.
Draw her make-up, eyeliner and eyelashes with black pencil pressing hard. Draw carefully because the colored pencils are difficult to erase, particularly black.
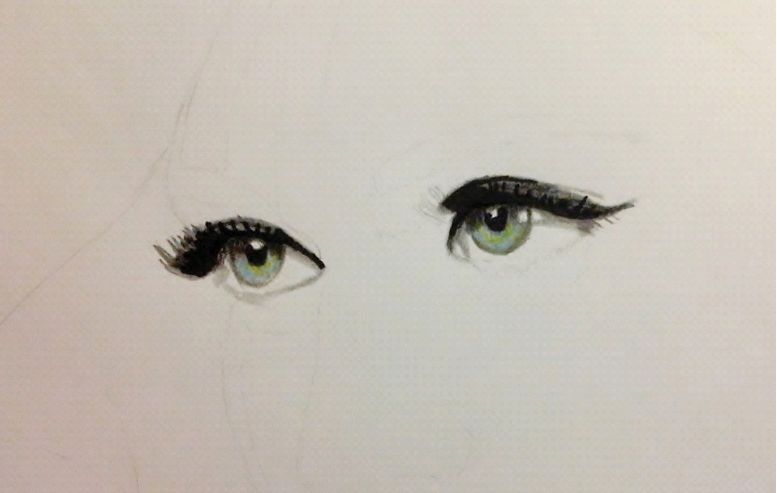
With dark grey pencil draw the upper eyelids and the parts of the irises directly under the false eyelashes which create huge shadow over the eyes.
With light grey pencil draw the shadow under the false eyelashes that fall over the white parts of the eyes, so called sclera.
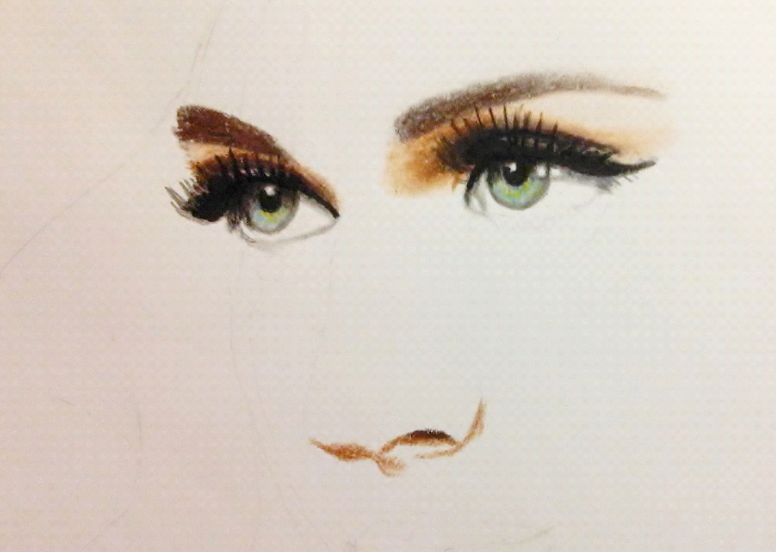
Now it's time for the skin. For drawing the skin I'm using Prismacolor Premier colored pencils, because they are really soft and you can draw one color over another many times, so I can tell you exactly which colored pencils I used. With Dark Brown pencil draw the deep areas under the eyebrows and add Sienna Brown as you go toward the eyebrows. Try to make these colors blended into each other.
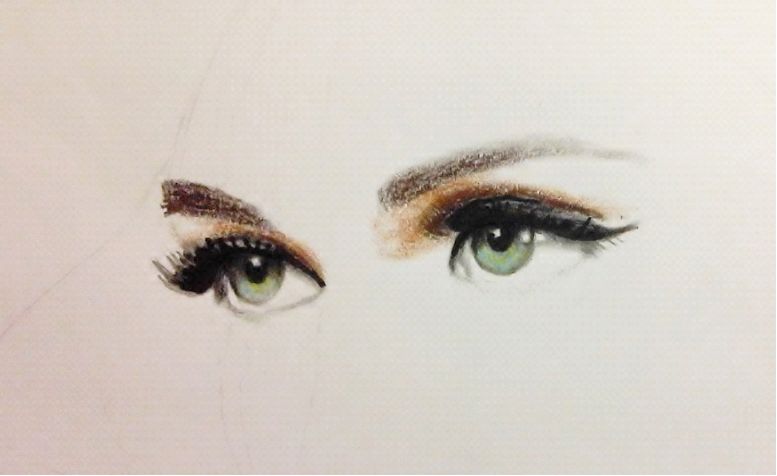
With Peach draw close to the brown areas and continue with Light Peach, which is somehow the base of her pretty pale skin.
With Dark Brown draw her eyebrows and use Sienna Brown for the highlighted parts of the eyebrows. With the same pencils draw the nostril and the downer shape of her nose.
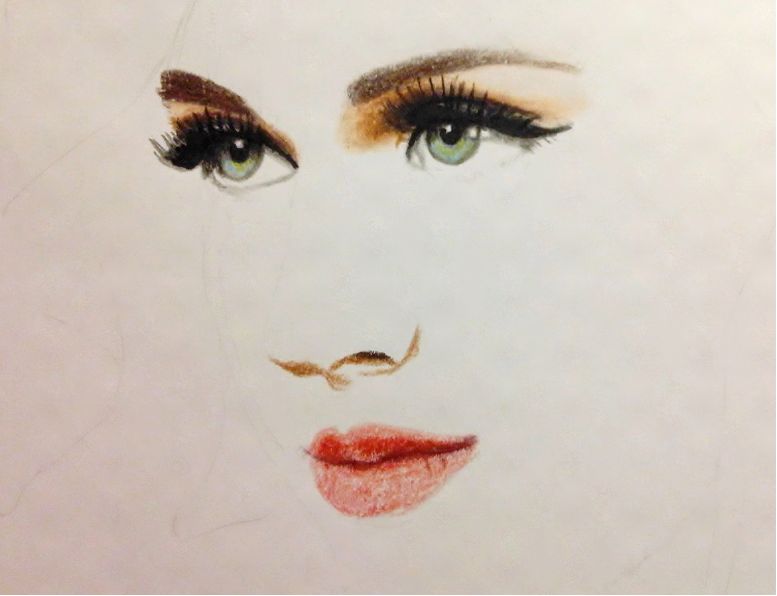
For the lips you can use any color because she has a lipstick. You don't have to draw everything the same as you see in the reference photo. The technique of the darker parts and the highlights is always the same no matter which color you use. Between two lips draw with Tuscan Red and the rest of the lips draw with red pencil.
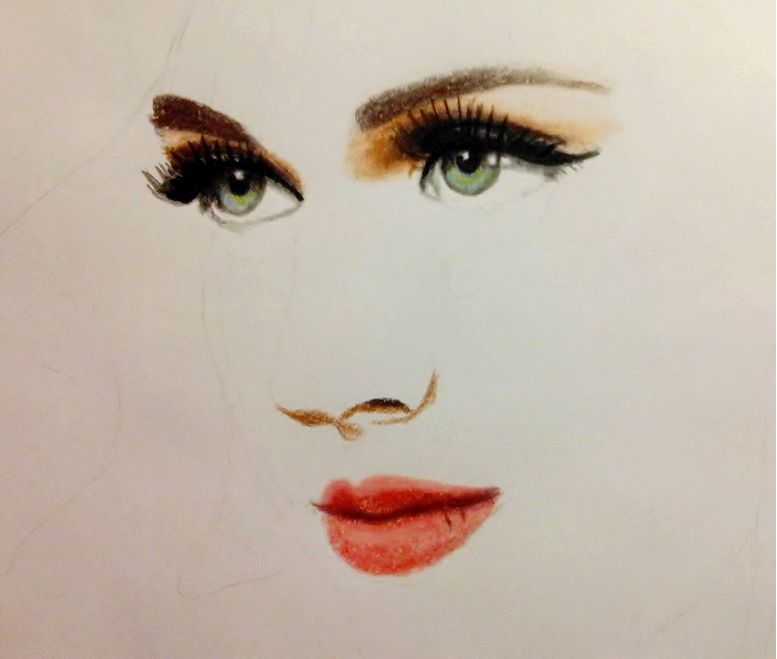
In the next step I used a wax colorless blender from Prismacolor and I blended the two nuances so there's no sharp edge between them anymore. Be careful if you use this tool, because it makes a drawn area little bit darker. If you don't want it to happen, simple use white colored pencil for blending.
Font size:
Interval:
Bookmark:
Similar books «How to Draw Realistic Portraits with colored pencils»
Look at similar books to How to Draw Realistic Portraits with colored pencils. We have selected literature similar in name and meaning in the hope of providing readers with more options to find new, interesting, not yet read works.
Discussion, reviews of the book How to Draw Realistic Portraits with colored pencils and just readers' own opinions. Leave your comments, write what you think about the work, its meaning or the main characters. Specify what exactly you liked and what you didn't like, and why you think so.