ACKNOWLEDGEMENTS
My gratitude goes out to so many people, who like a strong, sticky strip of DT have kept me together through this book project:
Mom, Dad & Vfor loving, supporting, and encouraging my making stuff from day one.
CHfor handing me the duct tape seed.
JAfor saying yes, allowing me the opportunity, and trusting my creative ways.
KCfor being the DIY book cheerleader from day one, offering encouragement and brilliance and believing in me enough to figure it all out.
RHfor his mad design skillz that made this book look all that.
The RP fam. (esp. LC, JL, RH & FSPC)for the support that helped me avoid DTing myself to my desk.
E, A, M, D & Hfor the laughs and listening to DT daily-ish updates ... and still being my friends.
JB, GK, EAJ, KR, HV, KM, EJ, G & ELfor being such creative, inspirational individuals in my life.
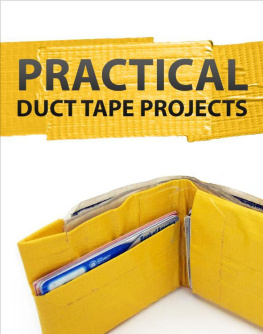
WALLETS
1.0
LIP-LOCK
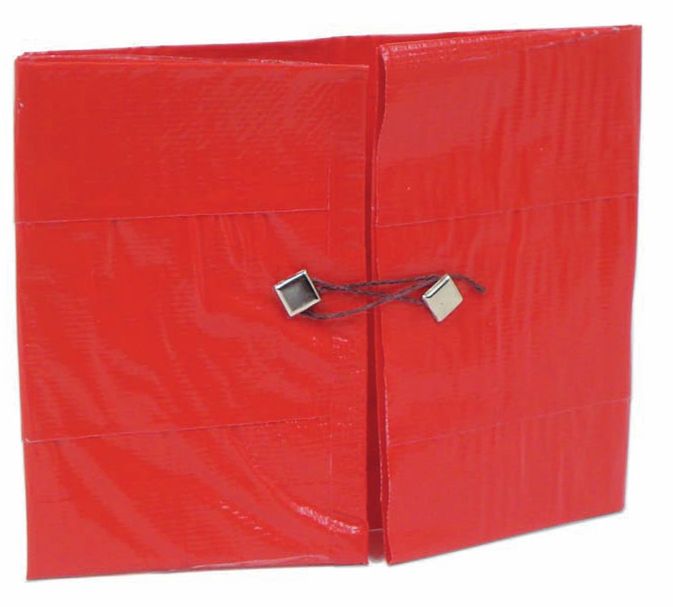
To David and Delilah, money talks loudly. They keep it mum within these Duct Tape walls, until they want to let it loose.
MATERIALS
DT (red)
Clear packing tape
Double-stick tape
Deco fastener
String
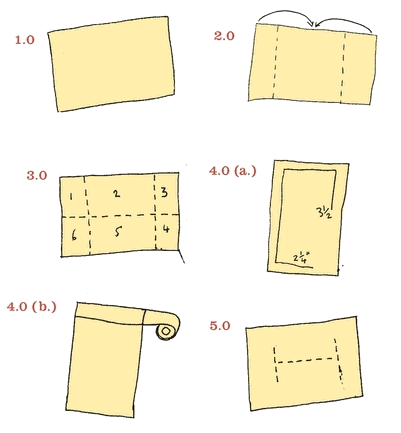
Create one 8 x 11 sheetthe long side on the bottom.
Fold the LFT and RT sides to the middle and crease their edges. Unfold.
Fold top to bottom, E2E, along the H-axis. Unfold. (You should see six panels. Think of them as #1-6, clockwise.)
Section 1 (ID holder):
a. ) Cut out one 2 x 3 window.
b. ) Cover the whole front and back with clear tape.
Section 2 (card holder):
With a 1 margin on each side, slice across the H-axis. At each end of that cut, make one 2 vertical cut.
Section 4 (closure):
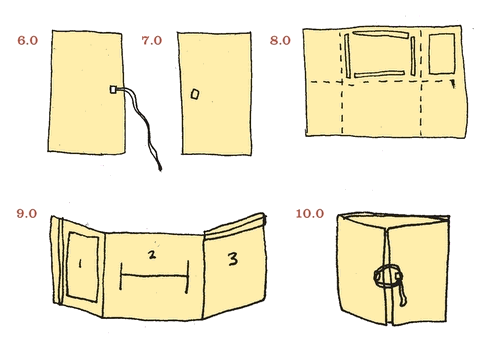
Attach deco fastener 1 from the RT vertical edge, in the middle. Knot one 6 strand of string to the fastener.
Section 6 (closure):
Attach deco fastener 1 from the LFT vertical edge, in the middle.
Turn the whole sheet over to the other side. Attach double-stick tape to the perimeter of section 2. Then fold the bottom edge of the whole sheet to the top edge. Apply pressure over section 2.
Flip over again, so youre viewing the wallet interior. Seal the following edges with thick DT strips: LFT vertical side of section 1 and across the top of section 3.
Fold in the LFT and RT flaps to the center and wrap the string around the opposite deco fastener to keep wallet closed.
1.1
WANNABE
Like Harvey, some wallets never learn to grow up. Some wallets just pretend. And some wallets survive like this in the real world just fine.
MATERIALS
DT (gray)
Clear packing tape
Gaffers tape (1 white)
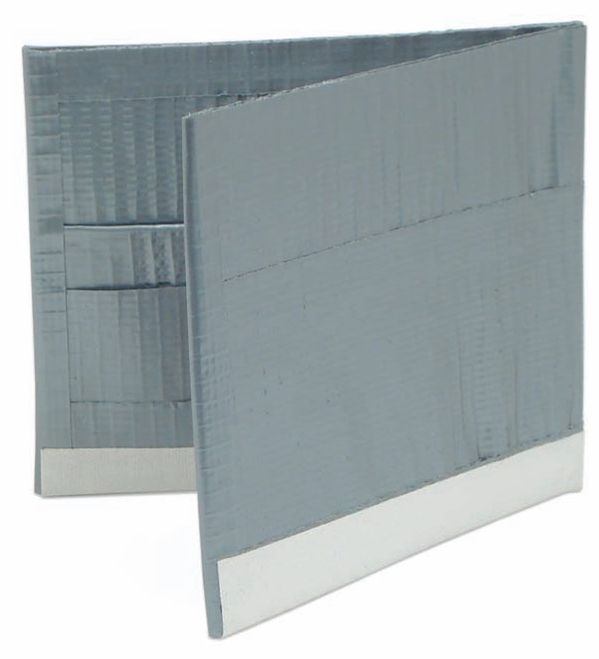
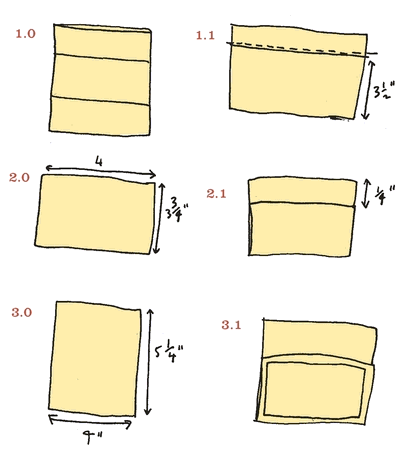
For wallet base: Create one 8 x 8 sheet.
Fold it approximately in half. (The fold should fall naturally along the crease of a strip of DT.) Trim excess, to create a 3 height.
For credit card pockets: create one 3 x 4 sheet.
Fold along the natural H-axis, which should result with about a margin at the top.
For plastic ID sleeve: create one 5 x 4 sheet with clear tape.
Fold along the natural H-axis, measuring against your ID. Keep a small margin on the top of the back sleeve.
To attach the credit-card pocket and ID sleeve to the wallet:
Cut:
a. ) One 1 x 4 DT strip
b. ) Two x 3 DT strips
c. ) One 3 x DT strip
d. ) One 8 Gaffers tape strip
With the wallet base fold on the bottom, place the credit card pockets on the LFT and ID sleeve on the RT, aligning both with the bottom.


