Sophie Simpson (What Delilah Did) - Stitch the halls!: 12 decorations to make for christmas
Here you can read online Sophie Simpson (What Delilah Did) - Stitch the halls!: 12 decorations to make for christmas full text of the book (entire story) in english for free. Download pdf and epub, get meaning, cover and reviews about this ebook. year: 2015, publisher: Pavilion Books, genre: Home and family. Description of the work, (preface) as well as reviews are available. Best literature library LitArk.com created for fans of good reading and offers a wide selection of genres:
Romance novel
Science fiction
Adventure
Detective
Science
History
Home and family
Prose
Art
Politics
Computer
Non-fiction
Religion
Business
Children
Humor
Choose a favorite category and find really read worthwhile books. Enjoy immersion in the world of imagination, feel the emotions of the characters or learn something new for yourself, make an fascinating discovery.
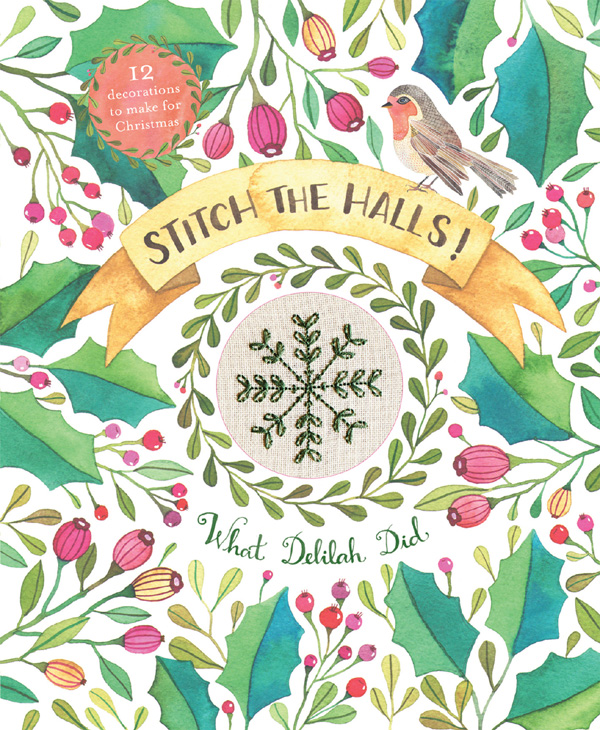
- Book:Stitch the halls!: 12 decorations to make for christmas
- Author:
- Publisher:Pavilion Books
- Genre:
- Year:2015
- Rating:4 / 5
- Favourites:Add to favourites
- Your mark:
Stitch the halls!: 12 decorations to make for christmas: summary, description and annotation
We offer to read an annotation, description, summary or preface (depends on what the author of the book "Stitch the halls!: 12 decorations to make for christmas" wrote himself). If you haven't found the necessary information about the book — write in the comments, we will try to find it.
Sophie Simpson (What Delilah Did): author's other books
Who wrote Stitch the halls!: 12 decorations to make for christmas? Find out the surname, the name of the author of the book and a list of all author's works by series.


Stitch the halls!: 12 decorations to make for christmas — read online for free the complete book (whole text) full work
Below is the text of the book, divided by pages. System saving the place of the last page read, allows you to conveniently read the book "Stitch the halls!: 12 decorations to make for christmas" online for free, without having to search again every time where you left off. Put a bookmark, and you can go to the page where you finished reading at any time.
Font size:
Interval:
Bookmark:
...to you all at this most wonderful time of year. I'll let you in on a little secret: Christmas is my happy place. At the first sign of cold weather, you will find me curled under a blanket with my Home Alone soundtrack on repeat, wishing for snow. Add in a slew of stitching projects to keep idle hands busy and you have the very definition of festive joy. With that in mind, I have designed a collection full of Christmas goodness to help you festoon your home and spread some seasonal delight. With a little time and love, you can create ornaments so unique and beautiful that they will become family heirlooms keepsakes to be treasured by future generations.
I am best known for my cross stitch designs, and you will find a fair few of those within these pages, but sometimes even I crave a little variety, so in this book I will also introduce you to counted thread work. This is not a million miles away from the straightforward little crosses you are used to in fact a number of the stitches are variations of traditional cross stitch so if you can do one, you will have no problem with the other.
I have grouped the projects into sections, each with a distinctive style, but they are designed to be mixed and matched ad infinitum. Choose thread and fabric colours to match your colour scheme and infuse your own personality into each and every stitch. Use scarlet thread for the Advent Tree Bag-lets, for example, and they will find a home in even the most traditional scheme, or stitch the Jumbo Christmas Sock-ing in a neon palette and it will delight the edgiest hipster in town.
My designs are meant as a blueprint to help you build up your own enviable collection of handmade Christmas decorations for posterity. Most of them, like the Perpetual Paper Chains for example, can be broken down into manageable stitching chunks add a little each year and before you know it you will have the best-dressed home in all the land. So without further ado I shall let you turn the page and hop to it. May your hand-stitched Christmas be supremely merry and bright!
Delilah
x
{FABRIC}
Counted Thread Fabric
Counted embroidery is most commonly worked on evenweave fabrics such as linen or cotton evenweave, or on blockweaves such as aida and waste canvas. Evenweaves and blockweaves are woven with the same number of threads in the warp and the weft, meaning that the holes between the woven threads form a grid of squares (like graph paper) that correspond to the pattern you are following.
Aida and waste canvas are woven in blocks that create very obvious squares to work on, making them perfect for beginners, whereas stitching over two threads at a time forms the squares on cotton evenweave or linen. Stitching on linen or evenweave takes a little more thought, but the finish is far nicer.
Evenweave fabrics come in different thread counts. The higher the count, the finer the fabric and the smaller your stitches will be. Evenweaves are counted by the number of individual threads per inch, whereas blockweaves are counted by the number of blocks per inch, so stitches worked on a 14-count aida will be the same size as those worked on a 28-count linen, because the linen is worked over two threads at a time. Each project specifies the type of fabric I have used, but feel free to substitute a different fabric of the same thread count if you prefer, so, for example, a 32-count evenweave could be substituted for a 16-count aida.
Felt
I have used felt for many of the small ornament projects in this book as its raw edges do not fray when cut, so it can be turned into small, fiddly shapes very easily. However since felt is not woven, you will need to use waste canvas to count your stitches onto it (see below).
IMPORTANT: I specify thick (1mm/ in+) 100% wool felt in the material lists because it must be strong enough to support the stitches and withstand the strain of removing waste canvas. If you use a wool-viscose mix or acrylic felt it will not hold your embroidery well and it is likely to shrink significantly and lose shape when the canvas is removed. It is easy to source 100% wool felt, especially online (see ).
Using waste canvas
Waste canvas can be used to work counted stitches on non-evenweave fabrics without a visible grid to stitch over. The stitch diagrams are shown being worked on waste canvas.
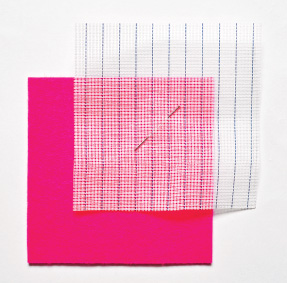
Cut the waste canvas to the same size as your felt and mark its centre with a pin (step 1).
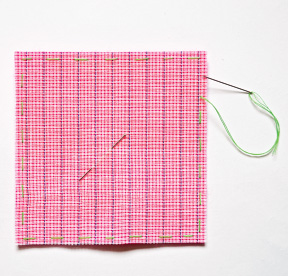
Tack the waste canvas in place on top of the felt all around the edge, using a length of waste thread and a loose running stitch (step 2).
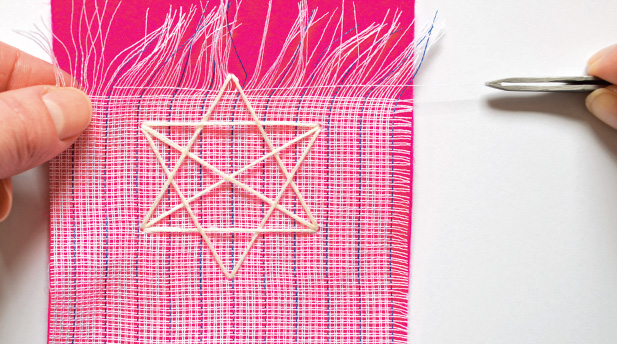
Work your embroidery stitches through both layers of fabric. When the design is finished, remove the tacking stitches and lightly spray the waste canvas with water to loosen the threads (over-wetting will soak the felt underneath and make the waste canvas difficult to remove; it is best to spray just a little to begin with, then re-spray as needed). While the waste canvas is damp, use tweezers or a small pair of pliers to pull out one thread at a time until it is all gone (step 3).
STEP 1
STEP 2
STEP 3
{THREAD}
The majority of the projects in this book use stranded cotton embroidery thread. Its six strands are loosely twisted together so that they can be easily separated for stitching with different thicknesses. Each charted pattern lists the number of strands you will need to use to create the same effect on the project fabric; feel free to increase or reduce the number of strands, or to substitute another thread if you prefer.
I have also used Kreinik metallic braid. It comes in different weights depending on what you are stitching and, unlike stranded cotton, you do not separate it but stitch with the whole thread at once. It is best to keep your thread lengths slightly shorter than usual when working with metallics to minimise fraying and knotting.
{NEEDLES}
Embroidery needles come in many different shapes and sizes, but generally have one thing in common: a large eye through which you can thread multiple strands at the same time. Working on evenweave and blockweave fabrics, you will need a blunt tapestry needle that will slide easily through the holes in the fabric without splitting the threads on either side. For working on waste canvas on top of another fabric, such as felt, you will need a sharp embroidery needle to pierce through the base fabric. Details of the best needle to use are given in the materials list for each project.
Next pageFont size:
Interval:
Bookmark:
Similar books «Stitch the halls!: 12 decorations to make for christmas»
Look at similar books to Stitch the halls!: 12 decorations to make for christmas. We have selected literature similar in name and meaning in the hope of providing readers with more options to find new, interesting, not yet read works.
Discussion, reviews of the book Stitch the halls!: 12 decorations to make for christmas and just readers' own opinions. Leave your comments, write what you think about the work, its meaning or the main characters. Specify what exactly you liked and what you didn't like, and why you think so.