iPhone 12 Pro User Guide
The Complete Illustrated, Practical Manual with Tips a to Maximizing the iPhone 12 Pro
By
Conor Albright
Table of Contents
Introduction
I ts been a wonderful year for Apple so far, starting with the release of the iPhone SE2 earlier this year to the iPhone 12 series. Apples iPhone 12 line is completely rebranded and entails four models which are; the iPhone 12 mini, the iPhone 12, the iPhone 12 Pro, and the iPhone 12 Pro Max, with the basic differences among these devices being the screen sizes and price points. Notwithstanding, Apple has made sure to include new video features, a recent MagSafe charging system, the new A14 processor, and the entire hype it can harness for 5G.
The mini variant and the max 12s variant are obviously different in terms of external appearance, however the mid-place 6.1 inch models, i.e. the iPhone 12 and 12pro, are significantly similar. Moreover, the iPhone 12 and the iPhone 12 Pro are provided with basic designs that are similar, and they are embedded with almost the same features, for instance they have similar OLED displays, exact processors, and they are both compatible with 5G network. However, the iPhone 12 Pro is provided with an edge by embedding an additional telephoto camera lens, a LIDAR sensor, a slightly higher RAM, a base storage that is double of the iPhone 12, as well as a shiny stainless steel frame.
With those additional features, it is definitely expected that the iPhone 12 Pro would have a higher cost price than the iPhone 12, and that is exactly how it is. The 12 Pro has a cost price of $999, this is $200 more than price of the base iPhone 12 which is priced at $799. Furthermore, the squared-off design also causes the iPhone 12 Pro to appear more substantial than it actually is. Even though it might not obviously appear such, the iPhone 12 Pro is thinner than a significant number of previous Apple devices
Chapter one
1.1 Set up Your iPhone 12 Pro.
A fter purchasing the iPhone pro, it is advisable that you charge the device by plugging it to a power source prior to diving into fully using it. After that, you can switch on the device by pressing the power button located on the side of the device. Now it is time to set up the device since it's a new device. When it comes to setting up the iPhone 12 Pro, it is essential that you understand your options, after powering the device, youll come across the following options and this is what they stand for;
Set up as new - this implies that youre starting everything , the entire setting, from scratch. This is aimed at people who are just using a smartphone or online services for the very first time.
-Restore from a previous iPhone, iPad, or iPod touch backup. This can be done online with iCloud or over USB with iTunes. This is meant for people who initially had an iOS device and are moving to a new one, in this case, an iPhone 12 Pro.
-
Import from Android, BlackBerry, or Windows Phone. Theres an application in Google Play that is developed by Apple to make moving data and files from an Android easier. However, online services enable you to transfer a large amount of data over from any old device.
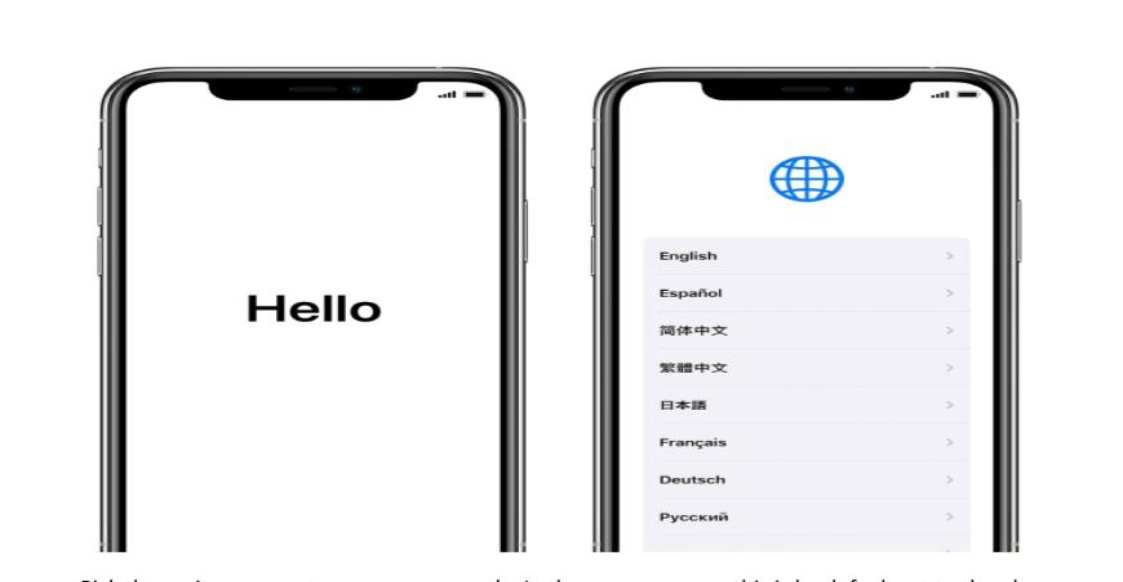
Irrespective of the option you select or the one that applies to you, everything goes through the same process. Touch slide to initiate the set up and, as it is stated on the screen, slide your finger across the screen to begin the process.
Select your preferred language option. If you purchased your iPhone 12 Pro in your native country, the appropriate language related will be automatically selected.
Pick the region or country you are in, presently. In the same manner, this is by default set to the place where you purchased the gadgets if you live in that region.
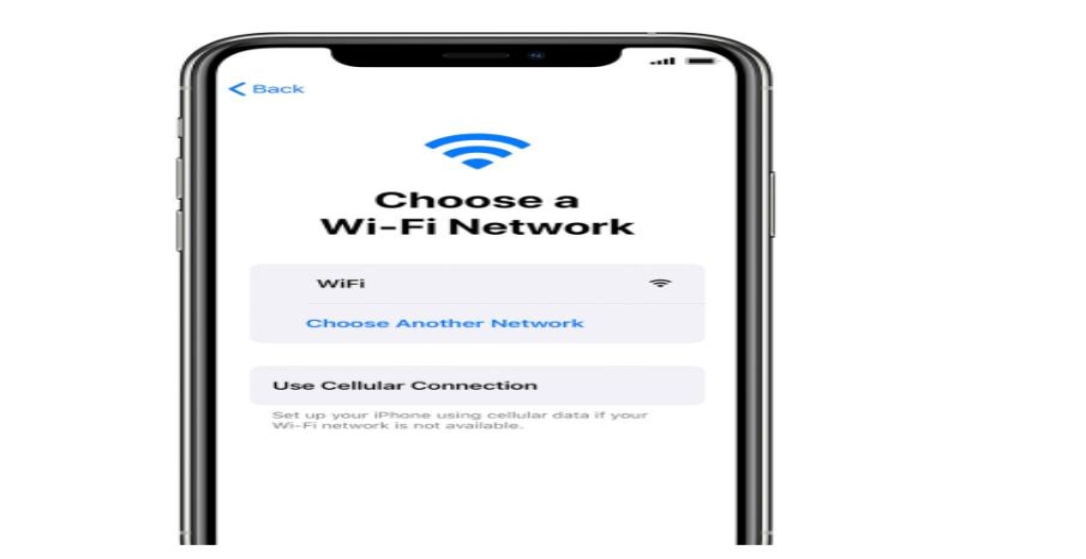
-Select a Wi-Fi network and input its password, if inquired. In instances whereby theres no Wi-Fi around, you can alternatively switch to utilize Cellular for an iPhone 12 Pro with data.
Hold on for a few seconds for your iPhone to activate. Afterwards, you can decide whether you want the Location Services to be enabled or not. You can always make adjustments to this option later, however, it is necessary that you enable at least some apps like Maps to use location services.
- Input up your Passcode, and set your touch ID.This part can be skipped at that moment by pressing Set Up Face ID Later.
1.2 Turn on iCloud Backup
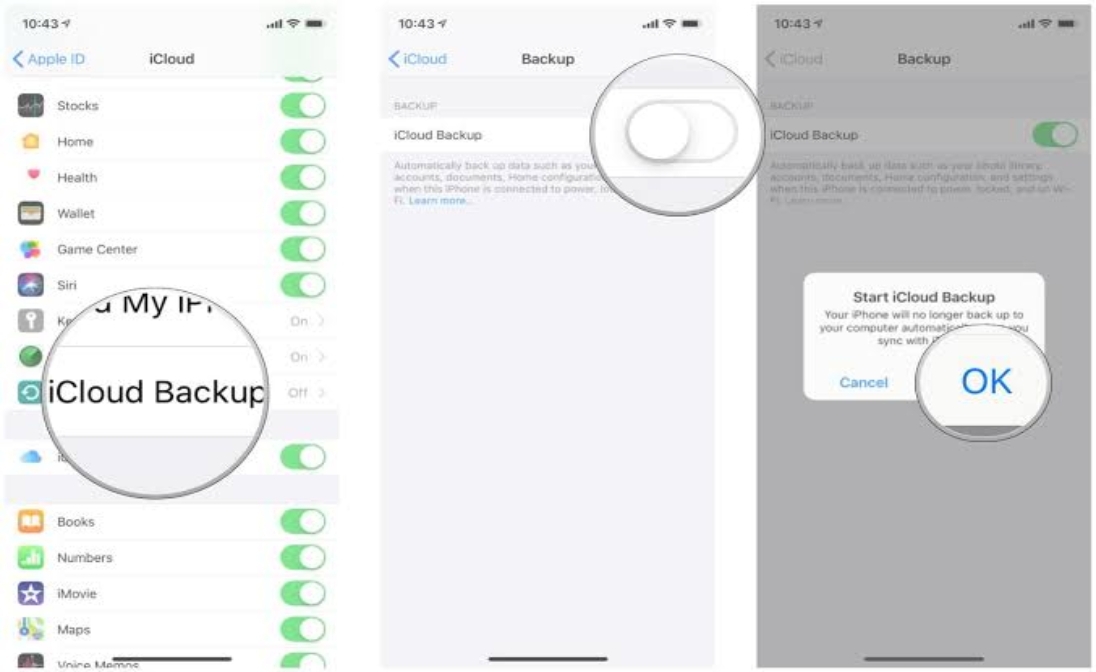
In the home screen, press the settings icon. Afterwards click on [your name] > iCloud > iCloud Backup. When you tap the iCloud toggle, it activates iCloud Backup. By implication, iCloud consistently backs up your iPhone 12 Pro regularly when the device is plugged to a power source, locked, and on Wi-Fi. If you tap that iCloud Back Up toggle again, it turns this feature off.
If you intend to carry out a manual backup, tap Back Up Now. Incase you want to take a look at your iCloud backups, go to Settings > [your name] > iCloud > Manage Storage > Backups. You can likewise delete a backup from the list , select that backup, and then press Delete Backup.
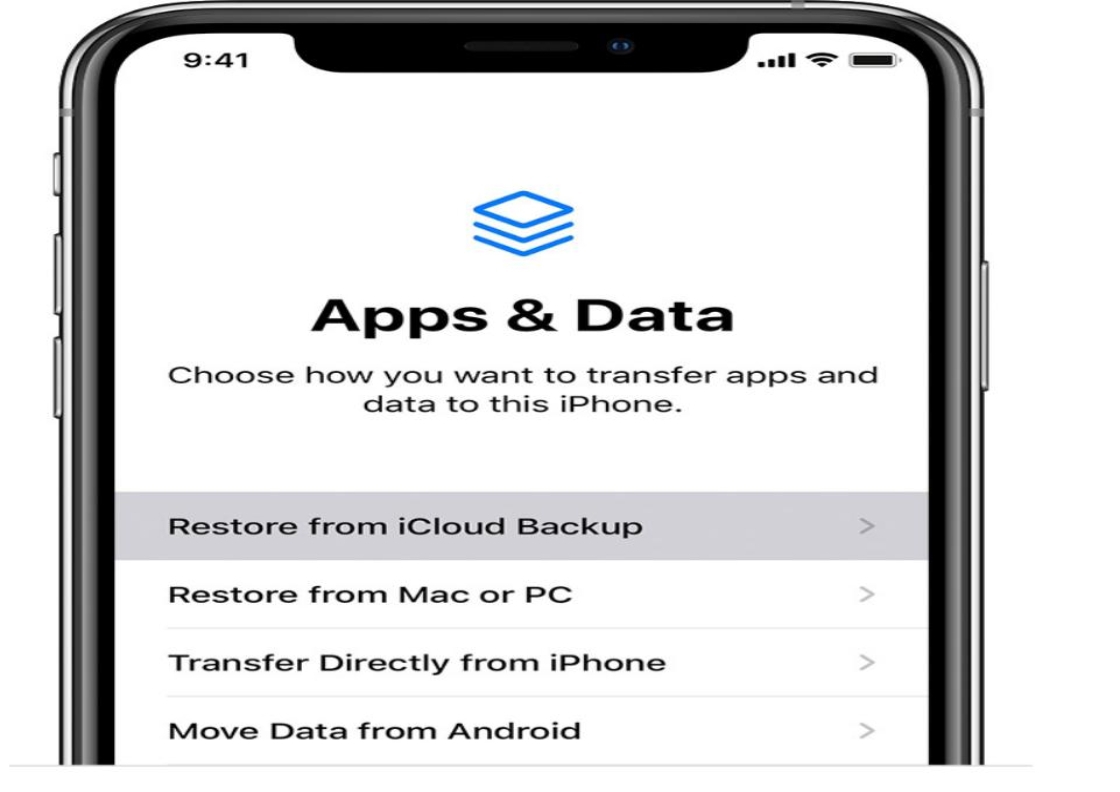
Incase you intend to restore the content you backed up on iCloud to your new device, that is very much feasible too. Although, this process ought to have been done when you are setting up your iPhone, if your iPhone has initially been set up, you need to wipe the entire content on it before you can utilize these steps to restore from your backup. Power the device, and a Hello screen will be displayed, adhere to the onscreen setup steps until you get to Apps & Data screen, then press Restore from iCloud Backup.
Then, sig n in to iCloud with your Apple ID and select a backup. Check the date and size of each and select the ones that are most relevant at that moment. When you are done selecting, begin the transfer.
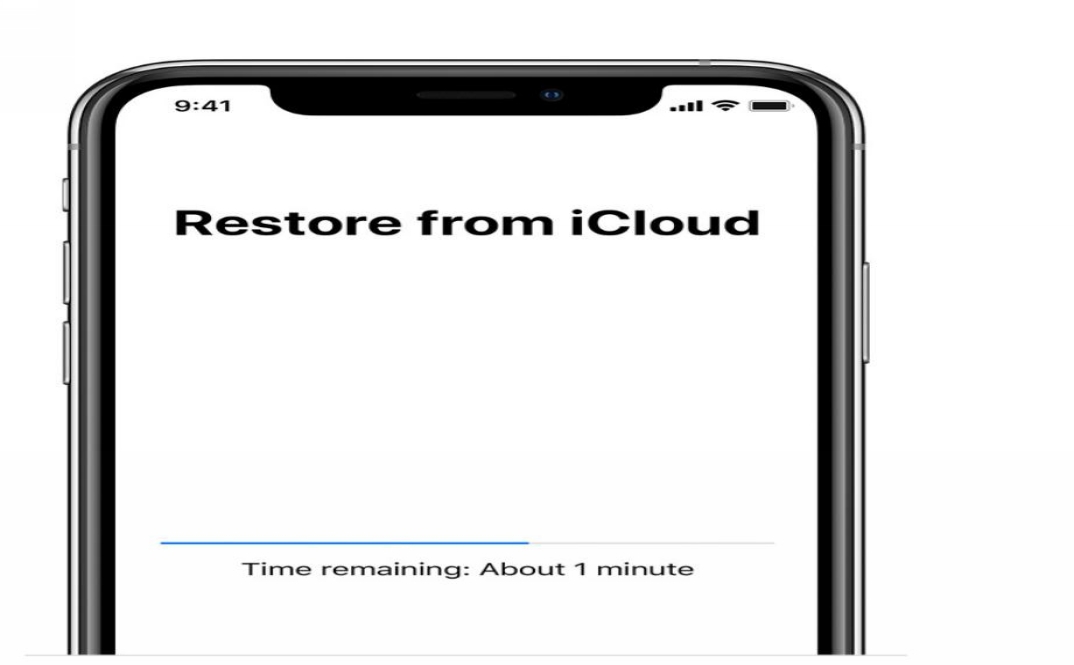
It is compulsory that you have an active internet connection as this is what will fuel the restore process in the first place. Ensure that you are always connected to the Wi-Fi or cellular data connection, then hang on for the progress bar to appear and be completed.
The progress bar might be completed within few minutes, or more than an hour contingent upon the size of the backup and the network speed. If, by any chance, you disconnect from Wi-Fi during the process, the progress will pause until you are actively connected to the internet again. When the progress bar completes, you can finish setup and start exploring your device. In addition, content like your apps, photos, music, and other information will keep on being restored in the background for the next couple of hours or days, contingent upon the amount of information you are restoring.
1.3 Set up your cellular plan with eSIM
An aspect of your cellular plans will utilize the nano-SIM, while the others will employ the eSIM. The eSIM is made available by T-Mobile or another carrier, it is embedded digitally on your iPhone. To enable this supplementary cellular plan, you can scan the QR code made available by the other carrier, this requires you to download a carrier app for activation, or fill in the information by yourself.

 -
-