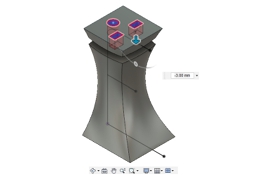
Electronic
enclosures
for 3d printing
Rodrigo S. A.
Steadman Thompson
Fusion 360 and Autocad are registered trademarks. This books is not affiliated with, sponsored or endorsed by Autocad, or in a manner that could reasonably be interpreted to suggest that this content has been authored or edited by them, or represents their views or opinions.
No part of this publication may be reproduced, stored in a retrieval system, or transmitted in any form or by any means, electronic, mechanical, photocopying, recording, scanning, or otherwise, without the prior written permission of the author.
Limit of Liability/Disclaimer of Warranty: This publication is designed to provide accurate and authoritative information in regard to the subject matter covered. It is sold with the understanding that neither the author nor the publisher is engaged in rendering legal, investment, accounting or other professional services. While the publisher and author have used their best efforts in preparing this book, they make no representations or warranties with respect to the accuracy or completeness of the contents of this book and specifically disclaim any implied warranties of merchantability or fitness for a particular purpose. No warranty may be created or extended by sales representatives or written sales materials. The advice and strategies contained herein may not be suitable for your situation. You should consult with a professional when appropriate. Neither the publisher nor the author shall be liable for any loss of profit or any other commercial damages, including but not limited to special, incidental, consequential, personal, or other damages.

Intro
No matter how good is your electronic project; without a nice looking enclosure, it will look awful, it wont generate the same level of interest and it could also be complicated to operate.
Of course you can use cardboard or even wood but there is one way and just one way of making things right: 3d modeling and 3d printing.
Unfortunately there are no shortcuts and you will have to learn several steps with incremental knowledge. This books was written for the electronic enthusiast in mind, so only required theory and tools will be considered and not the entire modeling universe, which covers entire careers.
We will start with basic Fusion 360 program operation, then we will directly start with a simple electronic front cover, then complete boxing, then snaps, nuts and even exciting forms and shapes including combination with other materials like glass or acrylic for a professional looking enclosure.
What requirements do you need? Not much. You can even sign up for a free Fusion 360 account and you can use a 3d printing service by mail, so there is nothing to purchase in advance.
Are you ready? Lets start with good looking enclosures for your own projects right away.
Rodrigo S. A.
Miami, Florida
Required software
There are many applications for 3d modeling, some of them open source and free like FreeCad. If you are en Open Source advocate, you are welcome to give them a try but believe me here: it will be way more complicated than using a good commercial tool that even has free versions available like Fusion 360.
Fusion 360 is a software made by Autocad. There is a free hobby version available but my advice is to get the commercial version that includes better features.
You can sign up using this referral link with up to $75 discount
Sign up and install the software. Once you have everything ready lets continue.
Basic enclosure front
Instead of explaining every software feature we will start right away making an enclosure front. Lets say you have an electronics project with Leds, buttons and knobs. Right now, every component is connected to a breadboard in the classic electronics awful way.
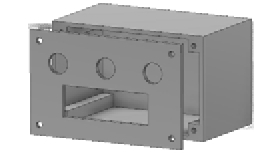
Using Fusion 360 we will design the enclosure front, where every component will fit to perfection.
The first step is to create a rectangle. It could also be an ellipse, circle, square or any crazy shape you want but it will be easier to make it a simple rectangle at this time. Next chapter will explain how to make a custom shape that will fit into an Altoids tin.
So, lets start with File, New Design or CTRL + N.
Next step is to Create a Sketch. What is a Sketch? Lets think about a sort of sheet where we are going to draw a 2D view of the enclosure. Since this project is just the enclosure front, it will be the frontal view. After we have the contour and the holes for Leds, buttons, etc we will just add 2mm depth and our part will be ready to print.
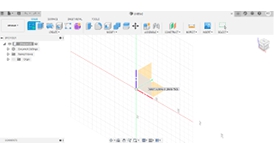
Go to Create Section, Sketch. Now we have to select in which plane to place that Sketch. It is not important at this point and we will just select Front from the upper right box and then left click to place the sketch there.
Now we are ready to create the enclosure front contour.
It is important to understand how to navigate the screen. You will need to zoom in, zoom out and move through the screen and those actions are performed with the mouse combined with some keyboard. Zoom in and Zoom out are done with mouse wheel. That was easy.
Now, lets say that some part of your design is out of the screen and you want to move it. Just press the mouse wheel down and move the mouse.
You can change this behavior and select your own key/mouse combinations.
Next step is creating the contour.
The simplest way to do this is to select the 2 point rectangle tool, click in the middle and then enter X size 40mm and Y size 70mm. You can also just move the mouse without selecting a specific measure but it is easier to change measures later if you specify numbers now.
Click on Finish Sketch. Now click on mouse wheel down + Shift keyboard key to generate a nice 3d perspective.
Then click E to Extrude, which is a function used to provide depth and also to cut and join parts as we will see later - Select the face and enter 2mm. Then click Ok on the Extrude sub window at the right.


