Best Raspberry PI Zero Project For Home Automation Part 1
Index Of Contents
Of all the things we do at Raspberry Pi, driving down the cost of computer hardware remains one of the most important. Even in the developed world, a programmable computer is a luxury item for a lot of people, and every extra dollar that we ask someone to spend decreases the chance that theyll choose to get involved.
The original Raspberry Pi Model B and its successors put a programmable computer within reach of anyone with $20-35 to spend. Since 2012, millions of people have used a Raspberry Pi to get their first experience of programming, but we still meet people for whom cost remains a barrier to entry. At the start of this year, we began work on an even cheaper Raspberry Pi to help these people take the plunge.

Today, Im pleased to be able to announce the immediate availability of Raspberry Pi Zero, made in Wales and priced at just $5 . Zero is a full-fledged member of the Raspberry Pi family, featuring:
- A Broadcom BCM2835 application processor
- 1GHz ARM11 core (40% faster than Raspberry Pi 1)
- 512MB of LPDDR2 SDRAM
- A micro-SD card slot
- A mini-HDMI socket for 1080p60 video output
- Micro-USB sockets for data and power
- An unpopulated 40-pin GPIO header
- Identical pinout to Model A+/B+/2B
- An unpopulated composite video header
- Our smallest ever form factor, at 65mm x 30mm x 5mm
Raspberry Pi Zero runs Raspbian and all your favourite applications, including Scratch, Minecraft and Sonic Pi. It is available today in the UK from our friends at The Pi Hut and Pimoroni , and in the US from Adafruit and in-store at your local branch of Micro Center . Weve built several tens of thousands of units so far, and are building more, but we expect demand to outstrip supply for the next little while.
One more thing: because the only thing better than a $5 computer is a free computer, we are giving away a free Raspberry Pi Zero on the front of each copy of the December issue of The MagPi, which arrives in UK stores today. Russell, Rob and the team have been killing themselves putting this together, and were very pleased with how its turned out. The issue is jam-packed with everything you need to know about Zero, including a heap of project ideas, and an interview with Mike Stimson, who designed the board.
Here Best Raspberry PI Zero For Home Automation Project
Pedal Pi Controller with Circuit Playground
You can find a video for this project on my YouTube channel here .
The Pedal Pi is an open source guitar pedal that uses a Raspberry Pi Zero running Raspbian Lite to run C scripts of digital effects to play around with. It's made by Electro-Smash, an open source hardware company out of the UK. They have some other open source guitar pedals as well, based on Arduino boards but this is their first step into the magical world of Raspberry Pi. They have their own packaged ISO of Raspbian Jessie Lite that includes their self-written effects scripts so that you can change effects via the terminal, since the Lite distro does not have a GUI (of course you can use a version of Raspbian w/ a GUI if that's more your style, but personally for this application I think sans-GUI is the way to go). The only thing that I eventually found to be a bit awkward with the pedal was the act of changing effects. As a guitarist, I'm used to switching things around with my feet so that I can keep playing or not have to awkwardly balance my guitar. Typing into the terminal to change effects was a bit cumbersome so I decided to make a controller to print strings in the terminal to control the Pedal Pi.

Choosing a Board
I've been leaning towards Adafruit m0 boards lately for their Circuit Python capability and the built-in USB HID feature without having to flash firmware. For this project I was also going for some aesthetics, namely some LEDs so I decided to go with the Circuit Playground Express, a circular board that features, well many things (it is a playground after all), but in this case I had my eye on the 10 NeoPixels available to animate. Of course going with the Circuit Playground I wasn't getting the same number of digital I/O that I would with a Metro m0, which I did consider, but I decided instead of loading all of the effects as an option to switch between I would just select my favorites.
Despite the Circuit Python capability with the m0 board though, I did write this in the Arduino IDE instead. I had some issues with printing strings within Circuit Python. It's entirely possible, and more than likely, that it was a mistake in syntax on my part since I am still fairly new to the Python family and syntax is the main aspect of coding that I struggle with. I have some projects in the pipeline that I do hope to use Circuit Python for, but at this time the Arduino IDE seemed to be the easier choice for me for this project.
Speaking of the code, it's available at my GitHub link down below. It can be easily modified for different HID device purposes since this is a very specific need. I go into a lot of detail on how the code is setup and working in the video for this project, which you can find a link for up top where this story started. If you're interested in a write-up detailing the code structure please let me know and I'd be happy to add it to this guide.
Hardware and Housing

I prototyped my code using aligator clips and a momentary push button that has a similar housing and form factor to a traditional latching switch used in guitar pedals to turn them on and off. This switch is great and eventually I want to revisit this project and use them for all of the buttons but at this time they're just a bit too pricey, approximately $6-$8/switch. Where I'm using eight switches that adds up fast. I ended up using a different type of momentary button that was a bit smaller but still had a similar form factor, only with a plastic top. I was able to get 10 in a pack for the same price as one of my dream switches so definitely more economical.
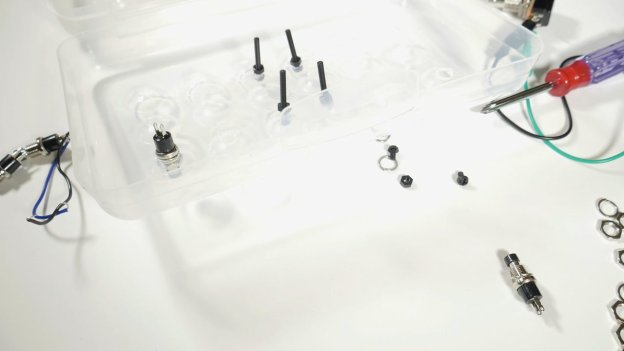
For a housing I basically knew going into this that this wouldn't be a final housing. Why? I think this project would benefit greatly from a 3D printed enclosure, which I currently don't have the ability to make. I have this idea for it to be a circle, with the Circuit Playground in the center with the NeoPixels facing up and then the eight switches arranged in a circle around the board; similar in form factor to the RotoVibe pedal made famous by Jimi Hendrix. But right now that isn't an option so instead I opted for a non-traditional housing; specifically a clear plastic pencil box that can be procured for $0.99 to $2 at your local discount store. A few reasons for this: 1. price of course; 2. clear plastic means that the NeoPixels will diffuse quite nicely; 3. It can be easily opened to access the components; and 4. It's easy to mod.
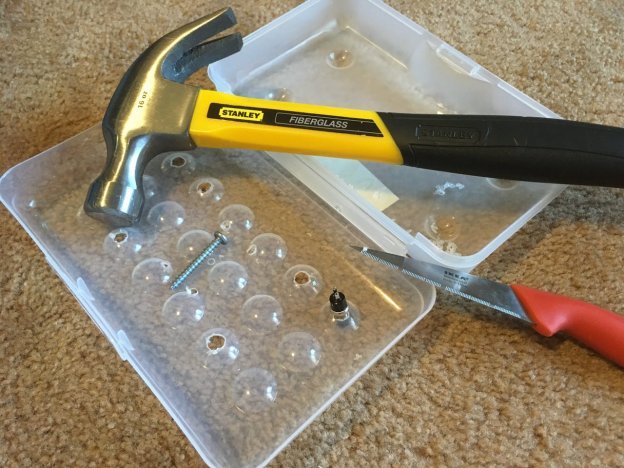
I created the holes in the top of the pencil case in a non-traditional way. When I use a drill in my projects, I'm actually borrowing it from someone else (aka my dad) and he was using his drill while I was working on this project so I had to get creative. I used a sharp and heavy screw to center each hole and then tapped the screw with a hammer to make a dent where I wanted the hole to go. Next, to create the actual hole, I grabbed one of my no longer used for food prep Ikea knives and slowly turned the knife to drill out a hole. It actually worked really well and I had really nice control over the size of the holes, even for the smaller holes to hold the mounting screws for the Circuit Playground board.


