Pen and Pencil Wildlife Sketching presents a simple, step-by-step approach to learning how to draw living things. These are the steps essential for nature sketching:
In other words, try to look at what you want to draw in terms of geometric shapesboxes, spheres, cylinders, cones. Then take a few seconds to lightly sketch the structure of your subject in terms of these geometric shapes before you start to develop the form. It makes the process of arriving at a good working composition much easier.
This book has taken you through a wealth of subjects. Let it serve as a point of departure for youas a collection of examples that serve to illustrate an approach, rather than a cookbook of how-to recipes. Take the suggestions I make here and extend them: try them with other subject matter and add to them from your own experience. This is the way your drawing skills will grow and develop.
Bibliography
Technique
Guptill, Arthur L. Rendering in Pen and Ink. Edited by Susan E. Meyer. New York: Watson-Guptill, 1976.
Hamm, Jack. How to Draw Animals. New York: Putnam Perigee Books, 1982.
Lohan, Frank. Pen and Ink Techniques. Chicago: Contemporary Books, 1978.
. Pen and Ink Themes. Chicago: Contemporary Books, 1981.
. Pen and Ink Sketching Step by Step. Chicago: Contemporary Books, 1983.
Pitz, Henry C. How to Draw Trees. New York: Watson-Guptill, 1972.
Sloan, Eric. An Age of Barns. New York: Funk and Wagnalls, 1967. NOTE: Eric Sloan has written and illustrated a number of books on Americana. His pen sketches in any of them are worth studying.
Subject
Brockman, C. Frank and Merrilees, Rebecca. Trees of North America. New York: Golden Press, 1968.
Cole, Rex Vicat. The Artistic Anatomy of Trees. New York: Dover, 1965.
Lund Harry C. Wild Flowers of Sleeping Bear. Traverse City, Mich.: Harry C. Lund, 1978.
Mathews, F. Schuyler. Field Book of American Wildflowers. New York: Putnam, 1927.
Norling, Ernest. Perspective Drawing. Tustin, Calif.: Walter Foster Art Books.
Pearson, T. Gilbert, et al. Birds of North America. New York: Garden City Press, 1942.
Pond, Barbara and Norman, Edward and Marcia. A Sampler of Wayside Herbs. New York: Greenwich House, 1974.
Robbins, Chandler S., Bruun, Bertel, Zim, Herbert S., Singer, Arthur. Birds of North America. New York: Golden Press, 1983.
Sutton, Ann and Myron. The Audubon Society Nature Guides Eastern Forests. New York: Knopf, 1985.
Tools and Materials
Pencil Drawing
Pen Drawing
Paper
Pencil Drawing
The tools needed for pencil. drawing are inexpensive and readily available in any art supply store. Pencils, two kinds of erasers, an erasing shield, paper towel, and fixative to eliminate smudging are all you need for many hours of drawing.
Pencils
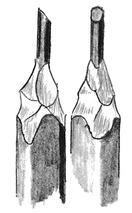
There are dozens of kinds of pencils available for sketching. The pencil illustrations in this book were done using only graphite pencils in hardness grades 2H, HB, 3B, and 6B (). The H series is hard, while the B series is soft. The larger the H number, the harder the lead is. The larger the B number, the softer the lead is. Using a 6H pencil can be like drawing with a nailit makes a light line and usually leaves an indentation in the paper.
I do not recommend the common No. 2 writing pencil as there is no telling just how hard or soft any brand might be. It is best to buy four drawing pencils, all from the same brand, in the 2H, HB, 3B, and 6B grades. This will give you a completely adequate tonal range for the subjects treated in this book.
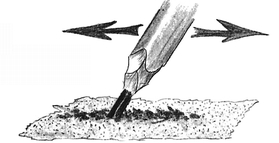
Sharpen your pencils with a pen knife or single-edge razor blade or a utility knife. Leave about one-quarter inch of lead beyond the wood (fig.1-3). Then, using a small piece of sandpaper (), put a slanted, flat surface on the lead. This gives you a broad, flat surface so that you can cover larger areas with a uniform tone, and also gives you a very sharp edge at the tip for putting details in place. I glue a small piece of sandpaper in the cover of a small box, and also glue a piece of paper towel there. This keeps the graphite dust in the box and off my drawing, and gives me a towel to wipe the lead on each time I sharpen it.
Erasers
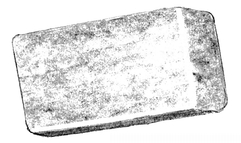
I recommend two different erasers: one is a soft, pink or white pencil eraser (). The eraser on the back of a common writing pencil is much too abrasive for use in sketching; it destroys the paper surface.
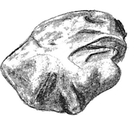
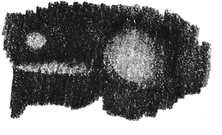
Im sure you are familiar with the pink or white pencil eraser, but you may not have seen a kneaded eraser before. It comes in a small rectangular package. Tear about one third of the eraser offit is like dry chewing gum and tears easily. You can squeeze it together with your fingers, twist it, fold it; press it together again and it becomes one piece. You can pinch it to a sharp edge and press that edge on a dark area of your sketch, or press a larger part of it on your drawing. You will get results like those illustrated in . It is great for slightly lightening a dark area. As you use it, keep kneading the dirty part inside and it will last a surprisingly long time.
Using sandpaper to properly point up the pencil.
Properly sharpened pencils.
Pressing kneaded eraser on drawing produces lightened areas.
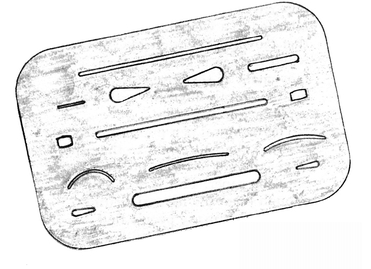
Using eraser shield and pencil eraser makes sharp lines.
Erasing Shield
An erasing shield is a very handy drafting tool (.
Paper Towel
I use a folded paper towel like a paint brush to dust the eraser residue from my drawing.
Fixative
I use clear spray enamel to fix or protect my finished drawings after I have cleaned up any smudges. Three or four light coats leaves an invisible, clean surface that greatly reduces smudging from handling or storage.

