Contents
Guide
Copyright 2020 by Penny Haren and Landauer Publishing
(www.landauerpub.com), an imprint of
Fox Chapel Publishing Company, Inc.,
903 Square Street, Mount Joy, PA 17552.
Shutterstock credits for front cover: Iryna Kalamurza (bottom far left); MaxCab (center, bottom middle left); melnikof (bottom middle right); SunCity (bottom far right)
Print ISBN: 978-1-947163-53-9
eISBN: 978-1-607658-57-3
First printing
Contents

Introduction
Whether your sewing room is large or small, if you take the time to organize both your space and your supplies, youll have a much easier time when youre ready to sew.
So lets get that sewing room organized! Regardless of your skill level, these quilting tips and tricks will make your quilting faster, easier, and better!
Im sharing some of my tried and true quilting tips and tricks in this handy pocket guide. From keeping your supplies clean to making design boards and so much more!
Ill help you find ways to organize your sewing room to keep everything ready for your next quilt project. You will love these thread, tool, and fabric storage ideas as well as design organization and displays.

Author of:
Penny Haren's Pieced Appliqu Blocks Made Easy
Penny Haren's Pieced Appliqu More Blocks & Projects
Penny Haren's Pieced Appliqu Weekend Projects
Penny Haren's Pieced Appliqu Blocks Made Easy
Quilt Block Fusion
Log Cabin Quilts
Organizing Your Space

Hanging Projects
Many of us have a closet in our sewing room. Hang your projects on the rod in vinyl mesh bags with S hooks. These bags come in a variety of sizeslarge enough to hold a book and everything you need to make the project. You can literally hang over 100 projects verticallyeasy to see and easy to find!
Folding Tables
If you use folding tables in your sewing room, consider two 4' (1.22m) tables instead of an 8' (2.44m) table. The shorter length makes it more stable and less likely to vibrate when sewing.
Cutting Tables
Design your cutting table so that it is the appropriate height for you. Kitchen counter height is ideal for someone who is of average heightapproximately 5' 4" (1.63m) for women. Adjust accordingly.

Stash
Organize your stash by type rather than color. Then when you are ready to make a scrappy project, simply pull out the bin of country fabrics, batiks, brights, backgrounds, Asian prints, pastels, etc. and start cutting. Everything in the bin will go together!
Background Fabric
If you are uncomfortable choosing fabrics for scrap quilts, use the same background fabric for the entire quilt. It gives your eyes a place to rest and gives a more controlled look.
Distributing Colors Evenly
When making scrap quilts over a period of timeand in my case, sometimes yearswait to put the blocks together so that the colors will be distributed evenly throughout the quilt. The shades of popular colors change from year to year. (Moss green is popular one year, evergreen the next.)
Sewing Machine

Buy from a Local Dealer
When buying a sewing machine, buy it from a reputable local dealer who also services machines. Then when you have a question or want to learn how to use all of those bells and whistles, the support is there.
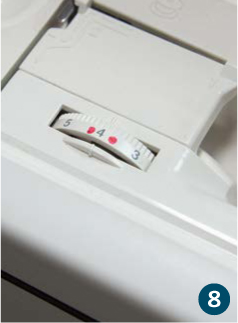
Marking Your Machine
You own your sewing machine so you can deface it! When I have my machine serviced and the stitch is perfect, I mark the tension guides as the default. Have a favorite width for machine appliqu? Mark it with a permanent marker in an inconspicuous place.

Threading
Having trouble threading a machine needle? Switch to a jean needle. It has a larger eye to accommodate heavier weight jean thread and has a sharp point so it works well for traditional piecing.
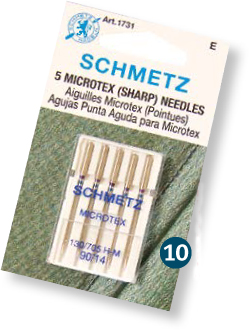
Microtex Needles
When topstitching, machine appliquing, or embroidering, use a Microtex needle. These needles have a very sharp, fine point. When sewing fusibles, use a non-stick needle. They come in different sizes and wont gunk up while sewing.
Sewing with Kids
When sewing with children, set up the sewing machine so it works for their size. Use a childrens table or raise the foot pedal by placing it on a box or crate.
Rotary Cutting Mats

Match the Lines
Place a ruler on the gridded side of your cutting mat. If the marks on the ruler line up with the lines on the cutting mat, it is okay to use cutting mat markings as guides when rotary cutting.
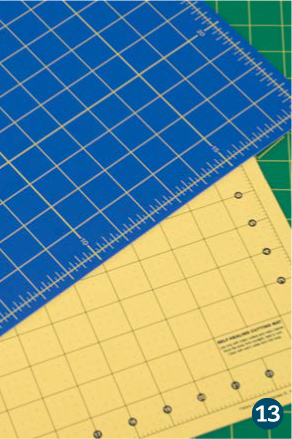
Grid Lines
If using the grid lines on your rotary cutting mat, utilize the horizontal AND vertical lines. Cut strips to the appropriate width by using the vertical lines on the mat, then cut squares or rectangles by sub-cutting using the horizontal lines.
Multiple Cuts
If you are making multiple cuts of the same fabric and using the grids on the rotary cutting mat, mark the top and bottom of the cutting lines with a water soluble marker. For instance, if you are cutting 3" (8.89cm) strips, mark the 3" (8.89cm), 7" (17.78cm), 10" (26.67cm), and 14" (35.56cm) grid lines. When done, simply wash away the markings with a damp cloth.
Place your Mat on a Corner
If you place your cutting mat on the corner of your cutting table. Then you can rotate your body instead of the block to cut all sides of a block when trimming.
Consider the Cutting Area
Consider the area where you rotary cut before buying a mat. Many of us would love a 24" x 36" (60.96 x 91.44cm) matbut if you cut on a kitchen counter that is a standard 21" (53.34cm) depth, the mat wont fit! And, if you have a petite stature, you may not be able to apply pressure the entire height of the board. An 18" x 24" (45.72 x 60.96cm) mat may be a better option.

