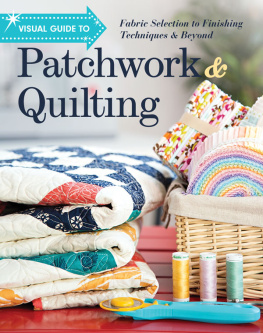
C - Visual Guide to Patchwork & Quilting: Fabric Selection to Finishing Techniques & Beyond
Here you can read online C - Visual Guide to Patchwork & Quilting: Fabric Selection to Finishing Techniques & Beyond full text of the book (entire story) in english for free. Download pdf and epub, get meaning, cover and reviews about this ebook. year: 2017, publisher: C&T Publishing, genre: Home and family. Description of the work, (preface) as well as reviews are available. Best literature library LitArk.com created for fans of good reading and offers a wide selection of genres:
Romance novel
Science fiction
Adventure
Detective
Science
History
Home and family
Prose
Art
Politics
Computer
Non-fiction
Religion
Business
Children
Humor
Choose a favorite category and find really read worthwhile books. Enjoy immersion in the world of imagination, feel the emotions of the characters or learn something new for yourself, make an fascinating discovery.

- Book:Visual Guide to Patchwork & Quilting: Fabric Selection to Finishing Techniques & Beyond
- Author:
- Publisher:C&T Publishing
- Genre:
- Year:2017
- Rating:3 / 5
- Favourites:Add to favourites
- Your mark:
Visual Guide to Patchwork & Quilting: Fabric Selection to Finishing Techniques & Beyond: summary, description and annotation
We offer to read an annotation, description, summary or preface (depends on what the author of the book "Visual Guide to Patchwork & Quilting: Fabric Selection to Finishing Techniques & Beyond" wrote himself). If you haven't found the necessary information about the book — write in the comments, we will try to find it.
C: author's other books
Who wrote Visual Guide to Patchwork & Quilting: Fabric Selection to Finishing Techniques & Beyond? Find out the surname, the name of the author of the book and a list of all author's works by series.


Visual Guide to Patchwork & Quilting: Fabric Selection to Finishing Techniques & Beyond — read online for free the complete book (whole text) full work
Below is the text of the book, divided by pages. System saving the place of the last page read, allows you to conveniently read the book "Visual Guide to Patchwork & Quilting: Fabric Selection to Finishing Techniques & Beyond" online for free, without having to search again every time where you left off. Put a bookmark, and you can go to the page where you finished reading at any time.
Font size:
Interval:
Bookmark:
PUBLISHER
Amy Marson
CREATIVE DIRECTOR
Gailen Runge
PROJECT EDITOR
Alice Mace Nakanishi
COMPILER
Lindsay Conner
DEVELOPMENTAL EDITORS
Liz Aneloski, Cynthia Bix, Joanna Burgarino, Stacy Chamness, Phyllis Elving, S. Michele Fry, Carrie Hargrave, Lynn Koolish, Karla Menaugh, Kandy Petersen, Debbie Rodgers, Deb Rowden, Lisa Ruble, and Katie Van Amburg
TECHNICAL EDITORS
Carolyn Aune, Mary E. Flynn, Helen Frost, Ann Haley, Cynthia Hilton, Joyce Lytle, Sara Kate MacFarland, Susan Nelsen, Ellen Pahl, Sandy Peterson, Nan Powell, Debbie Rodgers, Gailen Runge, Amanda Siegfried, Alison M. Schmidt, Teresa Stroin, Julie Waldman, Sadhana Wray, and Nanette S. Zeller
COVER/BOOK DESIGNER
April Mostek
PRODUCTION COORDINATORS
Zinnia Heinzmann and Tim Manibusan
PRODUCTION EDITOR
Jennifer Warren
INDEXER
Amron Gravett, Wild Clover Book Services
ILLUSTRATORS
Freesia Pearson Blizard, Jeff Carrillo, Lon Eric Craven, Jenny Davis, Mary E. Flynn, Valyrie Friedman, Jessica Jenkins, Alan McCorkle, Judith Baker Montano, Kirstie L. Pettersen, Jay Richards, Gretchen Schwarzenbach, Aliza Shalit, Rose Sheifer, Richard Sheppard, Tim Manibusan, and Gregg Valley
PHOTOGRAPHY BY Nissa Brehmer, Christina Carty-Francis, Luke Mulks, and Diane Pedersen, as well as John Bagley, Sharon Risedorph, and Richard Tauber, unless otherwise noted
COVER PHOTOGRAPHY BY
Lucy Glover of C&T Publishing, Inc.
Published by Stash Books, an imprint of C&T Publishing, Inc., P.O. Box 1456, Lafayette, CA 94549
Chapter 1: Quilting Supplies and Tools
These are the basics you need to know to get started, from setting up a simple sewing area to collecting the basic tools. This is the very first step in your quiltmaking adventure.
Setting Up a Sewing Area
BY HARRIET HARGRAVE AND CARRIE HARGRAVE
It may be daunting to think about all the equipment needed to start quilting if you are just beginning. If you already have a sewing room great! You are ready to jump in and begin. However, while having a dedicated sewing space is nice, be assured that it is not really necessary for making a quilt.
SEWING MACHINE AREA
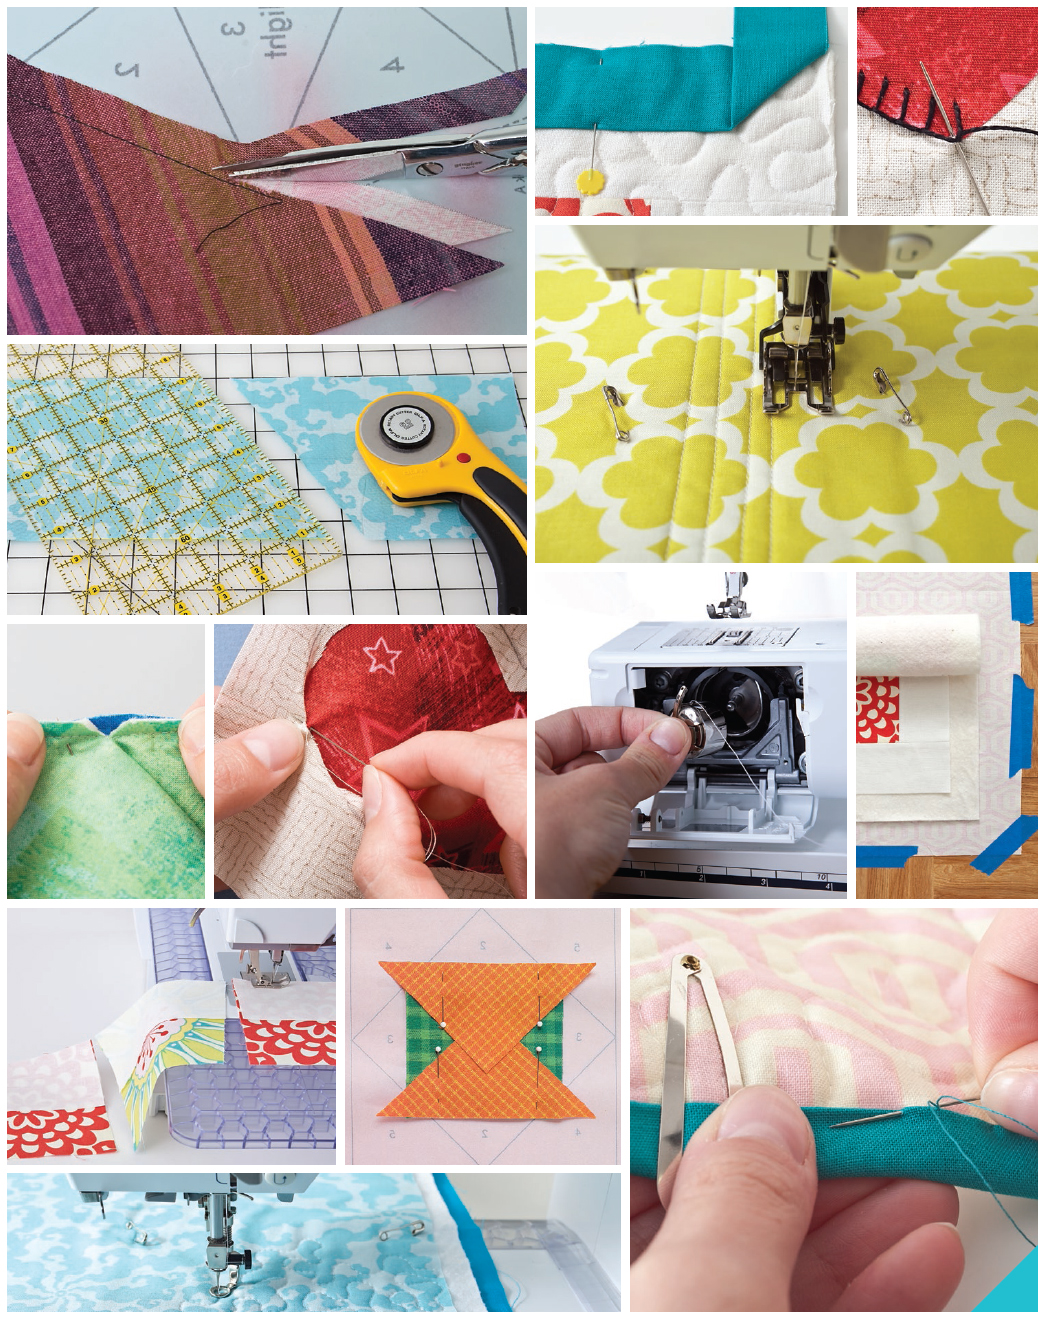
Piecing does not require an extensive work area like machine quilting does. The rough minimum sewing space you need for making a quilt top is about 3 feet by 4 feet, mostly to your left and behind your sewing machine. If your machine is on a tabletop instead of in a cabinet, you will need a good support system around the machine. If you are sewing on a dining room or kitchen table, the photo shows a great setup for a sewing machine. It is easily taken apart and put away when the space is needed for other things.
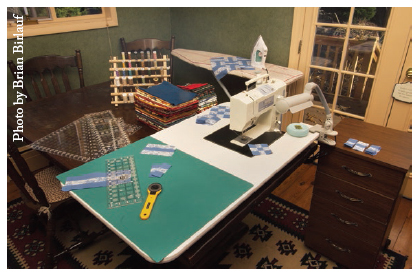
Setup of a basic sewing area
IRONING AREA
Your ironing board is a major workstation when you are piecing. Be sure that it is heavy, stable, and not warped. If yours has any of these issues, shop for a new one.
When ironing (even clothing), be aware that too much padding can lead to distortion. When you are piecing a quilt, inaccurate pressing of the pieces can ruin your project. A thin layer of 100% cotton batting (not more than thick) makes an ideal ironing pad under the ironing board cover. A gridded ironing board cover is helpful. If the cover is stretched onto the board tight and straight, the lines of the grid can be used as guides to keep strips straight when pressing.
It can be difficult to handle larger pieces on an ironing board because of its shape. Its helpful to turn the ironing board around so you are working on the wider end.

Avoid using a Teflon ironing board cover. The slippery surface makes it hard for the fabric pieces to get a grip and create resistance for the iron. Also, the fabric does not dry after you have steamed or starched it. Cotton is preferable because cotton sticks to cotton and absorbs moisture, and a cotton ironing board cover will keep the pieces from sliding when you are ironing seams. It also allows the pieces to dry quickly between steaming and starching.
CUTTING AREA
Kitchen or laundry room counters, or even the top of the clothes dryer, are good places to set up a makeshift cutting area. Just make sure its not too far from your sewing and ironing area.
Find a place thats at a comfortable height. If you are over 5 feet tall, about 36 is the best height. If you are under 5 feet tall, 32 or less will work for you. The main idea is that you do not want to lean over too much (ideally not at all) in order to be comfortable and to have the strength and power to cut the fabric cleanly and accurately.
Sewing Machines
BY HARRIET HARGRAVE AND CARRIE HARGRAVE
Of course, if you are going to learn to machine piece, you need a sewing machine. Todays sewing machine companies put a great deal of effort into making machines (even midline machines) that do every-thing, from straight stitch to digitized embroidery. The real story is that to excel at machine piecing, appliqu, and quilting, you need only a very basic machine. Few stitches beyond straight stitches are required, but there are some basic things you should consider when choosing a machine.
CHOOSING A SEWING MACHINE
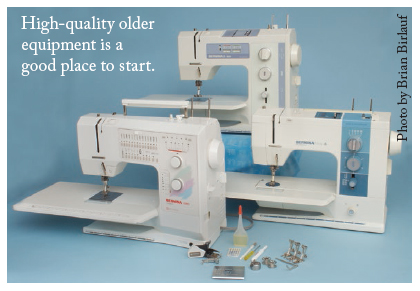
We strongly advise you to avoid buying a cheap sewing machine at a big box store. It is best to choose a quality machine that not only gives you the features you need to start out but also allows you to grow into other techniques.
An excellent way to get a high-quality machine at an affordable price is to look for a good used machine. The used machines of today were the top-end machines of a few years ago. A reliable sewing machine dealer generally has trade-in machines that are worth looking at. Try to test drive as many models and brands as you can, and make sure you actually sew on the machine you like best before you buy it. Many newer computerized machines are difficult for new sewers to understand, and you will be frustrated because the machine is in control instead of you!
If you dont want to invest in a machine, borrowing one from a family member or a friend is a good way to get started. If you already have a machine (or you borrow one), take it to a qualified mechanic and have it cleaned, oiled, and adjusted.
When you choose a machine, make sure that it is easy to regulate and understand. As you test it, note the sound of the machine, the placement of your foot on the foot control, the way the fabric feeds through the machine while you are sewing, the brightness of the machine light, and the machines functions and accessories. Following are some functions and accessories that we recommend:
Fully adjustable stitch width and length capabilities. Many machines have stitch length and width settings in predefined increments. This can hinder the ability to adjust the machine to any setting you need or want. A dial that has infinite settings between the numbers is ideal.
A bobbin with a case that inserts from the front of the machine instead of dropping in from the top. These bobbin cases are more easily adjustable than the top, drop-in models. Placement of a seam guide can be a problem with a drop-in system. Also consider bobbin size: the more thread it holds, the better.
Next pageFont size:
Interval:
Bookmark:
Similar books «Visual Guide to Patchwork & Quilting: Fabric Selection to Finishing Techniques & Beyond»
Look at similar books to Visual Guide to Patchwork & Quilting: Fabric Selection to Finishing Techniques & Beyond. We have selected literature similar in name and meaning in the hope of providing readers with more options to find new, interesting, not yet read works.
Discussion, reviews of the book Visual Guide to Patchwork & Quilting: Fabric Selection to Finishing Techniques & Beyond and just readers' own opinions. Leave your comments, write what you think about the work, its meaning or the main characters. Specify what exactly you liked and what you didn't like, and why you think so.