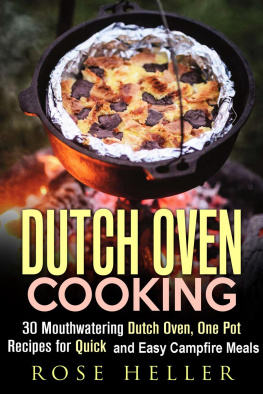
Dutch Oven Cooking
30 Mouthwatering Dutch Oven, One Pot Recipes for Quick and Easy Campfire Meals
Copyright Notice
Reproduction, duplication, transmission of this document in part or in whole is permitted only with written permission from the publisher. All rights reserved.
Respective brands and trademarks mentioned in this book belong to their respective owners.
Disclaimer
This document is geared towards providing summarization of information related to the topic. While all attempts have been made to verify the accuracy of the information, the author does not assume any responsibility for errors, omissions, or interpretations of the content. The information is offered for informational or entertainment purposes only. If professional advice is necessary, a qualified legal, medical, financial or another respective professional should be consulted. The reader is responsible for his or her own actions. The publisher does not accept any responsibility or liability arising from damages or losses, real or perceived, direct or indirect, resulting from the use of this information.
Table of Contents
Introduction
O ne of the hardest parts of camping is planning meals. Most people get burnt out because they think that they have to eat the same kind of foods every time they go camping. They tend to stick to foil dinners or foods that you can roast over an open campfire. If you are one of these people, dutch ovens are here to change the way you think about cooking on your next campout.
Made from either cast iron or enameled cast iron dutch ovens are ideal for perfect campouts. Quality dutch ovens are very durable; making them ideal for cooking in the outdoors. No more worrying about ruining your good pans. If you opt for a plain cast iron one rather than an enameled cast iron one, they can literally last you a lifetime.
Dutch ovens are made to withstand extremely high temperatures; the cast iron absorbs the heat from the fire or coals to cook the food inside. How you place the coals will depend on the recipe you are following, some recipes call for coals to be placed directly on the lid, as well as underneath the oven, while others simply require you to place the oven on a bed of hot coals or over open flames.
There are hundreds of recipes out there that you can use to create some of the most mouthwatering meals. We have included several to help get you started for your next campout.
Bonus: Your FREE Gift

As a token of our appreciation, please take advantage of the FREE Gift - a lifetime VIP Membership at our book club.

or open it in your browser: http://bit.ly/vipbooks
As a VIP member, you will get an instant FREE access to exclusive new releases and bestselling books.
Learn more

Chapter One: Secrets to Successful Dutch Oven Cooking
I n this chapter, you will learn:
- How to buy a dutch oven
- How to properly use a dutch oven
Purchasing Your Dutch Oven
D utch ovens are one of those must-have cooking items, so much so that if you dont already have it, you should head out and buy one. However, you dont want to buy just any dutch oven, you want to buy one that is going to last a lifetime. Dutch ovens are by no means cheap cookware, they can get rather pricey, but the good news is if you choose the right one they can last a lifetime.
When looking in dutch ovens you need to decide between a plain cast iron one or an enameled cast iron, which both have their pros and cons. The enameled cast iron does not need to be seasoned and allows you to use acidic ingredients from the beginning, but the enamel can crack and once it does you need to replace your dutch oven. Plain cast iron will literally last a lifetime, as long as it is properly taken care of. With plain cast iron you need to season it before you begin cooking with it and you need to avoid acidic ingredients until it is well seasoned.
The other thing to keep in mind when purchasing a dutch oven is the size and shape. With dutch ovens bigger is not always better, even if you arent restricted by a budget. Quality dutch ovens are very heavy, so the bigger you go the heavier it will be. How many people in your family will help you decide the perfect size to purchase. A 5.5 quart will work to feed anywhere from 2 to 4 people, while if you are cooking for more than 4 a 7 quart one will work best. In terms of shape, you have the option between round and oval. Oval ovens can fit longer cuts of meat, but the round many people find easier to store and carry.
The last thing you want to look for when purchasing a dutch oven is the lid, handles, and sides. The sides should be on the tall side to prevent sauces or food from spilling out while you are cooking. The lid should fit securely on the oven, but should also be heavy enough to hold itself in place. Handles or knobs should be easy to grip and hold onto.
Using your Dutch Oven
T he first thing you must do once you have bought your oven is to cure it. Curing it will prevent food from sticking to the bottom of the oven, plus it will prevent the oven from rusting. Curing the oven is a simple process, but what you do first depends on if you have a new or old oven.
Curing your Dutch Oven
If you have an old oven you will need to use a fine sandpaper to expose the metal surface. Once that is done or if you have a new oven it will need to be washed in hot, soapy water. For new ovens this removes the wax coating, while for old ovens it gets rid of any metal dust. Heat your oven to 200 degrees Fahrenheit with the dutch oven inside. Once the dutch oven is hot, pour in a small amount of oil and use a cotton cloth to coat the entire oven with oil. Take care and use gloves, as the oven will be hot. Turn your home oven up to 350 degrees Fahrenheit and place the dutch oven back inside and allow to heat for 1 hour. Once the hour is up, allow the pan to slowly cool, cooling too fast can warp or crack the cast iron.
Cleaning your Dutch Oven
This subject is up for debate, as everybody has their own ideas on the best cleaning methods. One way to clean your dutch oven is with plain hot water; you want to avoid using soap because the chemicals can seep into the cast iron and give your food a rather soapy taste. If you experience burnt on food your best bet is to burn the food off by cooking it off over an open fire. Once it gets hot enough the food will turn to ash and can be dusted out.
You can also pour water in your dutch oven with food bits, then cover it with the lid and heat it. After some time, remove it from heat and let it cool a bit. Later take a plastic scraper or sponge and rub the food bits off. They should come off rather easily.
No matter how you clean your dutch oven once it has been washed, dry it well and season with a light coat of oil.
Tools Required for your Dutch Oven
You are going to need all kinds of cooking utensils for our dutch oven, but you dont want to use metal ones. Always use Teflon, wood, or plastic utensils to avoid scratching the cast iron. If it does happen and bare metal is showing you will need to re-cure the cast iron oven. Other tools you will need are a pair of heavy duty leather gloves; make sure they are long enough to cover your wrists, a whisk broom, a lid lifter, and a small shovel.
Next page
