Dorie Hruska - Making Connections—A Free-Motion Quilting Workbook: 12 Design Suites - For Longarm or Domestic Machines
Here you can read online Dorie Hruska - Making Connections—A Free-Motion Quilting Workbook: 12 Design Suites - For Longarm or Domestic Machines full text of the book (entire story) in english for free. Download pdf and epub, get meaning, cover and reviews about this ebook. year: 2017, publisher: C&T Publishing Inc, genre: Home and family. Description of the work, (preface) as well as reviews are available. Best literature library LitArk.com created for fans of good reading and offers a wide selection of genres:
Romance novel
Science fiction
Adventure
Detective
Science
History
Home and family
Prose
Art
Politics
Computer
Non-fiction
Religion
Business
Children
Humor
Choose a favorite category and find really read worthwhile books. Enjoy immersion in the world of imagination, feel the emotions of the characters or learn something new for yourself, make an fascinating discovery.

- Book:Making Connections—A Free-Motion Quilting Workbook: 12 Design Suites - For Longarm or Domestic Machines
- Author:
- Publisher:C&T Publishing Inc
- Genre:
- Year:2017
- Rating:4 / 5
- Favourites:Add to favourites
- Your mark:
Making Connections—A Free-Motion Quilting Workbook: 12 Design Suites - For Longarm or Domestic Machines: summary, description and annotation
We offer to read an annotation, description, summary or preface (depends on what the author of the book "Making Connections—A Free-Motion Quilting Workbook: 12 Design Suites - For Longarm or Domestic Machines" wrote himself). If you haven't found the necessary information about the book — write in the comments, we will try to find it.
Dorie Hruska: author's other books
Who wrote Making Connections—A Free-Motion Quilting Workbook: 12 Design Suites - For Longarm or Domestic Machines? Find out the surname, the name of the author of the book and a list of all author's works by series.

Making Connections—A Free-Motion Quilting Workbook: 12 Design Suites - For Longarm or Domestic Machines — read online for free the complete book (whole text) full work
Below is the text of the book, divided by pages. System saving the place of the last page read, allows you to conveniently read the book "Making Connections—A Free-Motion Quilting Workbook: 12 Design Suites - For Longarm or Domestic Machines" online for free, without having to search again every time where you left off. Put a bookmark, and you can go to the page where you finished reading at any time.
Font size:
Interval:
Bookmark:
Publisher: Amy Marson Creative Director: Gailen Runge Editors: Donna di Natale and Liz Aneloski Technical Editor: Linda Johnson Cover/Book Designer: April Mostek Production Coordinator: Tim Manibusan Production Editor: Jennifer Warren Illustrator: Valyrie Gillum Photo Assistant: Mai Yong Vang Instructional photography by Diane Pedersen of C&T Publishing, Inc., unless otherwise noted Published by C&T Publishing, Inc., P.O. Box 1456, Lafayette, CA 94549 Dedication To my mother, Marsha, who taught me the love of being creative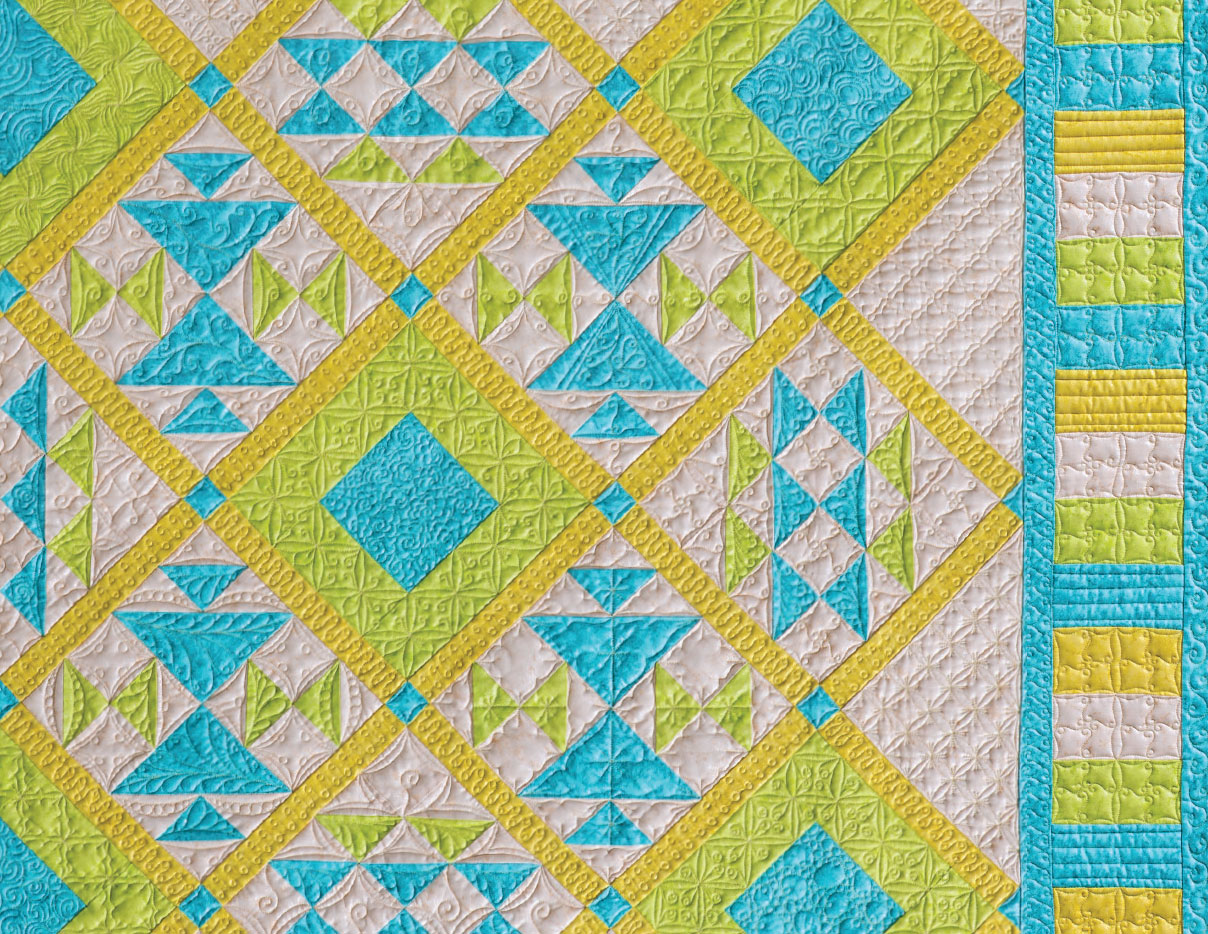 Introduction Quilters have been stitching continuous curved designs for years and calling them all kinds of different names. In this workbook, we will be looking at many different variations of these designs and expanding upon them, providing limitless possibilities for quilting. To take it a step further, well travel into open spaces like borders and large triangles, filling them in with these connecting designs. We will also look at applying this concept to the entire quilt top. Time is a precious thing.
You can spend your time stitching individual motifs in each area of a quilt, stopping and cutting your threads after each design, or you can save time by connecting the designsstitching them from one side of the quilt all the way to the other side, with just one start and stop. By keeping the designs simple, you can achieve a more complicated look. By repeating those designs throughout the quilt, you can also create a balance in design and texture. Making ConnectionsA Free-Motion Quilting Workbook is a collection of custom quilting designs for fewer starts and stops, including step-by-step instructions on how to get started. As you work through this book, I hope you will discover just how easy it is to quilt these designs and maybe come up with a few of your own. Forever quilting, DorieObjectives for This Book Learn how to use connecting designs to connect stitching lines with fewer stops and starts.
Complete the quilting faster by using freehand designs (versus ruler work). Limit or eliminate stitch-in-the-ditch quilting. How to Use This Book In this workbook, basic concepts and stitching designs are introduced first in straightforward squares and squares on point. As the study continues, we will develop a skill set of more difficult designs and filler motifs. Armed with an arsenal of designs, we will then focus on continuous-line strategies within more complicated, irregular blocks. After a quilt top is pieced using the pattern included, all of these skills will be put to use in a final project.
The last chapter provides instruction on the execution of continuous-line quilting, from sashing to blocks, setting triangles, corners, and borders. The following is a color key of stitching lines used for instructional purposes: Blue: first pass Green: second pass Orange: third pass Purple: fourth pass Single red dots: intersections Solid red lines: exit paths Dashed red lines: travel paths Dotted red lines: secondary travel paths 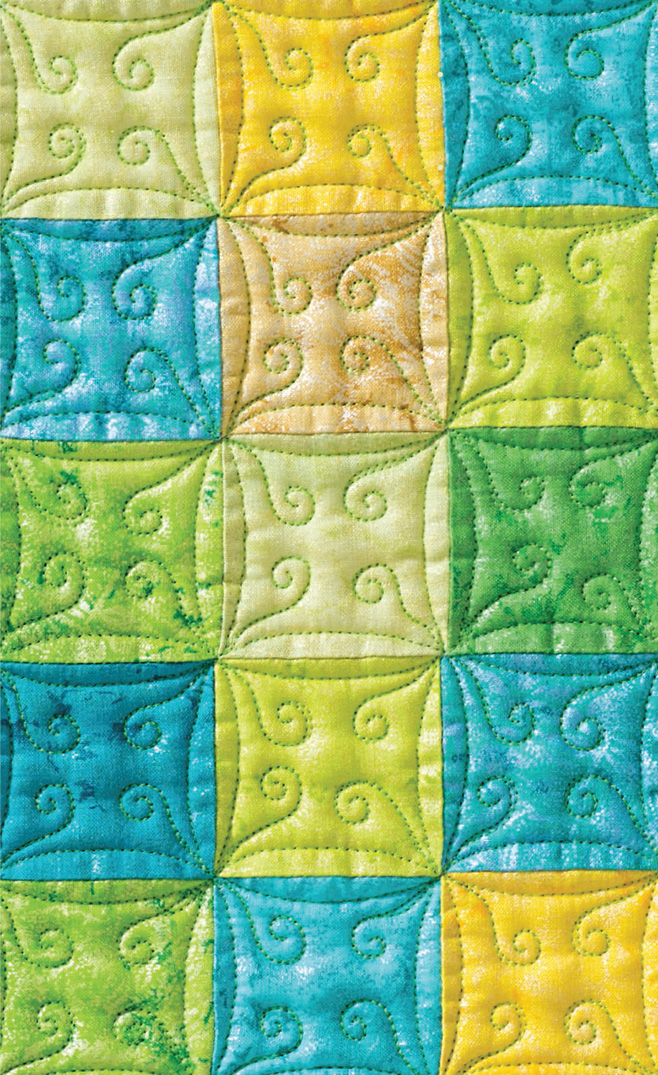 Basic Instructions Practice Drawing Lets begin practicing by drawing the designs in rows. For the first very basic stitching design, start drawing from the top left corner and work to the right along the top edge.
 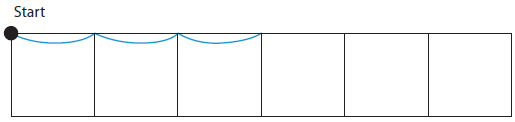 Get the feel of drawing the curves. Now lets move on.
 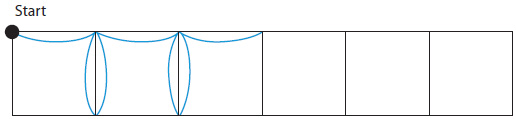 First line of a very basic stitching design To finish the design, draw a second line from right to left: OverOverOver, to the end of the row.
 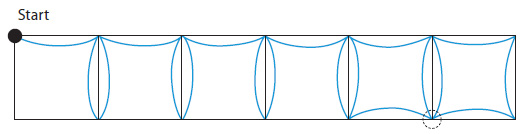 Second line to finish the design Tip Every time you come into the corners, aim for the intersection. Second line to finish the design Tip Every time you come into the corners, aim for the intersection.
Once you feel comfortable, you can progress to practicing the full design in a block. Train yourself to execute these designs in an overall clockwise direction. Part of the design might include going from right to left and left to right, but the overall progression will be clockwise as you move around the area. 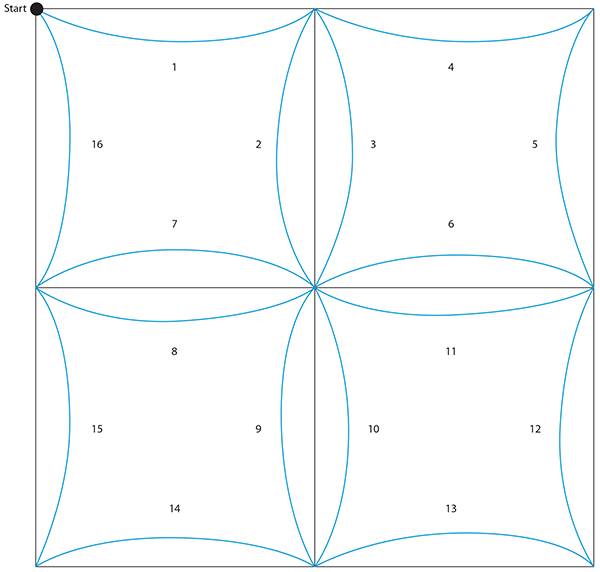 Practice working clockwise around the area. Follow the numbering system for each design. By practicing in this manner, you will be able to master the flow of a basic symmetrical block.
In each design section of this book, you will be given illustrations for stitching the design in a four-patch layout (basic squares) and in two border-and-corner grids (squares on point), plus a blank worksheet on which to practice drawing. Borders and SashingBasic Information Consider the width of the border or sashing when choosing a design. If your space is small, a simple design is all you need. But if you have a larger (wider) space to fill or you want the area more densely quilted, you may want to consider a double design with extra fillers. No matter which design you choose, be sure to keep the amount of quilting balanced throughout the quilt so it lies nice and flat. 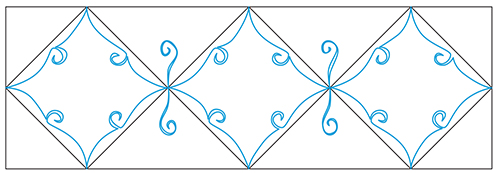 Stitching inside the grid plus adding a filler1 pass
 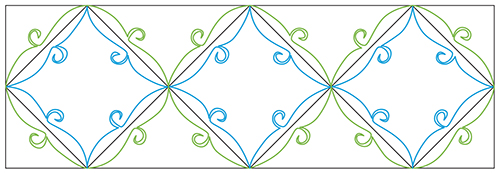 Stitching inside and outside the grid2 passes
  Stitching a fuller design inside, stitching the outside, and adding an outline3 passes
 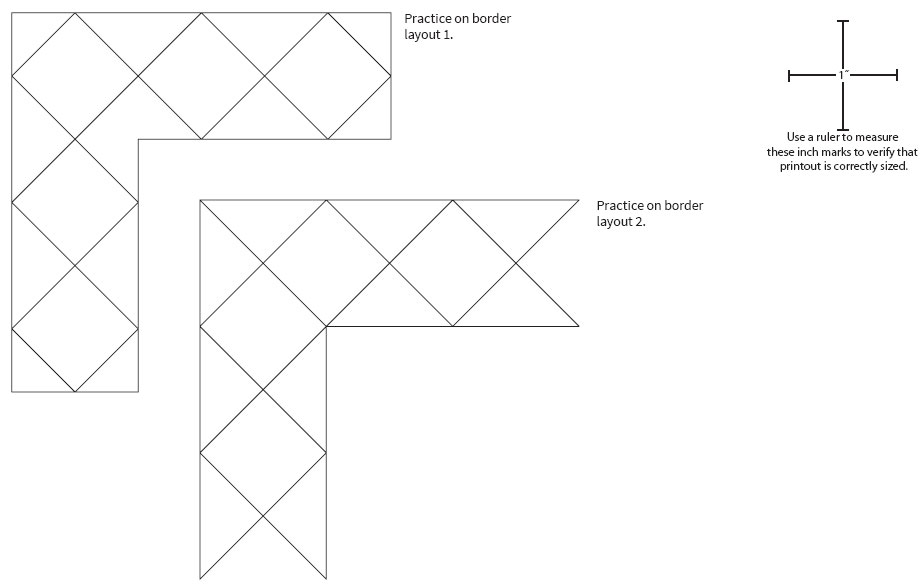 For all printable patterns or digital content: http://tinyurl.com/11258-patterns-download Marking a grid of crosshatched lines will give you reference points to put any of these connecting designs in any border or sashing.
In each design section, you will be given illustrations for stitching the design in a border using one of these grid layouts. These designs could also be stitched in horizontal or vertical rows. To make these steps even easier, I have designed a set of square grid stencils that are measured on the diagonal. They come in 1, 2, or 3 widths and are available for purchase on my website, Forever Quilting (forever-quilting.com). In conjunction with my stencils, Miracle Chalk is my go-to company for quilt-marking products. Their pounce pad, the Quick Swipe marking pad, is especially easy to use.
A tap of a hot iron erases the lines entirely. 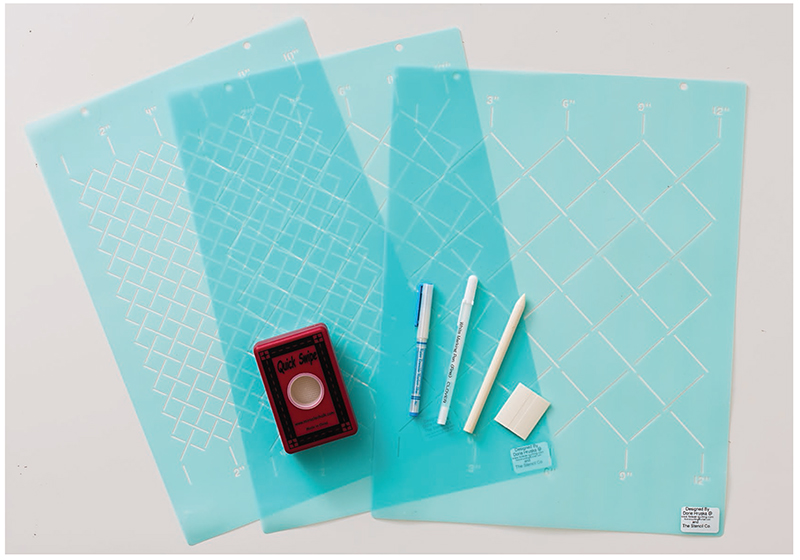 Stencils and marking tools For example, a border strip may be cut 61/2 wide. You could use any of these stencils to mark a 1, 2, or 3 grid on your 6 finished border, because 6 is divisible by 1, 2, and 3.
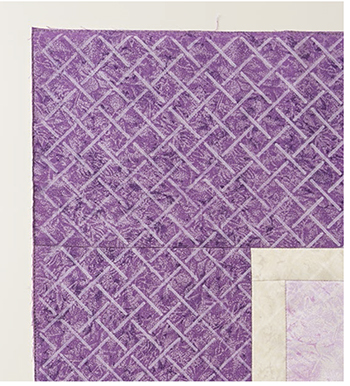
Font size:
Interval:
Bookmark:
Similar books «Making Connections—A Free-Motion Quilting Workbook: 12 Design Suites - For Longarm or Domestic Machines»
Look at similar books to Making Connections—A Free-Motion Quilting Workbook: 12 Design Suites - For Longarm or Domestic Machines. We have selected literature similar in name and meaning in the hope of providing readers with more options to find new, interesting, not yet read works.
Discussion, reviews of the book Making Connections—A Free-Motion Quilting Workbook: 12 Design Suites - For Longarm or Domestic Machines and just readers' own opinions. Leave your comments, write what you think about the work, its meaning or the main characters. Specify what exactly you liked and what you didn't like, and why you think so.