Contents
Guide
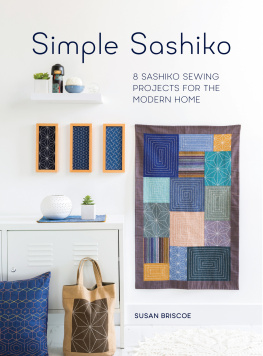
Simple Sashiko
8 SASHIKO SEWING PROJECTS FOR THE MODERN HOME
SUSAN BRISCOE

www.stitchcraftcreate.co.uk
Contents
Introduction
Sashiko is the simple yet evocative stitching tradition of northern Japan. Pronounced sash(i)ko (the i is almost silent), it means little stab or little pierce an accurate description of the stitching action. Originally invented for the thrifty creation of warm garments, made with recycled indigo fabric and conserving as much thread as possible, sashiko has developed into the richly patterned and often brightly coloured designs of today.
Simple Sashiko contains everything you need to know to get started in this creative, satisfying and often rather therapeutic style of embroidery. Each project includes simple instructions for marking and stitching the authentic designs, and for turning them into a range of beautiful items. This book will launch you into a life-long love of Japanese artistry as you capture the magic of sashiko in your work.
Getting Started
This section contains all the technical information you need to create beautiful sashiko. It will help you choose suitable tools, equipment and materials. The basic information on how to mark the patterns, stitching and finishing your work are all included essential sashiko know-how at your fingertips.
TOOLS AND MATERIALS
Sashiko requires only basic sewing equipment and materials, and you will probably already have a basic sewing kit (see below) which can all be used.
- Sewing & marking kit
- Sashiko needles (various sizes)
- Sewing needles sharps
- Small embroidery scissors
- Dressmaking scissors
- Pincushion or needle case
- Pins
- Thimble (optional)
- Tacking (basting) thread
- Sewing thread to match your fabrics
- Marking tools, including markers for dark and light fabrics, rulers and templates for marking curved designs.
- Rulers ordinary and quilters
- Cutting mat and quilters ruler
These are excellent for precision marking. You might also prefer to cut out your fabrics with a rotary cutter.
- Japanese embroidery scissors
Nigiri basami are not essential, but do make sewing sashiko feel very authentic! They are also useful for snipping threads at the sewing machine.
- Sewing machine
This is useful for assembling projects, although old sashiko items were made completely by hand. Zigzag as well as straight stitching will be useful, as fabrics suitable for sashiko tend to fray and it is a good idea to zigzag the edges before you begin hand stitching, especially with larger projects that will be handled a lot.
NEEDLES
Sashiko needles are, compared with ordinary Western sewing needles, quite thick and rigid in relation to their length. They are also sharp. Very long needles will help keep your stitching lines straight and speed up your sewing, once you are used to them. If you normally hand quilt with Betweens (special short quilting needles), you may find the smaller sashiko needles easier to manage at first, although the smallest are only suitable for fine sashiko thread. If sashiko needles are unavailable, try embroidery crewels or larger darning needles.
Match your sashiko needle to the thread and fabric weight. Finer threads and smaller needles will work with slightly heavier fabrics but it will be difficult to stitch a thick sashiko thread with a large needle through finer fabrics. If sashiko feels like hard work, change to a finer thread and needle or to a fabric with a lower thread count.
THREAD
Sashiko thread was specially spun, although ordinary fabric and needles were originally used. Modern sashiko thread has a looser twist than many embroidery threads and is made from long staple cotton. It is therefore very hardwearing and strong you cant snap it! Various brands are sold worldwide, in large skeins and in several weights fine, medium and thick in a rainbow of colours and shaded effects as well as white, cream and indigo. The exact thickness and shade varies between manufacturers, so use the same brand throughout a sashiko project. One 100m skein of sashiko thread in white or cream, plus smaller amounts of coloured threads, will be enough for several projects. Thread quantities given in the projects are fairly generous.
If you cannot obtain real sashiko thread, cotton broder makes a reasonable substitute. Cotton perl does not really look or behave like sashiko thread, although it can add an interesting colour accent. Thread made for sashiko will give you the best results as a beginner and you can experiment to find other suitable threads later on, once you know what sashiko thread looks and feels like. To create additional colours, thread can be dyed at home, either with natural or synthetic dyes
FABRICS
Sashiko was originally stitched on cotton, linen, hemp and other plant fibres. Copies of old hand-woven fabrics are specially made for sashiko, in indigo and other shades (see ). Fabric and threads often echo natural dyes and antique colours. Choose plain weaves and natural fibres with a lower thread count (the number of threads to the inch), slightly thicker than you might normally choose for quilting. Some quilting and craft fabrics, such as prairie cloth, Osnaburg cloth and cotton flannel, are pleasant to stitch and look authentic. Indian cottons made for household textiles are an excellent source of thicker cottons and dressmaking fabrics can be used too. Old sashiko was often stitched on recycled fabrics, so thats another option, but always check that old fabrics are still strong enough to use.
FABRIC MARKERS
Marking your chosen sashiko pattern on the fabric will be easy with the right marker. Choose a marker you like and marking will be a pleasure.
HERA
The Japanese sewing marker, traditionally made of bone (and now plastic), scores and polishes a line on the cloth. It shows up best on very dark fabrics and the line washes out. Always put a cutting mat or cardboard under your fabric when marking or you will permanently score your table!
QUILTERS WHITE PENCIL
This soft pencil is good for dark fabrics, with marks that wash out or rub off. Sharpen soft pencils with a craft knife, cutting away on either side and trimming to make a flat point the pencil will last much longer.
AIR-ERASABLE MARKING PEN (WHITE)
This is a felt-tip pen that marks white and fades away when exposed to air. The marks only last for 48 hours and can fade sooner, so use it for small projects. Remember to wash out the chemical residue when the work is complete.
WHITE MARKING PEN
This is a roller ball that makes a fine, clear white line which takes a few seconds to develop after drawing. Marks can be removed with water or heat (check individual brand information).
QUILTERS SILVER PENCIL
This is best for light fabrics, as the marks can be difficult to see on dark or medium colours. Marks wash out or rub off. Blue marking pens are another option but must be washed out or the chemicals may damage fabric.
TAILORS CHALK
This is an inexpensive marker available in various colours. Marks brush off easily but can be redrawn. It washes out.

