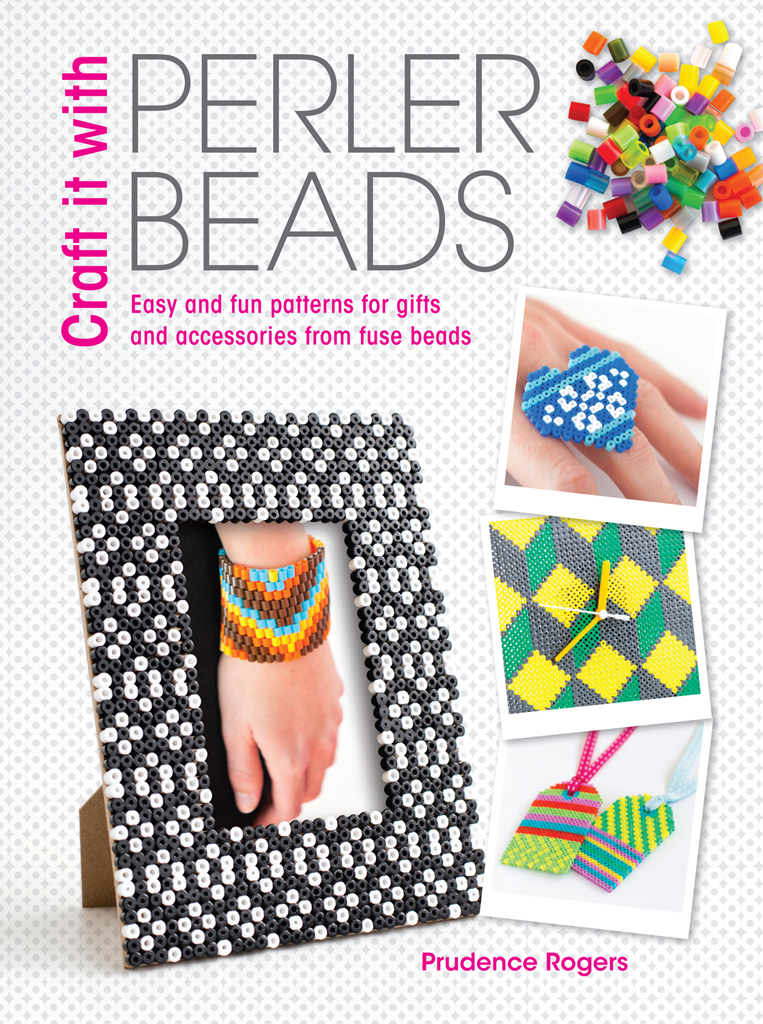
Prudence Rogers - Craft it With Perler Beads
Here you can read online Prudence Rogers - Craft it With Perler Beads full text of the book (entire story) in english for free. Download pdf and epub, get meaning, cover and reviews about this ebook. year: 2014, publisher: F+W Media, genre: Home and family. Description of the work, (preface) as well as reviews are available. Best literature library LitArk.com created for fans of good reading and offers a wide selection of genres:
Romance novel
Science fiction
Adventure
Detective
Science
History
Home and family
Prose
Art
Politics
Computer
Non-fiction
Religion
Business
Children
Humor
Choose a favorite category and find really read worthwhile books. Enjoy immersion in the world of imagination, feel the emotions of the characters or learn something new for yourself, make an fascinating discovery.

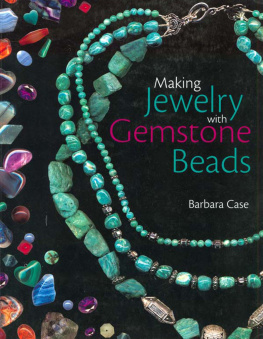
- Book:Craft it With Perler Beads
- Author:
- Publisher:F+W Media
- Genre:
- Year:2014
- Rating:5 / 5
- Favourites:Add to favourites
- Your mark:
Craft it With Perler Beads: summary, description and annotation
We offer to read an annotation, description, summary or preface (depends on what the author of the book "Craft it With Perler Beads" wrote himself). If you haven't found the necessary information about the book — write in the comments, we will try to find it.
Get fired up by fuse beads with this stunning collection of simple makes!
A new wave of crafters are turning Perler Beads on their head and showing that far from being just novelties for kids, these colourful plastic beads that fuse together when ironed can be used to make stunning sophisticated gifts and accessories.
In this fun collection of genuinely easy makes, you will find fuse bead patterns, designs and ideas for a wide range of items from jewellery such as necklaces, earrings, bracelets and rings, to home dcor items such as coasters, a photo frame, a garland, a clock and even a lampshade that will have you seeing Perler Beads in a whole new light!
Each project has a full-colour chart plus easy-to-follow instructions to guide you through the process from start to finish.
Prudence Rogers: author's other books
Who wrote Craft it With Perler Beads? Find out the surname, the name of the author of the book and a list of all author's works by series.


Craft it With Perler Beads — read online for free the complete book (whole text) full work
Below is the text of the book, divided by pages. System saving the place of the last page read, allows you to conveniently read the book "Craft it With Perler Beads" online for free, without having to search again every time where you left off. Put a bookmark, and you can go to the page where you finished reading at any time.
Font size:
Interval:
Bookmark:
PERLER
BEADS
![]()
Fuse beads have long been a popular material used for creating eye-catching and stunning objects, while allowing your imagination to run wild. Beads are arranged on a plastic pegboard and then ironed to melt them together. The brightly coloured beads are inexpensive, accessible and versatile, making them a perfect crafting medium for adults as well as kids.
Its so easy to create fun, colourful designs that, with very little equipment, can be turned into pictures, jewellery, 3d objects, gifts, home ware and much more. This book is packed with ideas for crafty creations, but dont limit yourself to what you see here adapt, personalize and change colours wherever you want to its simple to add your own creativity with fuse beads. Theres something extremely satisfying about watching all the tiny beads fuse and solidify to make your design permanent!
There are many different brands of fuse beads available, the main ones being Hama in Europe and Perler in the US. These are both good quality and have consistent melting rates, meaning its usually possible to mix these brands if desired without too much trouble. However, the outcome is likely to be less reliable if you use some of the cheaper beads, as their melting rates are often inconsistent and the sizes of beads tend to vary. Other popular brands include Nabbi and Pyssla (available from Ikea).
Any type of fuse beads can be used for the designs in this book, just be sure to check which sized beads are required for each project.
If you are planning on letting the kids get creative with their designs, make sure they leave the ironing to an adult to avoid injury.
Sizes Standard size fuse beads are 5mm in diameter and are termed Midi beads (Hama). These are the most common size of beads and are suitable from age five upwards. Its also possible to buy larger beads, which are around 10mm and although not used in this book, they are great for younger children. Finally, Mini beads (approx 2.5mm) are the smallest beads available and are suitable for 10 years and over. Its possible to get much more detail into smaller designs with these tiny beads.
Take note whether 2.5mm (Mini) or 5mm (Midi) beads are used for each project it makes a huge difference to the size of your finished piece (see image). Its possible to use the same charts in either Mini or Midi beads, but just take note of finished sizes.
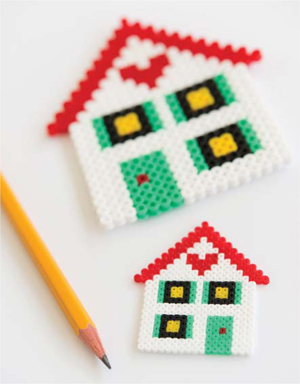
This house design can be created using either Midi or Mini beads. (See for chart)
Colours Fuse beads come in an amazing array of colours, including solid, translucent, pastel, glitter and even glow-in-the-dark! Take a look at the website for your brand of beads and download a colour chart to see whats available. The charts in this book dont specify colour codes, as this will depend which type of beads you are using. Use colour charts to match and select the colours you need, or be inspired and choose your own.
When starting out with fuse beads, it makes sense to buy a big jar of mixed beads, as these are cheap and great for practising new ideas. However, as you try more challenging designs, such as those in this book, you will almost always end up having to sort the beads. Therefore its much easier and quicker to buy packs of individual coloured beads.
Besides the beads themselves, one of the great things about fuse beads is that you need very little equipment.
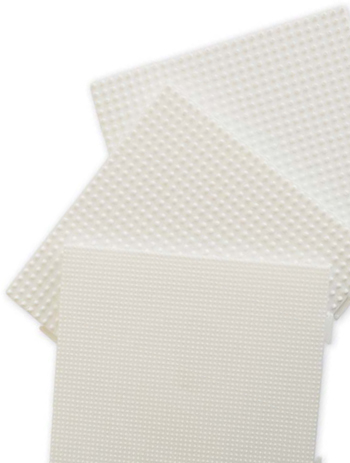
Pegboards Flat plastic boards with tiny pegs that hold your beads in place while youre working them are available from many craft retailers. Different shaped boards are available, although in this book, all the charts are designed to work on the standard 29 x 29 (beads) interlocking pegboards, as they are the most versatile, allowing for any shape or size design. For the Mini fuse bead (2.5mm) designs, you will need a similar board, but with smaller pegs.
Tweezers Although not essential, you may find it easier and quicker in some instances to use tweezers for placing beads onto the pegboard. This is particularly true for Mini fuse beads (2.5mm). Longer tweezers with pointed ends are the most useful, allowing you to pick up beads from the edges, or by grabbing the centre hole.
Some designs use the holes in the beads to create/finish the project, so be sure to check before you go crazy with the iron and lose all your holes!
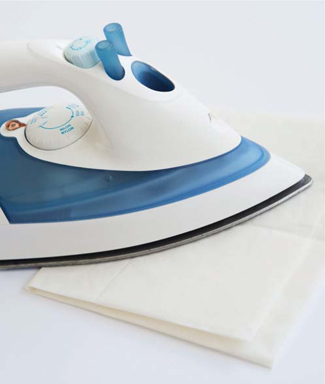
Iron and ironing paper You will need a standard clothes iron with variable heat settings to fuse/melt the individual beads together. Smaller compact or travel irons are ideal, as they are easy to hold and control. You will need ironing paper to cover your beads to prevent melting onto the iron. Specific paper for fuse beads is available, or alternatively, use greaseproof (wax) paper.
To create the designs in this book, simply add the corresponding colour beads to the pegboard following the chart supplied. Each square on the chart represents one bead on the board. For larger designs, it may help if you mark off the squares on the chart as you place your beads so you can keep track of where you are.
Place ironing paper over your finished design on the pegboard, ensuring all the beads are completely covered.
Set your iron to the required heat setting (low/medium for Mini fuse beads 2.5mm, high for Midi fuse beads 5mm) and when it reaches the required temperature, iron the paper while keeping the iron level. Let the iron do the work its not necessary to apply additional pressure working evenly over the design. As the beads start to melt, they will appear darker through the paper, which means they are ready. Ensure you have ironed all the beads, paying particular attention to the edges or any areas that are only attached by one bead to make sure they are well fused.
Carefully peel off one edge of the paper to check that all the beads have been fused. If any beads have been missed, lay the paper back down and apply further heat to those areas. Lift the paper off to reveal the fused design.
Flip the pegboard over onto a heatproof surface and (optionally) repeat the process to fuse the reverse of the design (see ).
After ironing, the beads will remain hot for a short while, so be careful when handling. Place a flat heavy object, such as a book, onto your design while its cooling to ensure it remains flat (alternatively, to shape your design see ).
You have a couple of choices when ironing designs, which really come down to personal preference of the look you favour, or what type of project is being created.
Font size:
Interval:
Bookmark:
Similar books «Craft it With Perler Beads»
Look at similar books to Craft it With Perler Beads. We have selected literature similar in name and meaning in the hope of providing readers with more options to find new, interesting, not yet read works.
Discussion, reviews of the book Craft it With Perler Beads and just readers' own opinions. Leave your comments, write what you think about the work, its meaning or the main characters. Specify what exactly you liked and what you didn't like, and why you think so.