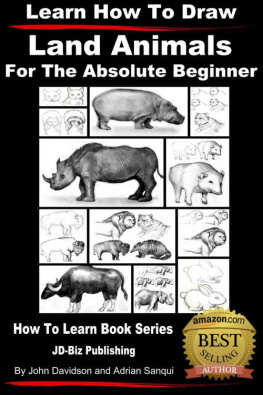
John Davidson - Learn How to Draw Aquatic Animals - For the Absolute Beginner
Here you can read online John Davidson - Learn How to Draw Aquatic Animals - For the Absolute Beginner full text of the book (entire story) in english for free. Download pdf and epub, get meaning, cover and reviews about this ebook. year: 2013, publisher: JD-Biz Corp Publishing, genre: Home and family. Description of the work, (preface) as well as reviews are available. Best literature library LitArk.com created for fans of good reading and offers a wide selection of genres:
Romance novel
Science fiction
Adventure
Detective
Science
History
Home and family
Prose
Art
Politics
Computer
Non-fiction
Religion
Business
Children
Humor
Choose a favorite category and find really read worthwhile books. Enjoy immersion in the world of imagination, feel the emotions of the characters or learn something new for yourself, make an fascinating discovery.
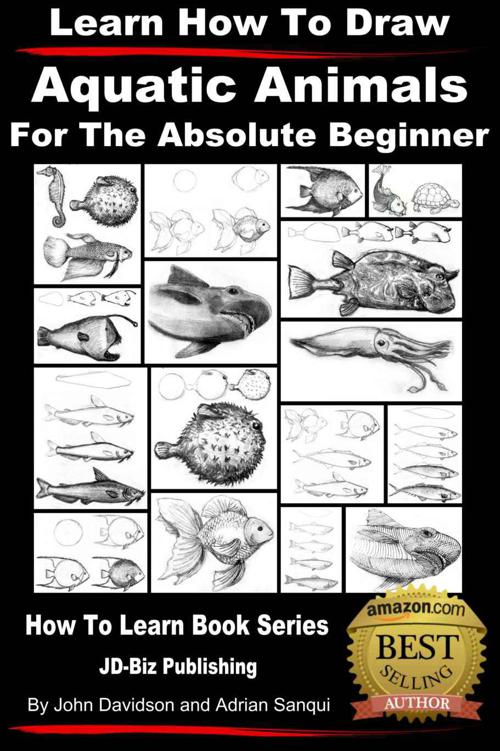
- Book:Learn How to Draw Aquatic Animals - For the Absolute Beginner
- Author:
- Publisher:JD-Biz Corp Publishing
- Genre:
- Year:2013
- Rating:5 / 5
- Favourites:Add to favourites
- Your mark:
Learn How to Draw Aquatic Animals - For the Absolute Beginner: summary, description and annotation
We offer to read an annotation, description, summary or preface (depends on what the author of the book "Learn How to Draw Aquatic Animals - For the Absolute Beginner" wrote himself). If you haven't found the necessary information about the book — write in the comments, we will try to find it.
TABLE OF CONTENTS
Introduction: Drawing Tools
Primary Sketches
Constructing Outlines
Using a Base
Common forms
o Veiltail goldfish
o Queen angelfish
o Mackerel
o Salmon
o Catfish
Unique forms
o Ocean sunfish
o Cowfish
o Anglerfish
Contour Shape
Planes
Texture
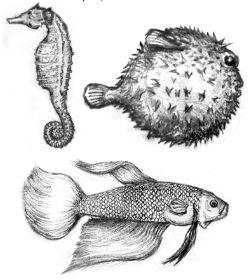
o Porcupine fish
o Siamese fighting fish
o Seahorse
Composing the Figure
o Tarpon
Primary sketches
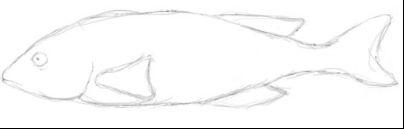
Rough sketching is an easy approach to build up your drawing skills by letting your hand gain familiarity on how the forms and details are expressed by lines. This is a good way of enhancing your creativity through experience and can build up your hand and mind coordination rapidly.
Build the form through several lines until you figure out the primary shape of the subject. Sketching is the way to express your imagination freely and portray your ideas visually through lines.
Start with a simple animal figure. Try to draw an animal in profile/side view, draw a simple fish or dolphin, whatever you think is easy for you.
A figure in side view barely involves dimension values and does not contain any kind of foreshortening (overlapping proportions to depict the figures perspective).
Worry less on how many line strokes you need to make just to obtain the primary shape of the animal. Be expressive on your line strokes and produce different kinds of lines to construct a figure that is distinguishable to your subject.
Start with thin and barely visible lines with light hand strokes.
Try to construct the primary parts of the figure. Depict the animals mass and try proportioning them properly.
Choose the lines that best define the primary shape of your figure and thicken them.
Get back to the line marks you have made and observe what linings depicted the shape of your figure. Darken these lines to make them more dominant to the other markings.
When you already have a good outline of the figure, clean up your drawing and erase the unnecessary line marks you no longer need.
Erase the unsuccessful outlines so you will be left with the effective one (the ones you darkened). And clean up the inner portion of your drawing to have as space for the details.
Now try to draw the details. Draw the eye, fins and gills.
Continue your illustration with the same process you did before. Start with light thin lines until you make the most successful line stroke. Make the fins curvy as if its floating on the water. Once again, thicken the most successful lines and erase the unsuccessful sketch marks.
Once you have the primary details, draw the secondary details such as the lines on the fins.
At this point, the permanent (successful outlines) lines should be thinner than the previous outlines you have made but it should be as dark and as visible. Make parallel curved lines to give some details on the fins, follow the outline curves of the fins and adapt how it bends until the lines reach the outline.
Now for the texture, dont fill the whole thing with overlapping curves to illustrate the scales, just try to imagine that the scales are there but they arent totally exposed (as if the light is too bright for the little details to be visible).
draw the scales on the sides near the main outline with dark lines then make it lighter and lighter as it gets nearer at the center.
Remember that the shape of a fish is a bit round, so draw the scales in a curved line, and sustain this curve along with the other scales on the upper portion of the fishs body.
John Davidson: author's other books
Who wrote Learn How to Draw Aquatic Animals - For the Absolute Beginner? Find out the surname, the name of the author of the book and a list of all author's works by series.


Learn How to Draw Aquatic Animals - For the Absolute Beginner — read online for free the complete book (whole text) full work
Below is the text of the book, divided by pages. System saving the place of the last page read, allows you to conveniently read the book "Learn How to Draw Aquatic Animals - For the Absolute Beginner" online for free, without having to search again every time where you left off. Put a bookmark, and you can go to the page where you finished reading at any time.
Font size:
Interval:
Bookmark:
Learn How to Draw
Aquatic Animals
Adrian Sanqui and John Davidson
HOW TO LEARN
Book Series
JD- Biz Publishing
All Rights Reserved.
No part of this publication may be reproduced in any form or by any means, including scanning, photocopying, or otherwise without prior written permission from JD-Biz Corp and at http://JD-Biz.com . Copyright 2013
All Images Licensed by Adrian Sanqui
Fotolia and 123RF
Read More Learn How to Draw Books
TABLE OF CONTENTS
Introduction: Drawing Tools
Primary Sketches
Constructing Outlines
Using a Base
Common forms o Veiltail goldfish o Queen angelfish o Mackerel o Salmon o Catfish Unique forms o Ocean sunfish o Cowfish o AnglerfishContour Shape
Planes
Texture
o Porcupine fish o Siamese fighting fish o SeahorseComposing the Figure
o TarponDrawing tools
Pencils
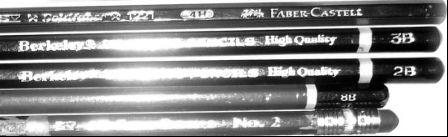
The most important tool you need to be able to enhance your drawing skill is a medium that can be corrected in case you make sloppy line strokes. It is better if you have pencils of different grades so you can have the kind of lightness or darkness you want to make. The H engraved near on the pencils tip (side of eraser) stand for hardness, it ranges from 2H to 9H. A pencil with only an H mark and doesnt have a number means 1H, the most common grade of a pencil (pencils without grade marks) is usually a 2H pencil. The B marking on the pencil stands for blackness, this means the pencil produces a darker marking and is softer than H pencils. It ranges from HB (hard and dark) to 9B (very soft and very dark), and this means the higher the grade, the softer and darker it becomes.
Mechanical pencil 
A mechanical pencil has a consistent wick or point which makes it easier for you to maintain the thickness of the line marks you produce, instead of sharpening your pencil several times just to have a thin and constant fine point. Different grades of lead or graphite is also available for refilling your mechanical pencil, just makes sure that the size of the point your pencil has is also the same as the pencil leads you refill it with.
Sharpener 
A regular sharpener is quite dependable if you are using H and low B pencils, but if you are going to use it to sharpen a pencil with very soft graphite cores, it may keep on breaking, most especially if you will use it for a charcoal lead pencil. A good substitute for regular sharpeners is a cutter, so you can easily control the pressure just enough to expose the core and make a fine point. Cutters are often used if you want a chisel point pencil that is very helpful for thick and thin linings.
Erasers
Having an eraser is essential if you are going to use a pencil for drawing. Choose a rubber eraser that is soft and not the ones that leave a faint color or worst is a scratch on the paper. Dont leave your eraser lying around on the table or just anywhere, keep it on a pencil case or anything that can protect it from being exposed to air for too long because some erasers (cheaper ones) harden when its left to dry out.
A kneadable eraser is very helpful for making highlights and reaching hardly accessible areas such as the gloss on the eyes or light portions of fingernails and such. It usually looks like a gray slab or a small bar of clay that can be molded or deformed to any shape you desire. It doesnt rub off the marking like usual erasers, but instead, it lifts off the graphite from the paper, like absorbing it. Instead of rubbing the eraser with a certain pressure to remove a marking, carefully dab on the portions you want to erase or decrease the applied graphite or charcoal, until you recover the brightness (whiteness of the paper) you want.
Smudge stick
A smudge stick is used for smearing the shades on the portions that are hard to access. Some artists dull down the other tip so it can be used for distributing the shades on the general areas. To avoid ruining the smudge stick, use a sand paper to make a blunter tip or to make it even pointier.

Primary sketches
Rough sketching is an easy approach to build up your drawing skills by letting your hand gain familiarity on how the forms and details are expressed by lines. This is a good way of enhancing your creativity through experience and can build up your hand and mind coordination rapidly.
Build the form through several lines until you figure out the primary shape of the subject. Sketching is the way to express your imagination freely and portray your ideas visually through lines.
Start with a simple animal figure. Try to draw an animal in profile/side view, draw a simple fish or dolphin, whatever you think is easy for you.
A figure in side view barely involves dimension values and does not contain any kind of foreshortening (overlapping proportions to depict the figures perspective).
Worry less on how many line strokes you need to make just to obtain the primary shape of the animal. Be expressive on your line strokes and produce different kinds of lines to construct a figure that is distinguishable to your subject.
Try to construct the primary parts of the figure. Depict the animals mass and try proportioning them properly.
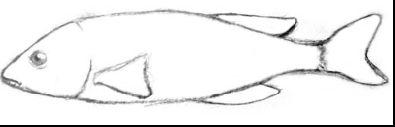
Get back to the line marks you have made and observe what linings depicted the shape of your figure. Darken these lines to make them more dominant to the other markings.
When you already have a good outline of the figure, clean up your drawing and erase the unnecessary line marks you no longer need.Erase the unsuccessful outlines so you will be left with the effective one (the ones you darkened). And clean up the inner portion of your drawing to have as space for the details.
Now try to draw the details. Draw the eye, fins and gills.Continue your illustration with the same process you did before. Start with light thin lines until you make the most successful line stroke. Make the fins curvy as if its floating on the water. Once again, thicken the most successful lines and erase the unsuccessful sketch marks.
Next pageFont size:
Interval:
Bookmark:
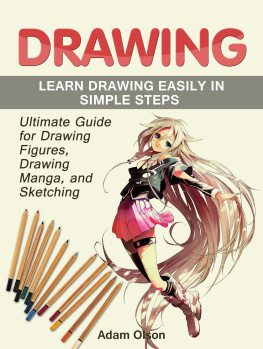
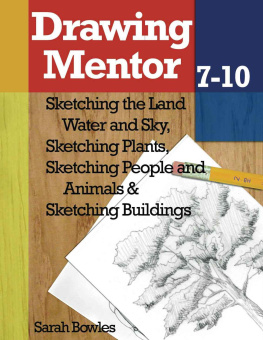
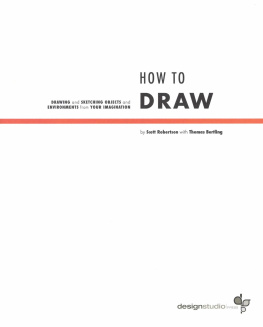
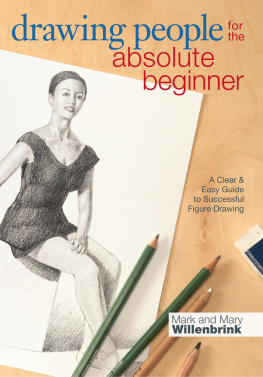
Similar books «Learn How to Draw Aquatic Animals - For the Absolute Beginner»
Look at similar books to Learn How to Draw Aquatic Animals - For the Absolute Beginner. We have selected literature similar in name and meaning in the hope of providing readers with more options to find new, interesting, not yet read works.
Discussion, reviews of the book Learn How to Draw Aquatic Animals - For the Absolute Beginner and just readers' own opinions. Leave your comments, write what you think about the work, its meaning or the main characters. Specify what exactly you liked and what you didn't like, and why you think so.