How to Use Microsoft PowerPoint 2010
Contents
Chapter 1 - Using a template
Chapter 2 - Editing a Show
Chapter 3 - Applying Designs
Chapter 4 - Adding Objects
Chapter 5 - Special Effects
Chapter 6 - Action Buttons
Chapter 7 - Slide Master
Chapter 8 - Testing
Copyright Gerard Strong 2012
Trademarks
All terms mentioned in this book that are known to be trademarks or service marks have been appropriately capitalised. We cannot be attest to the accuracy of this information. Use of a term in this book should not be regarded as affecting the validity of ay trademark or service mark. Access 2007 and Microsoft are registered trademarks of Microsoft Corporation.
Contact: mrgerardstrong@gmail.com
Chapter 1
Using a Template
What is Microsoft PowerPoint?
Microsoft PowerPoint is the leading graphics package. You can use it to create, design and organise professional presentations quickly and easily. You can then;
o Give the presentation yourselfo Set it to run automatically on its own oro Let users use it as an interactive Web style site with links to different pages of the presentation. GETTING STARTED Load Microsoft PowerPoint. You can do this in two ways;Either double-click the PowerPoint icon
Or click Start at the bottom left of the screen, then click on Programs, Microsoft PowerPoint on the menu.

Your screen will look like this.
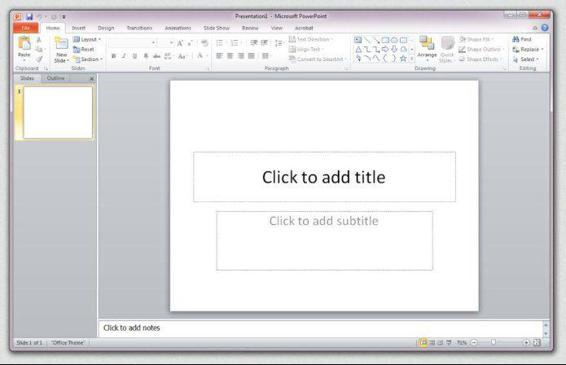
Over the next several chapters youll be working on a presentation of several slides. This will be the sort that you would deliver yourself to an audience or have automatically running for people to look at in their own time.
PLANNING A PRESENTATION
To deliver an effective presentation you need to consider who your audience is, and prepare your slides to suit them. The audience could be your classmates or even work your colleagues and general public if you are working for a real company.
Whoever your presentation is for here are a few basic guidelines.
1. Start with a title screen showing what the project is about.2. Dont put more than 4 or 5 points on each slide. People cant concentrate on too much information at once.3. Keep each point short and simple. You may want to talk around each point to explain it in further detail.4. Sound, graphics and animation can add interest, but dont overdo them!
USING A TEMPLATE
A quick way to create a colour full presentation is to use a Template or a Theme.
Once PowerPoint is loaded, click on the File tab. You should see the New option in the menu.
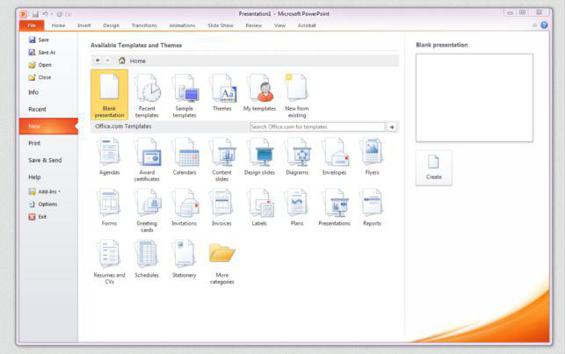
Select Themes, along from the highlight button Blank Presentation.
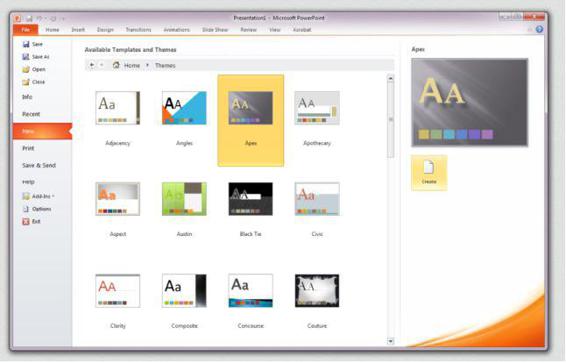
Click on the Apex Theme and Press the Create button.
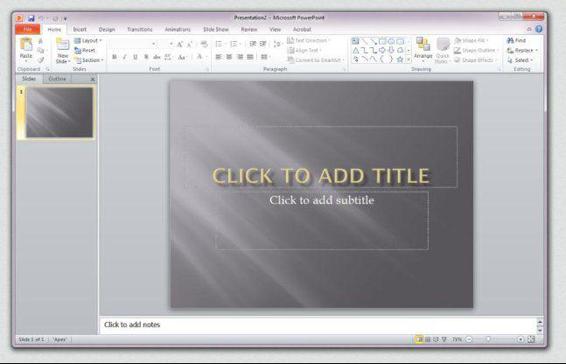
You will not see that the theme has been applied to the new Presentation.
Click on the Layout menu on the home ribbon.
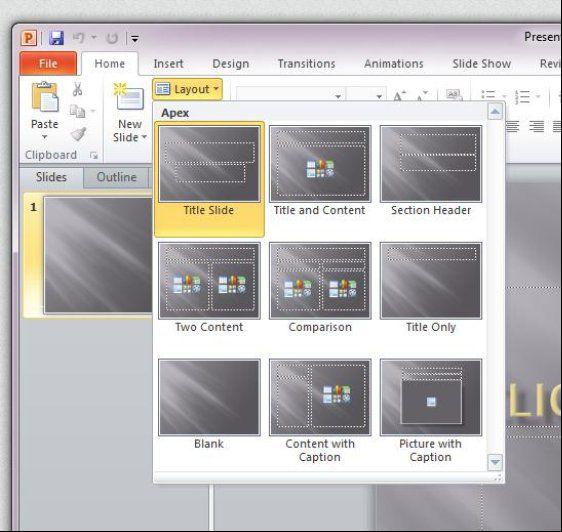
From here you can change the layout of the slide and see the variations you could pick from. For the moment lets leave it as a title slide, which is already highlighted. This is the most suitable layout for the first page of your new presentation.
Click on Title Slide and the menu will close.
You may want to make a new folder in which to save your presentation. You could call this for example London Presentation.
Save your new blank presentation as London.ppt in the folder you wish. PLACE HOLDERS
Each slid layout displays placeholders that allow you to easily add objects such as text, clipart or a chart to a slide. You will see two examples of placeholders on your title slid, one for the title and one for the subtitle.
Adding text to the title screen
Click the title placeholder (the box where PowerPoint tells to click here to add title) and type the title; London .
Now add a subtitle, click in the placeholder and type: Activities and Entertainment provided all year round .
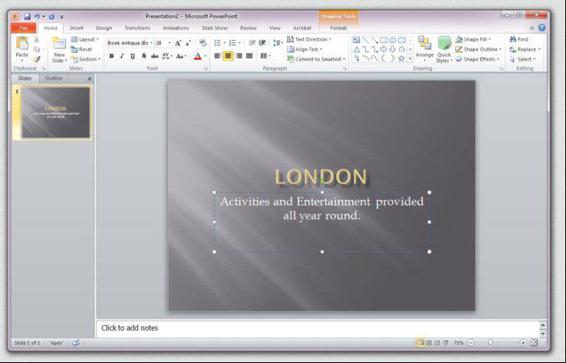
FORMATTING AND MOVING THE TEXT
You can click the text boxes to move them around the screen. You can also format the text in each text box for example, change its colour, size or alignment.
To format text you need to select the text box by clicking on its border. When the border has changed from a dashed line on the border of the box to a solid line you can start formatting the text.
If you want to edit, add or delete text in a box, click inside the box. The border changes to a dash line on the border.
Dashed line

Solid line

Select the solid line around the sub-title box
Make the text Italic.
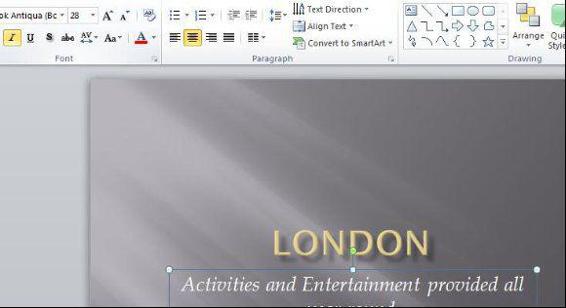
Increase the font size to 40.
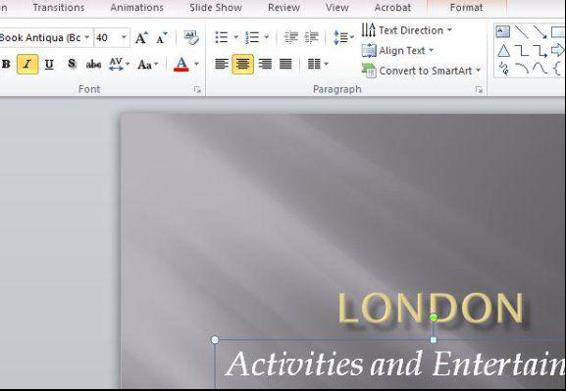
CHANGE THE VIEW You can change the view between various types of the presentation by clicking on the icons at the bottom of the screen.

Normal View This is the most useful view as it lets you see, down the left of the screen, small images of each slide in your presentation. This the view currently selected and shown here.
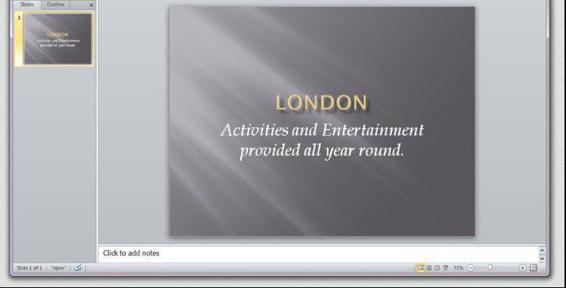
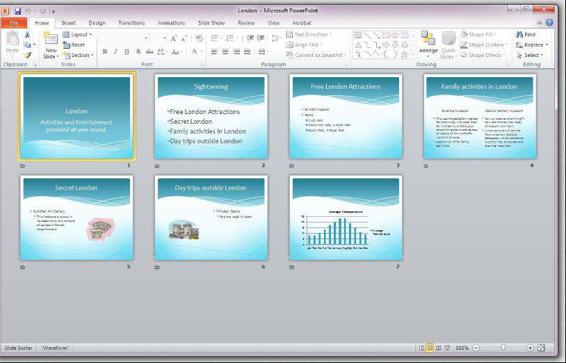
Slide Sorter View
This view helps you to organise your slides in the later stages. Well be looking at this view later when you have more than one slide. Heres a preview of what it will look like when you have 7 slides.
Slide show View
Click on this icon to view your presentation

Save and Close the presentation
Chapter 2
Editing a Show
In this Chapter you will add some more to the presentation you started in Chapter 1. You will also learn how to change the order of your bullet point and swap the slides around.
Opening an existing presentation Open PowerPoint if it is not already open.
Next page



 Or click Start at the bottom left of the screen, then click on Programs, Microsoft PowerPoint on the menu.
 Your screen will look like this.


 Increase the font size to 40.
 CHANGE THE VIEW You can change the view between various types of the presentation by clicking on the icons at the bottom of the screen.
 Normal View This is the most useful view as it lets you see, down the left of the screen, small images of each slide in your presentation. This the view currently selected and shown here.

