NEW
DIRECTIONS
IN
PUNCHED METAL
JEWELRY
20 CLEVER AND EASY
STAMPED PROJECTS
AISHA FORMANSKI

CONTENTS
Sullivan Found Objects

INTRODUCTION
I had moved to Californias Bay Area from Minnesota in October of 2010, specifically in search of reawakening my creativity in jewelry making. After high school, I attended Minneapolis Technical College Jewelry Manufacturing program and then Revere Academy of Jewelry Arts where I was trained as a traditional metalsmith. Since then I had spent many years focused on fiber art and other jewelry-making techniques such as Precious Metal Clay, seed bead weaving, and wirework. But I felt a strong pull to get back to my metalworking roots. Living in the Santa Cruz Mountains allowed me to grow as an artist and experiment with new ideas, practices, and designs as a metalsmith again.
Inspiration ended up coming when I least expected it! While having my hair cut at a local salon in town, I was mesmerized by the huge antique Mexican copper-framed mirror in front of me. Its size and detailed texture, in dark patinated metal, was striking. I inquired about the piece and the stylist explained that it had been salvaged by the salons owner and was very, very old. I saw it had been made using the traditional rustic style of punched-tin home decor. Established in the 1800s, this method of craftsmanship used tin sheet metal to create decorative mirrors, light fixtures, and lanterns. The chance encounter with this enormous mirror instantly inspired me to try to re-create this technique in jewelry, putting a creative spin on the established techniques of punching.
Like punched tin home decor, the character of punched jewelry is expressed through the decoration and manipulation of metal. A punch tool is used to drive an impression into a metal sheet, creating designs in patterns and words. In my studio, I searched through craft supplies looking for clues on how I could merge the techniques of punched jewelry with the aesthetic of the Mexican mirror. Armed with a glue stick, graph paper, a sheet of metal, and my steel punches, I got to work.

As I explored punching and texturing sheet metal, I found myself drawn to embroidery patterns. It was exciting to translate stitches traditionally made on fabric with thread to indentions on sheet metal made with steel stamps. By experimenting with these methods and ideas, changing the punched pattern and physical design, I could explore a wide range of styles. I started creating stamped patterns on metal that surprised me with their depth and interest. Every time I completed the stamping and removed the graph paper, a beautiful new one-of-a-kind pattern was revealed. The possibilities of creating geometric patterns with a cool, rustic feel seemed infinite.
THE TECHNIQUES OF THIS BOOK
One of the great things about this style of jewelry is that its based on a very simple technique. After you gain familiarity with a few simple tools and materials and read ), youll be ready to start experimenting with creating designswhether you follow the templates provided at the back of the book or choose to create your own personal designs.
), introduces other basic jewelry-making methods, so you can start creating more layered designs. The techniques include riveting, shaping, sawing, and hole punching. Theyre simple enough for anyone to learn, and they open up a world of possibility as you follow the project instructions in this book and later begin to design your own patterns.
Following those chapters, youll find twenty one-of-a-kind jewelry projectsbracelets, earrings, rings, necklaces, charms, and findingsfor you to create using the new skills youve learned. Patterns are provided so you can re-create the intricate overall designs used in the projects.
All of the projects in this book can be made using commercially available steel punches.
In the end, youll have the joy and satisfaction of making and wearing beautifully made punched jewelry pieceshandcrafted by you! So lets get started.
DIFFICULTY LEVELS
 BEGINNER
Any level of jewelry maker can feel comfortable with this level of project. Some of the techniques covered at this level are: shaping, punching holes, and adding a patina to your finished work.
 INTERMEDIATE
Once you have a few basic techniques under your belt youre ready for the intermediate-level projects. These projects will introduce you to riveting and take you further into shaping techniques and cutting with shears.
 ADVANCED
These are projects that have many different techniques in one design, including riveting and sawing.
CHAPTER 1
TOOLS &
MATERIALS
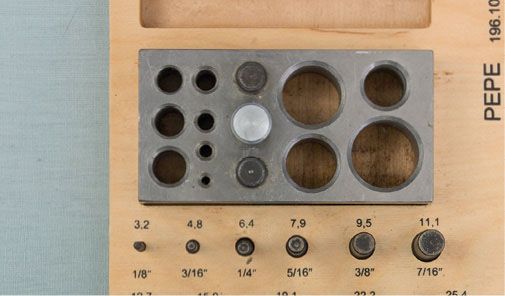
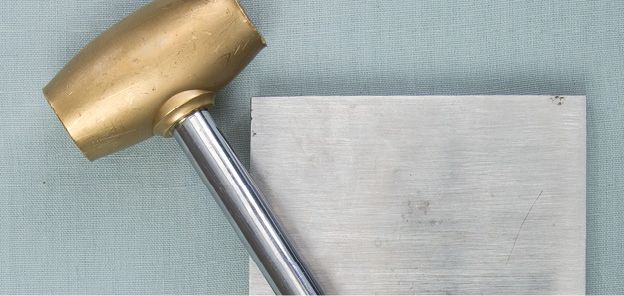
The tools I list in this chapter are all you need for a full-fledged cold-connection jewelry studio. Heres my advice to those of you who are just starting out:
- Pick and choose what you invest in by choosing a handful of techniques you would like to learn first. This way, your initial investment wont be as large, and you can add as you advance in your learning.
- Alternatively, or in addition to the above, after you learn the basics of the punching technique (see and the tools listed in this chapter), you can simply choose one of the many beginner-level projects in this book and acquire the tools and skills needed for it. Slow and steady wins the race. Soon enough youll have worked through all twenty projects, from beginner to advanced, and youll have a full library of tools at your disposal!
KNOW BEFORE YOU GO
The beginning of each project lists the materials, tools, and techniques that are required for it, so there are no surprises! Each project also lists a skill level to guide you: Beginner, Intermediate, or Advanced (see for the skills required for each level).
THE BASIC TOOLS FOR PUNCHING
These are core tools youll need if youre interested in achieving the effects of the punched metal pieces in this book but have less of an interest in cutting, forming, and shaping metal. You can easily create your own designs, and some variations on these designs, using precut blank metal shapes available at craft and bead stores.
STEEL STAMPS
Decorative stamps made of steel are used to create impressions in metal. For most of the patterns in this book, youll be making textured patterns using stamps that create impressions of dashes, curves, dots, and other shapes, combining them in interesting ways.




 BEGINNER
 INTERMEDIATE
 ADVANCED

