Check Out The Rest of
The Just Do Yoga Series!



Contents
FLAT TUMMY, HERE I COME!
Flat stomachs are one of the many side effects of yoga. Of course just rolling out your mat and laying in everyones favorite pose, Savasana, at the end of class isnt going to magically give you a tight tummy. So how does yoga do it?
First of all, not all yoga classes will be able to boast the ability to shrink bellies and tighten abs. The class must incorporate three very important things. First, you have to be able to work up a sweat, burn calories through cardiovascular work. If your heart rate doesnt increase while practicing yoga, you wont benefit from a lean middle. Second, core-strengthening exercises that work all of the abdominal muscles must be included. In order to really flatten your tummy, you must work all sections of your core, not just the superficial muscles in the center that are targeted by doing set after set of sit-ups and crunches. A lot of people never get the results they want not because they cant, but simply because they are doing the wrong type of exercises. Lastly, the class must also strengthen the back. If the back is weak, the core wont be able to strengthen and flatten the front of the body needs the back of the body in order to see results.
One of the awesome aspects of yoga is that, when done correctly, nearly every pose works to strengthen and tone the core. For example, balancing poses make the core work to keep your center of gravity. Forward folds are great for toning the stomach so long as the navel is sucked in towards the spine and then up under the ribcage this is so often overlooked, but is one of the best ways to flatten your tummy! Backbends help to lengthen the abdominal muscles, giving you a look that is long and lean. On top of all of that, there are some amazing poses in yoga that do an excellent job in strengthening the core and in ways that target crucial muscles that are often neglected in regular ab-workout routines.
I gave birth to my son just five months ago and with nothing but lots of yoga, I was able to get my flat tummy back! It really does work!
With consistency and effort, a flat tummy is yours for the taking! And the best part is that you can honestly do it all right from your own living room, with nothing more than a yoga mat and the following sequences.
XOXO
Julie

FLAT TUMMY YOGA FLOW BURN CALORIES
Benefits: This sequence should be repeated as many times as possible or until you are able to increase your heart rate and work up a bit of a sweat. Burning calories through cardiovascular exercise is one of the keys to getting a flat tummy no one can see how strong your stomach is if you have a bit too much around the middle! The goal should be to work your way up to doing 10 to 12 of these flows each day.
As you flow from one pose to the next, remember to keep the core engaged pulling the navel up and in on folds and then using its strength to transition from one to the next. Use the breath to guide you, moving with each inhalation and exhalation. The goal should be to eventually move quickly through the poses. However, feel free to hold a pose longer if it feels good or if you need a little breather.
If jumping back and forward (as shown in the video) is too much for right now, simply step back and forth instead.
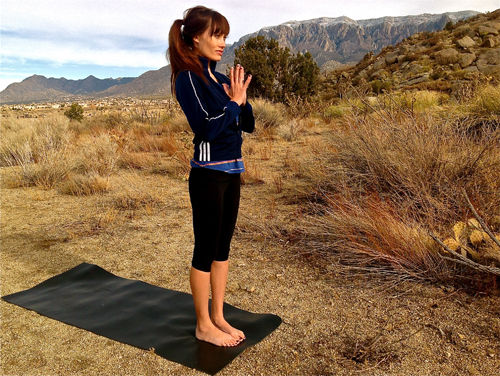
1. Tadasana with Anjali Mudra
(Mountain Pose with Offering Seal)
Stand at the top of your mat with your hands in Anjali Mudra (palms pressing together at heart center). Feel your feet ground down, balancing the weight of your body through all four corners. It should feel like you are actually pressing the ground away from you. Lengthen both sides of the ankles and gently engage the muscles of the thighs by lifting the kneecaps. Roll the inner thighs back to help create more space in your lower back. Scoop the tailbone down and under to help the spine curve naturally, protecting the lower back from over arching. Feel the vertebrae of the spine naturally stack on top of each other as you lengthen your back by feeling as if someone is pulling you straight up by a string attached to the top of your head. Keep your chin parallel to the ground and the neck long on all four sides.
As you breathe in this pose, feel free to shut your eyes, working on maintaining your center of gravity. Stay in this pose for as long as youd like theres a lot of benefit to learning how to stand properly!
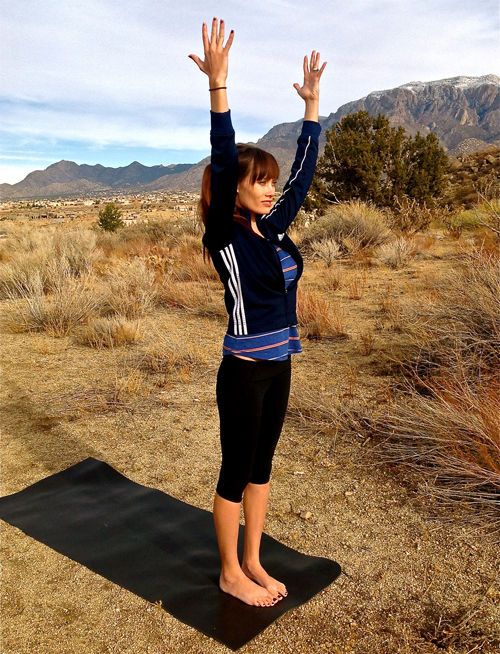
2. Urdhva Hastasana
(Upward Salute)
Inhale, bring your hands overhead, keeping the shoulders relaxed and bringing your gaze up. Try to keep the same alignment from Tadasana its harder when you extend your arms so really pay attention to your hips and lower back. Allow the chest to open and expand evenly across the collarbones and shoulder blades as you feel a gentle stretch through the shoulders.
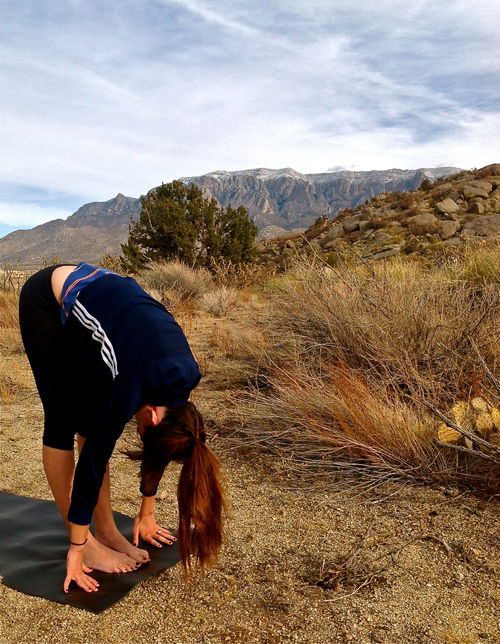
3. Uttanasana
(Standing Forward Bend Image)
Exhale, bending from the hips, bring the hands down to the ground. If your hands do not touch, allow them to rest on your shins or thighs. Allow the head to be heavy so that your neck can relax and lengthen. Keep the legs strong and engaged by pulling the kneecaps up. To more effectively perform this pose, pull the lower abdomen up and in. The spine should feel like it is lengthening as you continue to get deeper and deeper into the fold.


