INTRODUCTION
1. Difference Between Life and Cast Drawing. No one should undertake to make finished drawings from a living model without having first had considerable practice in drawing from the plaster cast. There is no harm, however, in making sketches from the figure that require no longer than 15 or 20 minutes time, if full and proper attention be given to the direction of the lines and the position of the masses. But the student must be familiar with the form of the different parts of the body as they appear in the plaster cast before he can successfully draw from the living model. No matter how steady it may be, the living model will unconsciously change its posture under growing fatigue, and unless familiar with form and construction the student will draw one part of the figure as it first appears and another part as it appears after the model has sagged from fatigue. In drawing from the cast, the main forms and proportions should be closely studied in order that the human form will be so impressed on his mind that the student can rapidly sketch the whole figure before exhaustion has set in, and can promptly detect and eliminate errors in his own work owing to changes in the pose of the model.
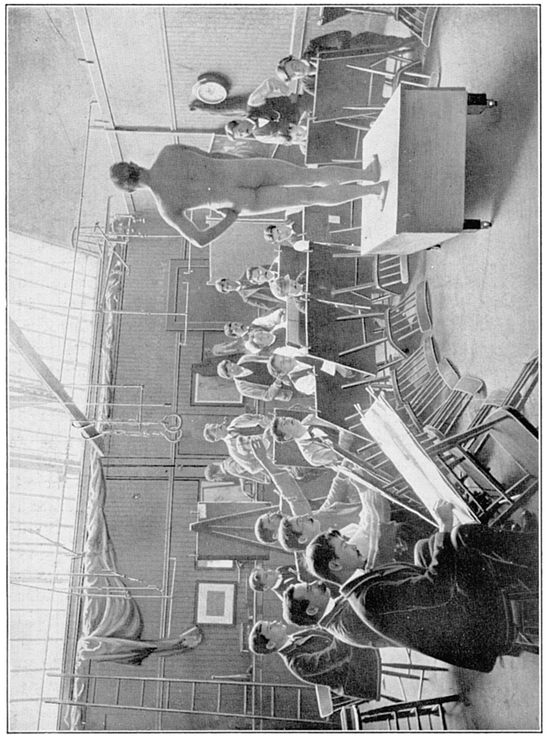
2. Posing the Model. For general practice it is usually better to have the model elevated somewhat from the eye. To accomplish this the model should stand on a box or platform, while the effect of elevation may be still further increased by the student working in a sitting posture as low as possible. A convenient easel can be made by inverting an ordinary kitchen chair, as shown in , which is a photograph of the life class of the Art Students League, of New York, and their usual method of working. The drawing board can thus be laid at a convenient angle upon the rounds of the chair, and at the same time the student can plainly see the model.
MATERIALS USED
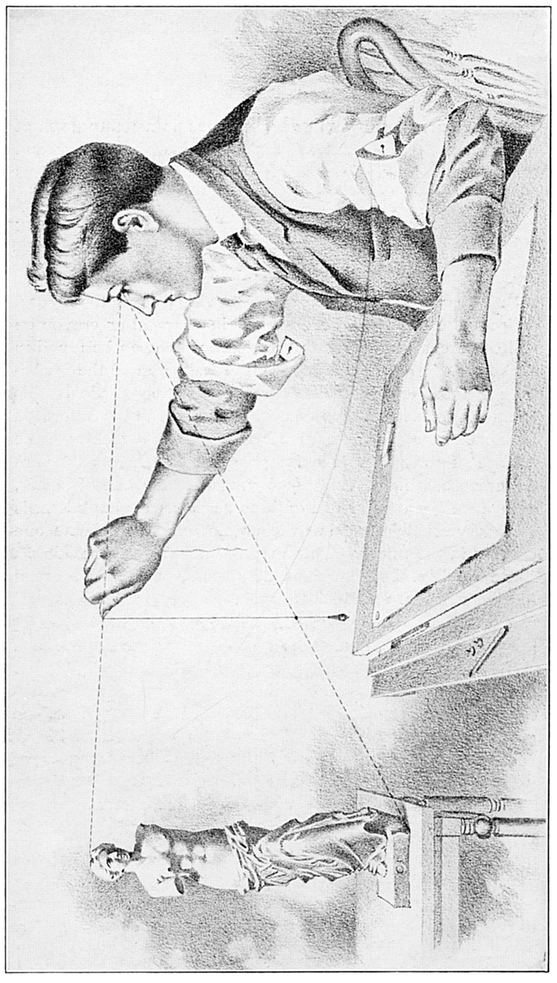
3. Crayons and Papers .Drawings from the figure, as from the cast, may be executed in charcoal or crayon on white charcoal paper, many brands of which can be found in art stores. Two popular brands, the Lalanne and the Michelet, are imported, while the Strathmore paper made in this country is considered quite as good. Errors may be erased by means of a piece of fresh rye bread, as this leaves the surface of the paper in quite as good condition as before the erasure, whereas rubber roughens it. A piece of string, with a weight on the end of it to serve as a plumb-line, is very serviceable in noting the points that fall beneath one another in the figure. This may be held before the eye, as shown in , and various details may be thus recorded to give points from which to work.

4. Stomps .Where a fine finish is required to the drawing, a pulverized sauce crayon is laid on with small paper stomps , , which consist of rolls of cartridge paper of various proportions from the size of an ordinary brush handle to the thickness of the forefinger. From this size, however, to the largest ones they are usually made of chamois leather. For charcoal work it is best not to use the stomp, as it is more convenient for blocking out and general modeling, but for close modeling , as delicate finishing is termed, the lines may be blended into tints by touching them with the stomp, or it may be dipped in the pulverized sauce crayon as one would dip a brush in color and the tints laid on directly with it. In working, one needs a small piece of sandpaper to keep the crayon pointed, and an easel on which the board can rest.
LAYING IN THE FIGURE
5. Blocking in .The first blocking in of the general form of the figure is called laying in, and it should cover the whole length of the paper. The reason for this is that when one is required to make compositions either for decorative work or for illustration, each figure must fill a certain space, so that by becoming accustomed to proportioning the size of the drawing to the space it is to fill no difficulty is met with in future work.
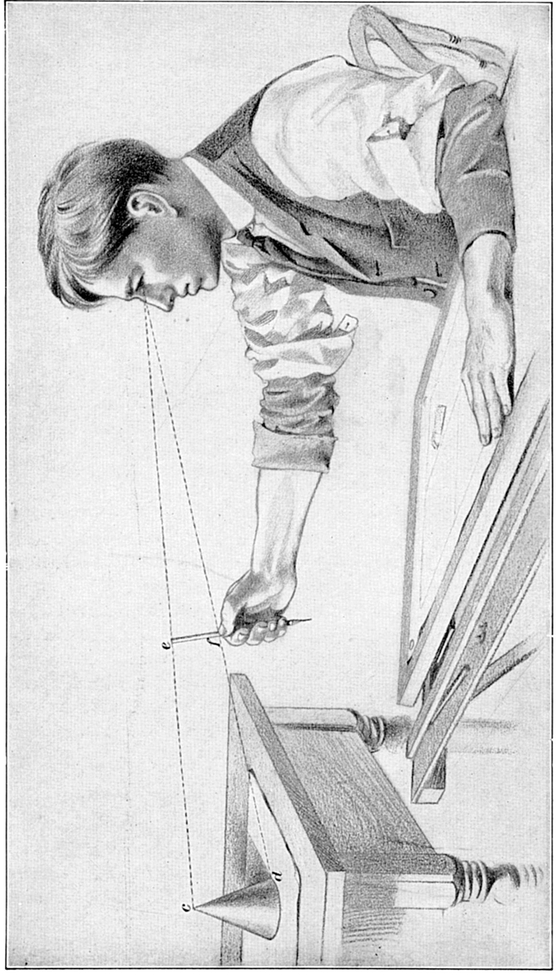
6. Unit of Measurement .The head, from the chin to the crown, is commonly used as a unit of measurement, each figure being considered as so many heads high. A pencil held upright at arms length may be used in estimating the proportions and distances for different parts of the figure, as shown in . In this way it is possible to locate almost exactly the position of each detail of the figure before the main structural lines are boldly drawn in. With the plumb-line to locate points that fall beneath one another and the pencil as a scale for measuring, one can readily locate all the main features with exactness.
The first measurement to take is the height of the head, and with that as a unit, measure the number of heads in length each portion of the body appears to be. The standard human figure is assumed to be eight heads high; that is to say, a man standing 6 feet in height should have a head very close to 9 inches in height. The female head, however, is larger in proportion to the height than the male, and the average woman stands seven and one-half heads high. However, various exceptions to these measurements are found in every-day practice, as will be pointed out as we proceed.
7. Action .In viewing the figure, the first thing to consider is the action, by which is meant the general trend of the main lines. By these main lines alone it is possible to express the entire intention and purpose of the figure. One readily sees that a man running leans forward, that a man pulling on a rope and bracing himself leans backward, and that a man standing in conversation usually rests on one foot so that the main lines of the body are perpendicular. The direction of these lines expresses the action of the figure and should always be considered first. This combined with the proportion of the main forms gives a solid ground on which to proceed with the work.
The lines indicating action and proportion should be marked by definite points of start and finish, and should be drawn in boldly without any attempt to closely follow the general contour. By definite points are meant the shoulders, hips, knees, ankles, etc., which, being located by means of the pencil measurement lines, can be drawn from them in bold sweeps giving the outlines of the main construction. These lines will give the action; the lines of proportion can be worked over them. By combining these the first necessary steps in the drawing of a well-constructed figure are taken. In drawing the arm, work from the point of the shoulder to the elbow, from the elbow to the wrist, and from the wrist to the tips of the fingers; this will give to each form its proper allowance of space and distance, and the subtle curvature of line that must afterwards be expressed is built up on it, but should never be attempted until the first crude drawing is satisfactory and as nearly correct as possible.


