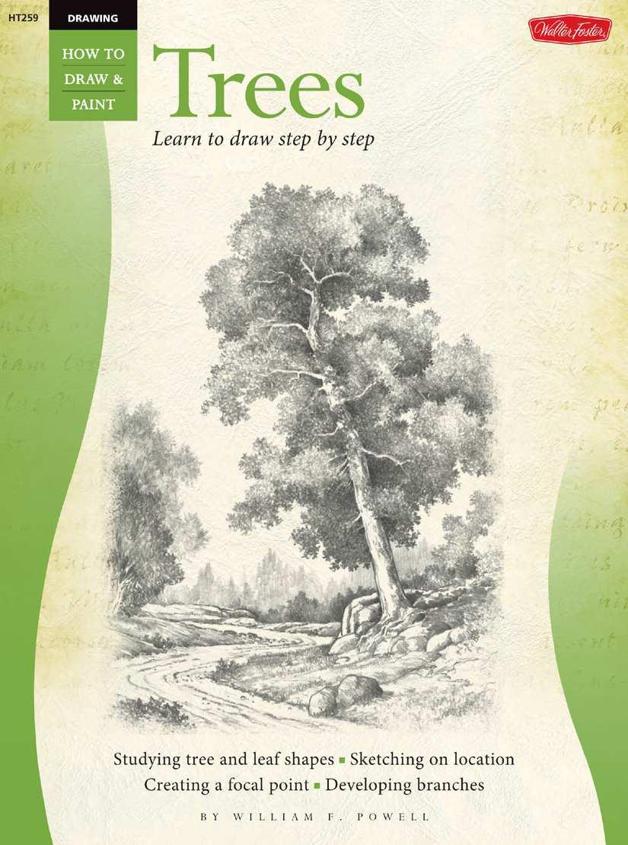
William F. Powell - Drawing: Trees
Here you can read online William F. Powell - Drawing: Trees full text of the book (entire story) in english for free. Download pdf and epub, get meaning, cover and reviews about this ebook. year: 2010, publisher: Walter Foster Publishing, genre: Art / Computer. Description of the work, (preface) as well as reviews are available. Best literature library LitArk.com created for fans of good reading and offers a wide selection of genres:
Romance novel
Science fiction
Adventure
Detective
Science
History
Home and family
Prose
Art
Politics
Computer
Non-fiction
Religion
Business
Children
Humor
Choose a favorite category and find really read worthwhile books. Enjoy immersion in the world of imagination, feel the emotions of the characters or learn something new for yourself, make an fascinating discovery.
- Book:Drawing: Trees
- Author:
- Publisher:Walter Foster Publishing
- Genre:
- Year:2010
- Rating:5 / 5
- Favourites:Add to favourites
- Your mark:
Drawing: Trees: summary, description and annotation
We offer to read an annotation, description, summary or preface (depends on what the author of the book "Drawing: Trees" wrote himself). If you haven't found the necessary information about the book — write in the comments, we will try to find it.
In this book, William F. Powell invites you into his artistic world as he shows you how to render a variety of beautiful trees in pencil. The author explains a number of basic drawing techniques before exploring basic tree shapes and leaf types. As you learn how to draw branches, bark, and ground foliage, step by step, youll also discover important tips about shading, creating textures, setting up compositions, and applying perspectivehelping you develop your own tree drawings to their fullest potential. Helpful examples and essential information make this comprehensive guide a valuable addition to any artists drawing library!
William F. Powell: author's other books
Who wrote Drawing: Trees? Find out the surname, the name of the author of the book and a list of all author's works by series.


Drawing: Trees — read online for free the complete book (whole text) full work
Below is the text of the book, divided by pages. System saving the place of the last page read, allows you to conveniently read the book "Drawing: Trees" online for free, without having to search again every time where you left off. Put a bookmark, and you can go to the page where you finished reading at any time.
Font size:
Interval:
Bookmark:

The qualities we most admire in trees are also what we value in ourselves or other peoplestrength, dignity, and perseverance. Perhaps this is why were naturally drawn to them as artistic subjects. And because trees are everywhere, there are always plenty of available subjects to draw. From the initial blocking in of basic shapes to the addition of final details, this book teaches the step-by-step process of drawing a wide variety of trees. Youll also learn about basic tree shapes and leaf types, as well as the fundamentals of shading, composition, and perspective. Inside youll find tips on drawing root patterns, branches, barkeven fallen treesand simple techniques for rendering cast shadows and ground foliage. With just a little practice, youll soon be creating many different types of trees, each with its own unique qualities and elegance.

D rawing is just like writing your name. You use lines to make shapes. In the art of drawing, you carry it a bit further, using shading techniques to create the illusion of three-dimensional form.
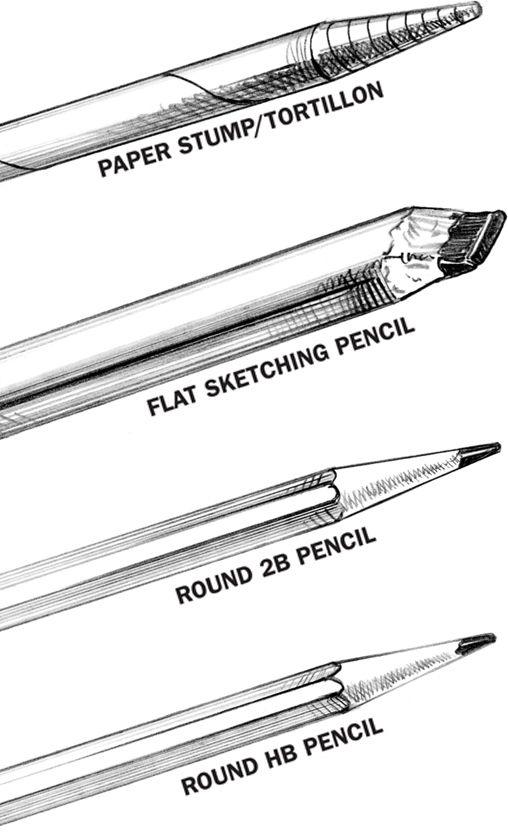
Only a few basic tools are needed to draw. All the tools necessary to create the drawings in this book are shown here.
Pencils come in varying degrees of lead, from very soft to hard (e.g., 6B, 4B, 2B, and HB, respectively). Harder leads create lighter lines and are used to make preliminary sketches. Softer leads are usually used for shading.
Flat sketching pencils are very helpful; they can create wide or thin lines and even dots. Find one with a B lead, the degree of softness between HB and 2B.
Although pencil is the primary tool used for drawing, dont limit yourself. Try using charcoal, colored pencils, crayons, and pastelsthey can add color and dimension to your work.
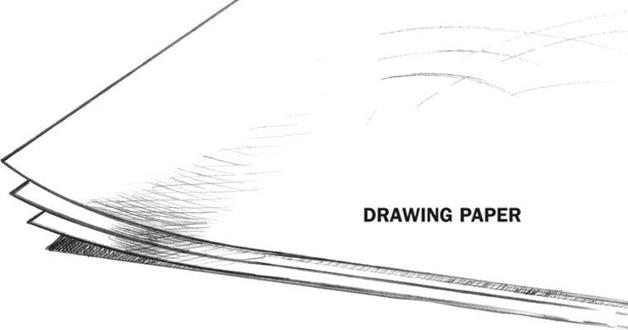
There are many types of paper that vary according to color, thickness, and surface quality (e.g., smooth or rough). Use a sketch pad or inexpensive bond paper for practice. For finer renderings, try illustration or bristol board. Bristol board is available in plate finish, which is smooth, or vellum finish, which has more tooth. As you become more comfortable with drawing techniques, experiment with better quality paper to see how it affects your work.
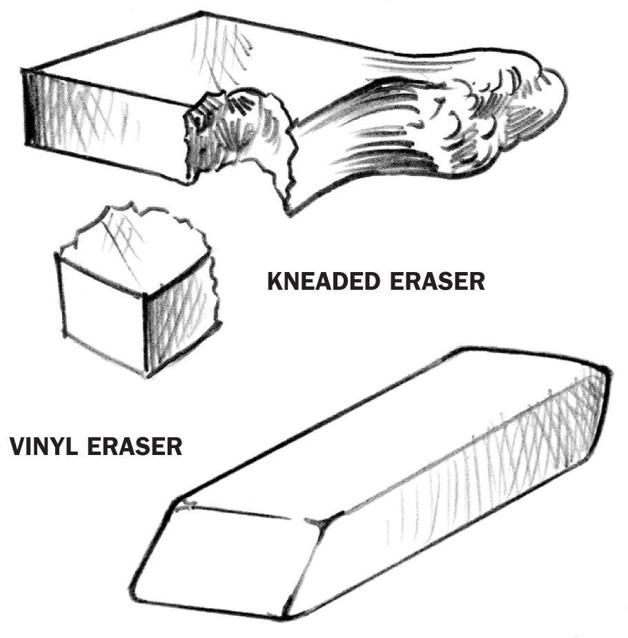
Erasers not only help correct mistakes but also are fine drawing tools. Choose from several types: kneaded, vinyl, gum, or rubber, depending on how you want to use the eraser. For example, you can mold a kneaded eraser into a point or break off smaller pieces to lift out highlights or create texture. A gum or rubber eraser works well for large areas.
You should have a paper stump (also known as a tortillon) for creating textures and blends. The paper stump enhances certain effects and, once covered with lead, can be used to draw smeared lines.
To conserve lead, purchase a sandpaper pad to sharpen the point without wearing down the pencil. You may also want to buy a regular hand-held pencil sharpener and a metal ruler. Finally, a sturdy drawing board provides a stable surface for your drawings.

Before beginning to draw, set up a spacious work area that has plenty of natural light. Make sure all the tools and materials are easily accessible from where youre sitting. Because you might be sitting for hours at a time, find a comfortable chair.
Tape the corners of the paper to the drawing board or surface to prevent it from moving while you work. Use a ruler to make a light border around the edge of the paper; this will help you use the space on your paper wisely, especially if you want to frame or mat the finished product.
S hading enables you to transform mere lines and shapes in your drawing into three-dimensional objects. As you read this book, note how the words shape and form are used. Shape refers to the actual outline of an object, while form refers to its three-dimensional appearance. In the examples below, notice how shading builds up the object, creating the illusion of depth.
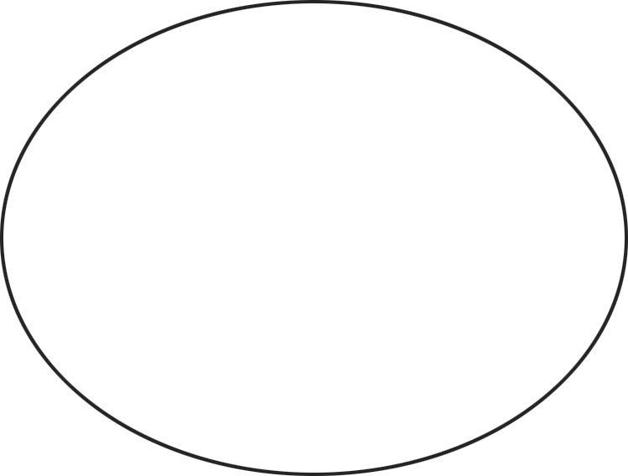
This is an oval shape.
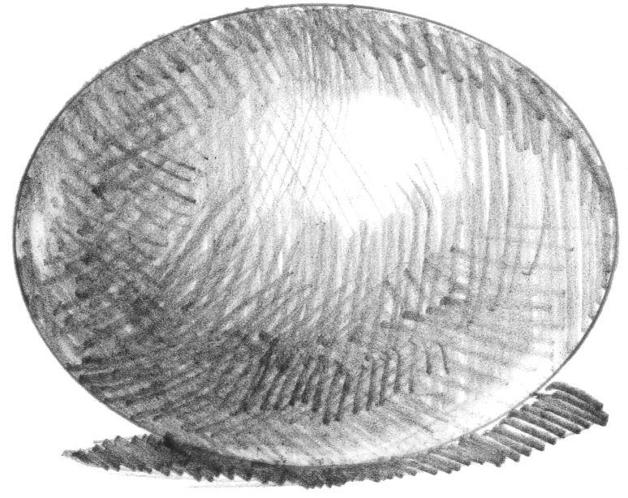
This has a three-dimensional, ball-like form.
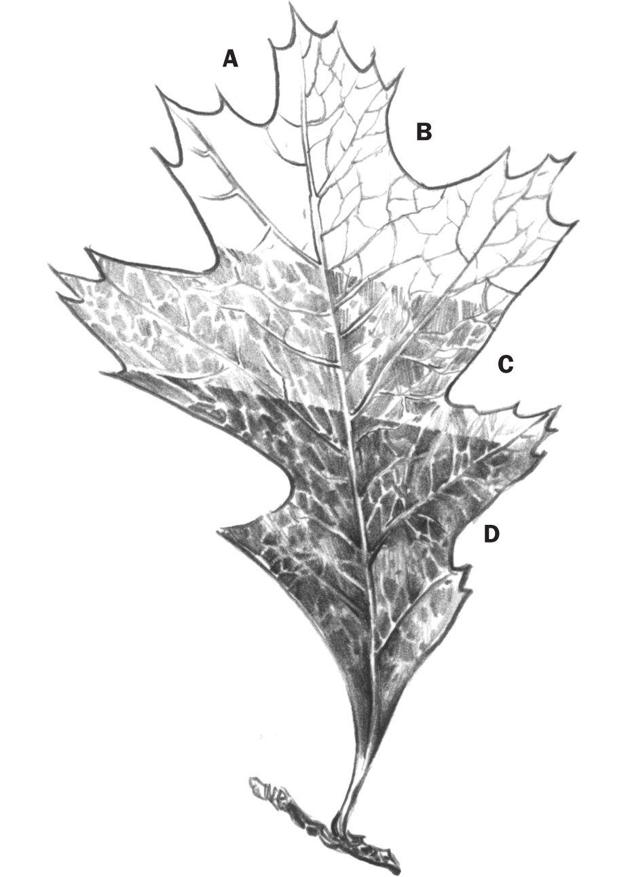
(A) Begin by drawing the basic leaf shape and vein pattern using a pointed HB pencil. (B) Add more vein pattern. (C) Begin middle-value shading using the side of the lead. To create the vein patterns, leave areas clean or use a kneaded eraser to lift out the highlights. (D) Add darker shading using the point of a 2B pencil. Develop surface textures and detail.
Round pencils can be used with sharp, chiseled, and blunt points, and several techniques can be combined on one surface. The paper stump is used to smear the lead, making a blend softer. Experiment to see what kinds of textures you can create on your own.
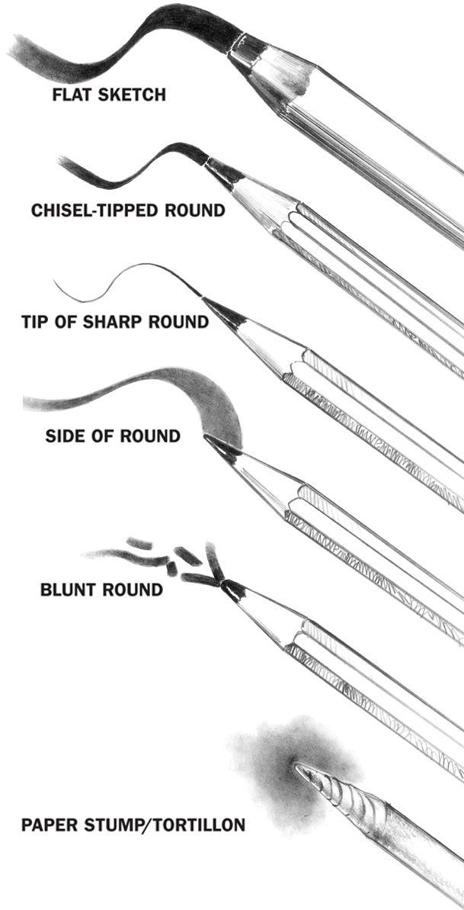
Notice the different kind of line each type of drawing tool creates.
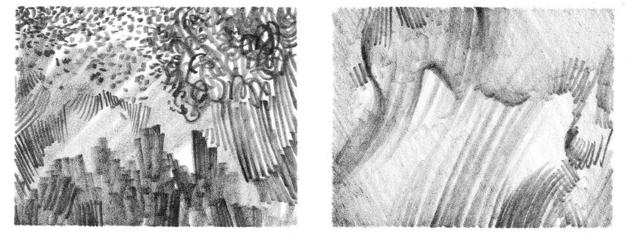
Make patterns such as the ones above using the side, blunt tip, and sharpened point of an HB pencil. Shade backgrounds first; then draw patterns over them. Pressing harder creates darker effects.
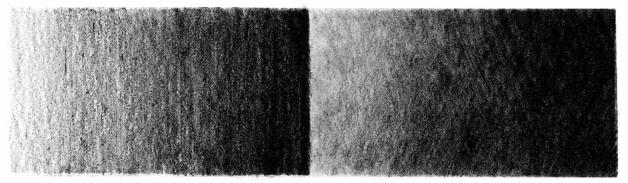
Gradual blends (above) can be created using the side of a 2B pencil. Shade in one direction to make the vertical finish on the left. On the right, see that two blend angles produce a smoother finish. Start lightly and increase pressure as you work toward the right.
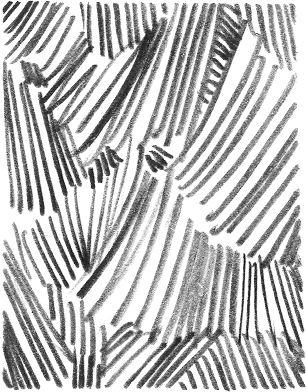
Use a sharp-pointed HB pencil to draw this line pattern.
Font size:
Interval:
Bookmark:
Similar books «Drawing: Trees»
Look at similar books to Drawing: Trees. We have selected literature similar in name and meaning in the hope of providing readers with more options to find new, interesting, not yet read works.
Discussion, reviews of the book Drawing: Trees and just readers' own opinions. Leave your comments, write what you think about the work, its meaning or the main characters. Specify what exactly you liked and what you didn't like, and why you think so.