Samantha Rosinski - 20 minute crafts for kids
Here you can read online Samantha Rosinski - 20 minute crafts for kids full text of the book (entire story) in english for free. Download pdf and epub, get meaning, cover and reviews about this ebook. year: 2015, publisher: Samantha Rosinski, genre: Children. Description of the work, (preface) as well as reviews are available. Best literature library LitArk.com created for fans of good reading and offers a wide selection of genres:
Romance novel
Science fiction
Adventure
Detective
Science
History
Home and family
Prose
Art
Politics
Computer
Non-fiction
Religion
Business
Children
Humor
Choose a favorite category and find really read worthwhile books. Enjoy immersion in the world of imagination, feel the emotions of the characters or learn something new for yourself, make an fascinating discovery.
- Book:20 minute crafts for kids
- Author:
- Publisher:Samantha Rosinski
- Genre:
- Year:2015
- Rating:5 / 5
- Favourites:Add to favourites
- Your mark:
20 minute crafts for kids: summary, description and annotation
We offer to read an annotation, description, summary or preface (depends on what the author of the book "20 minute crafts for kids" wrote himself). If you haven't found the necessary information about the book — write in the comments, we will try to find it.
Samantha Rosinski: author's other books
Who wrote 20 minute crafts for kids? Find out the surname, the name of the author of the book and a list of all author's works by series.


20 minute crafts for kids — read online for free the complete book (whole text) full work
Below is the text of the book, divided by pages. System saving the place of the last page read, allows you to conveniently read the book "20 minute crafts for kids" online for free, without having to search again every time where you left off. Put a bookmark, and you can go to the page where you finished reading at any time.
Font size:
Interval:
Bookmark:
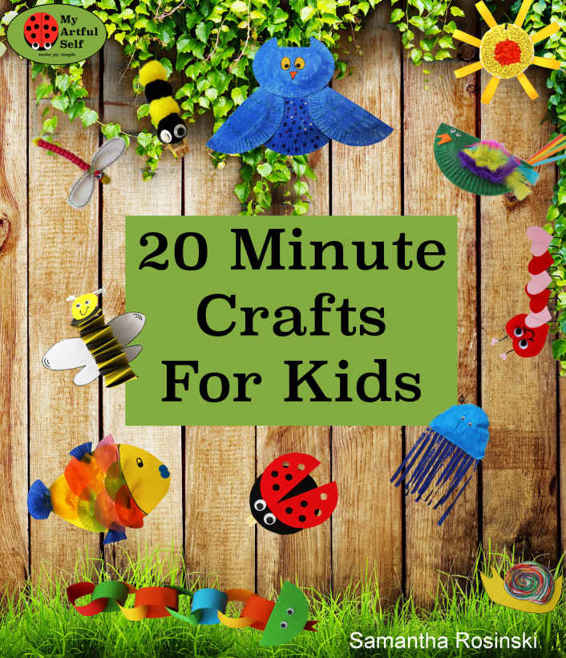
You are creating the conditions for a joyful learning experience for both of you. I hope you find the experience a joy. We have summarised our favorite art activities in this publication so that you can have some ideas readily at hand. We aim to take a little of the frustration and fear out of getting started with doing art with children. The key is to take action with some simple projects to get some early success that will snowball for both you and your child. This is why we have chosen the tag line Make Joy Simple and the Ladybug for our logo.
We produce a weekly newsletter with simple instructions for art projects you can do with your kids. You can sign up to receive these emails at myartfulself.com Samantha Rosinski has 15 years experience in Primary School Teaching in Australia. She has current memberships in the Queensland and New South Wales Teachers Associations and is the editor and co-creator of myartfulself.com, a source of ideas for simple kids crafts. Matt Rosinski is the engineer and co-creator of the myartfulself.com website. He has a PhD in chemical engineering and is a former Harvard Medical School postdoctoral fellow and University of Wyoming lecturer.
Here we are making some aeroplanes using felt strips, pegs and glue. Make several planes, paint them in different colours and hang them up as a mobile! Give yourself the gift of creating moments of joy with your child on a daily basis. 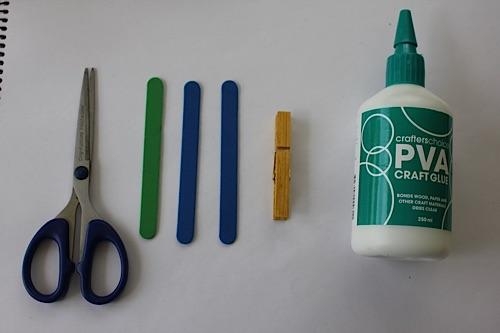 Materials: 1 peg, 3 foam strips, PVA glue, scissors
 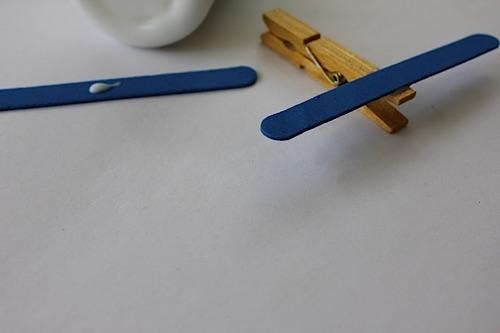 Step 1. Paint or colour the peg if desired. Glue two felt strips onto either side of the peg for a biplane wing effect.
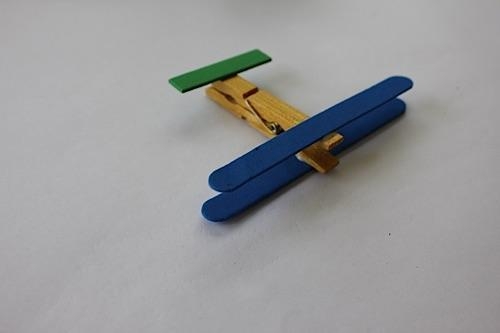

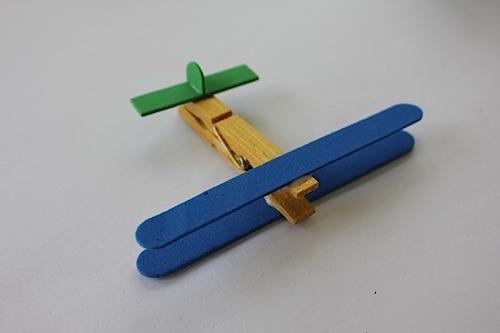 Step 3: Glue on the tail piece then use a short rounded piece to form the rudder.
Watch their faces light up after they see the results of their creations. They wont be able to wait for the next celebration to help decorate the house with these easy streamers. 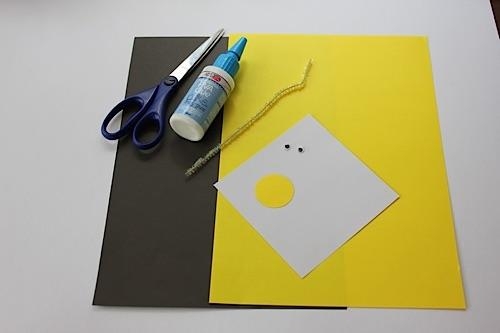 Materials: Yellow and black paper, small circle of yellow card, one small piece of white paper, two joggle eyes, small piece of glitter pipe cleaner, scissors, PVA glue.
 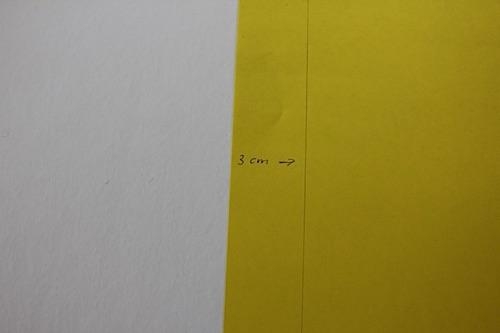 Step 1: Measure 2 strips of yellow and black A4 paper (approx 3cm wide)
 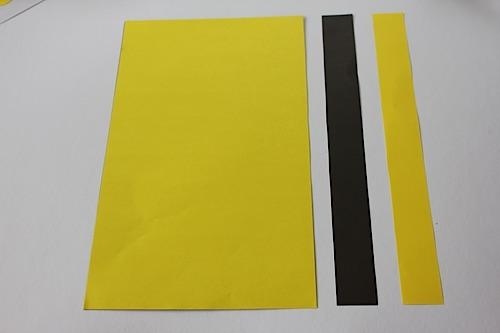 Step 2: Cut out a strip of black and yellow paper 3cm wide.
 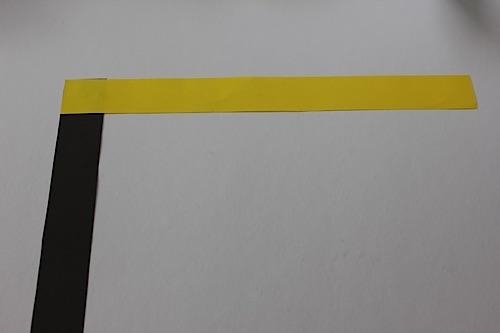 Step 3: Place the two strips in an upside down L shape and glue the ends together.
 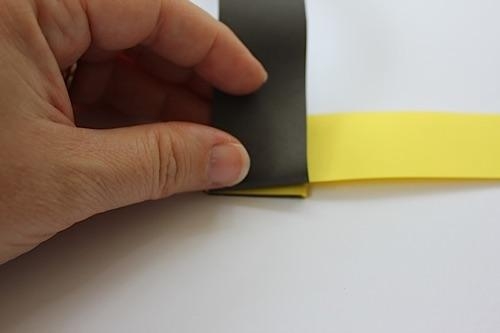 Step 5: Keep folding to the end of the strips.
 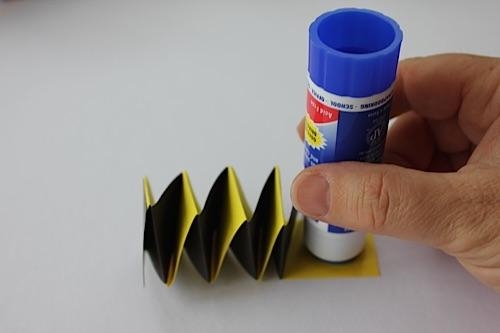 Step 6: Glue the ends of strips together. Step 6: Glue the ends of strips together.
Add more paper if you want a longer body. Trim off any excess paper. 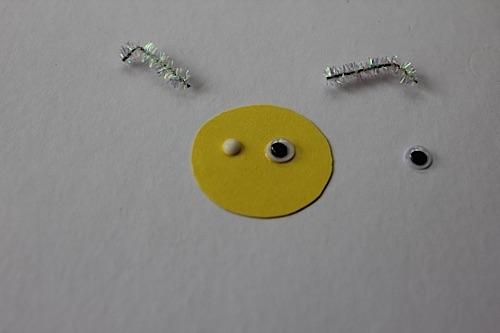 Step 7: Create the head of the bee using a round piece of yellow card, glue on joggle eyes and pieces of pipe cleaner for antennae. Take the yellow circle of card and glue eyes. After eyes have dried turn head over, cut pipe cleaner into 2 small pieces.
 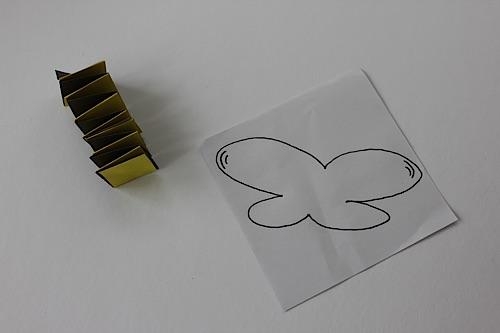 Step 8: Draw a set of wings on the white paper and glue them on to the body of the bee.
 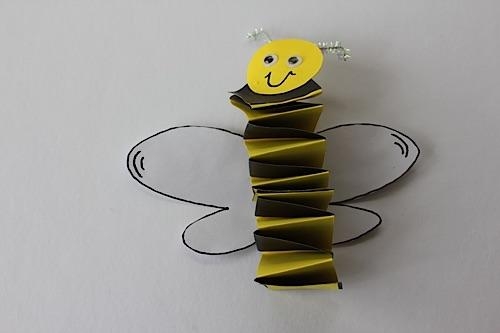 Step 9: Glue on the head and leave to dry.
Use them to tickle your toddler and let them tickle you back. Have you heard your child giggle recently? I love it! Th is art activity is suitable for children from 18 months to 7 years. 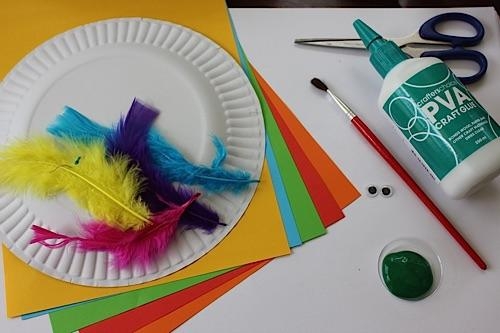 Materials: Paper plate, glue, scissors, A4 coloured paper, various coloured feathers, 2 goggle eyes, paint and brush or various coloured markers.
 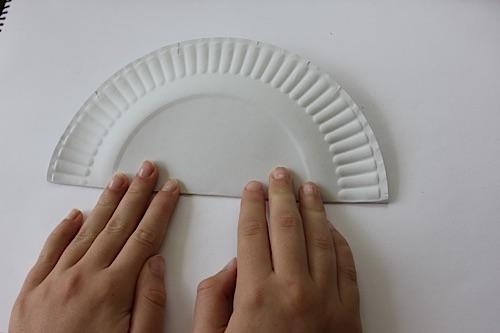 Step 1: Fold plate in half
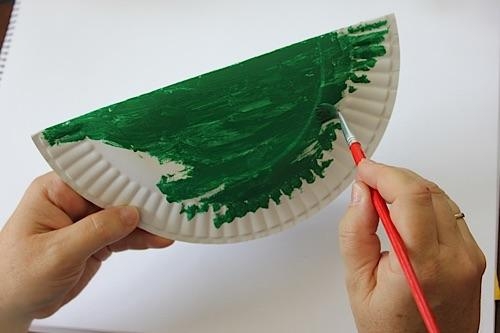
Font size:
Interval:
Bookmark:
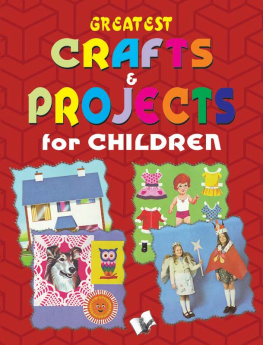
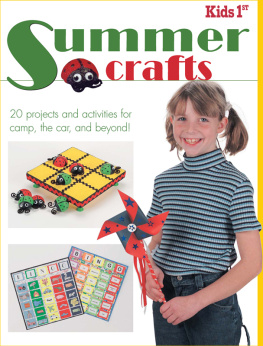
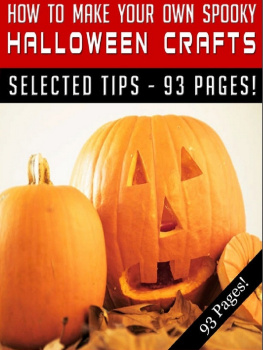
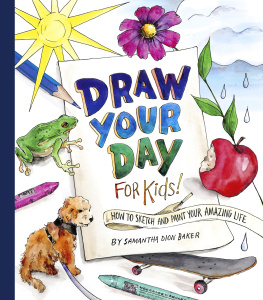
Similar books «20 minute crafts for kids»
Look at similar books to 20 minute crafts for kids. We have selected literature similar in name and meaning in the hope of providing readers with more options to find new, interesting, not yet read works.
Discussion, reviews of the book 20 minute crafts for kids and just readers' own opinions. Leave your comments, write what you think about the work, its meaning or the main characters. Specify what exactly you liked and what you didn't like, and why you think so.