
Introduction
The word kirigami comes from the Japanese kiru (to cut) and kami (paper). Paper-cutting in Japan dates from the 4th century ad, soon after the invention of paper in China. Kirigami came to be considered a serious art form in Asian culture from the 17th century onward. In Japan and China, kirigami designs were used to represent wealth, perfection, grace, elegance, and the relationship with nature and the universe. Today, kirigami art is used for greetings cards, gift wrapping, home decoration projects, wall art, and scrapbooks. Kirigami is also taught in schools as part of the curriculum, because primary symbolism is very important in Asian culture.
Kirigami gives students the opportunity to learn about the importance of Japanese culture while developing visual motor and planning skills.
Materials
Symmetry is very important in kirigami. This is evident from the designs, which tend to be the same on both sides. Kirigami deploys various folds and bases; the three bases used in this book are rectangular, square and triangular. With certain types of kirigami, you can create three-dimensional effects by cutting the design in some areas and not in others.
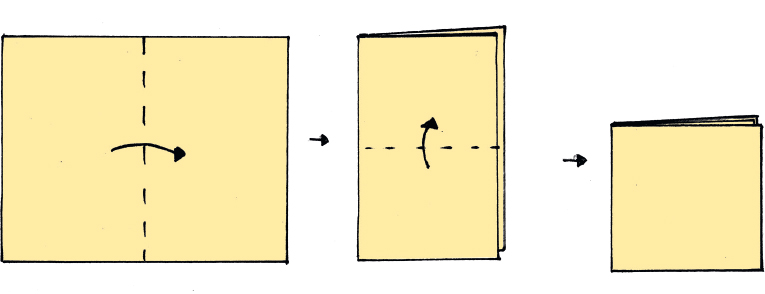 Square base
 This base consists of a vertical followed by a horizontal fold.
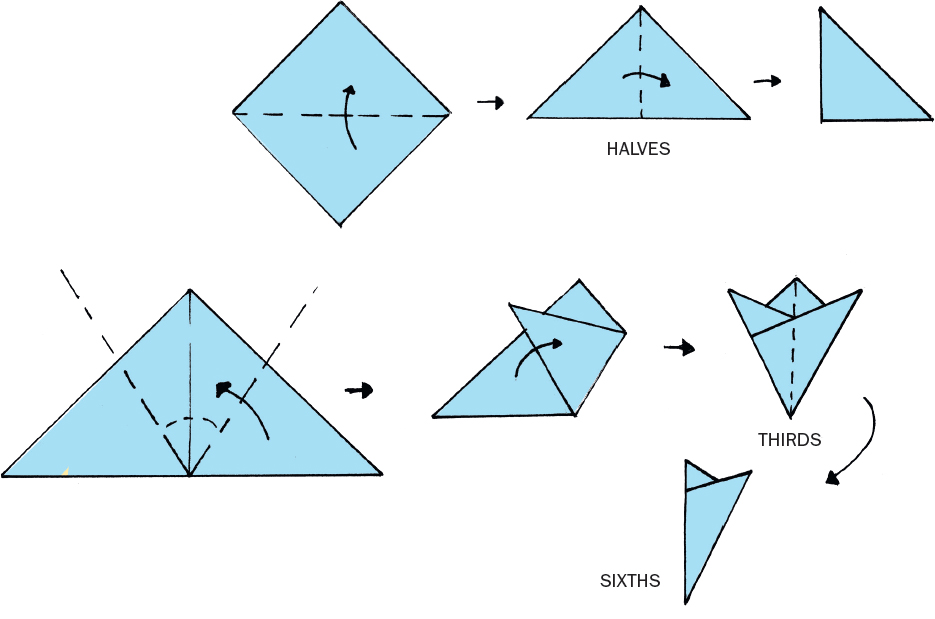 Triangular base
 To make the triangular base, fold the paper on the diagonal, then fold the resulting triangle in half.
Measure an angle of 60, then fold over the points as shown, making sure your shape is symmetrical.
 Triangular base
 To make the triangular base, fold the paper on the diagonal, then fold the resulting triangle in half.
Measure an angle of 60, then fold over the points as shown, making sure your shape is symmetrical.
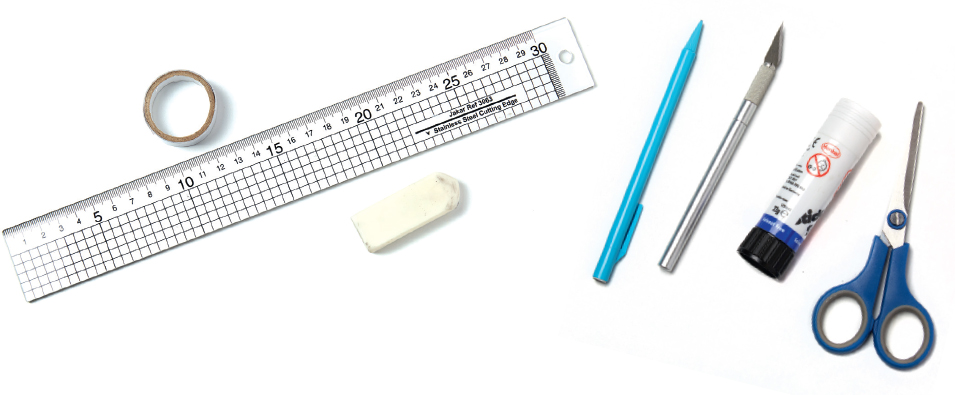
Essential materials and tools for kirigami consist of the following:
- a pencil
- paper and card
- a craft knife
- scissors
- glue stick or double-sided tape
- a cutting mat
- a ruler
- a protractor (for measuring angles)
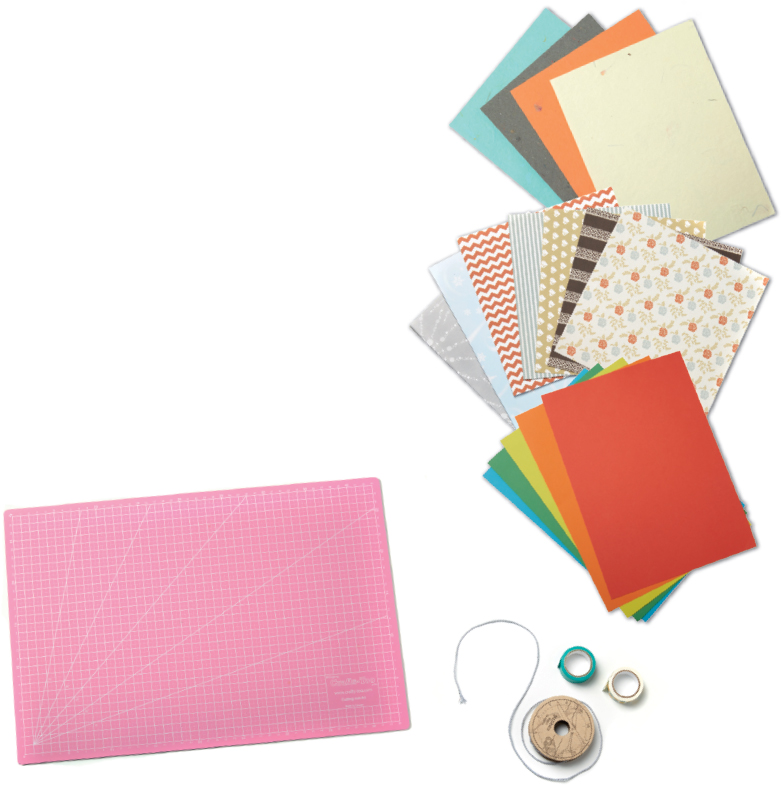
Any type of paper or card is suitable for kirigami, though thinner paper is best for projects that involve lots of folds. You can use scissors to make the cuts, but a craft knife is necessary for thicker card and internal detailed cutting. The knife needs to be sharp, so its important to use a cutting mat to protect the work space and provide a flat surface on which to do your cutting. A ruler is useful for measuring paper sizes and keeping folds in place. A glue stick or double-sided tape may be necessary for joining various paper structures and completing greetings cards.
Getting started
Creating kirigami can be confusing at first, so here are some basic steps to help you start your projects:
You can draw your design directly onto paper or print it on copy paper and tape the paper to the final card before cutting through both layers at once. Alternatively, print the design on the reverse of your final card and cut it out back to front.
2. Cut along the lines
Once youve created your design, cut it out using a craft knife or scissors.
3. Fold, display, and illuminate
When you have completed all your cuts and made your model, you can use LED lighting to illuminate the different planes of your design and turn it into an eye-catching work of art.
In order to create 3D-style kirigami, you need to be aware that everything works along a principal fold. A basic rule of 3D kirigami is shown in the diagram below, where two perpendicular vertical lines are cut across the principal fold, then the paper is folded horizontally to create a cube. 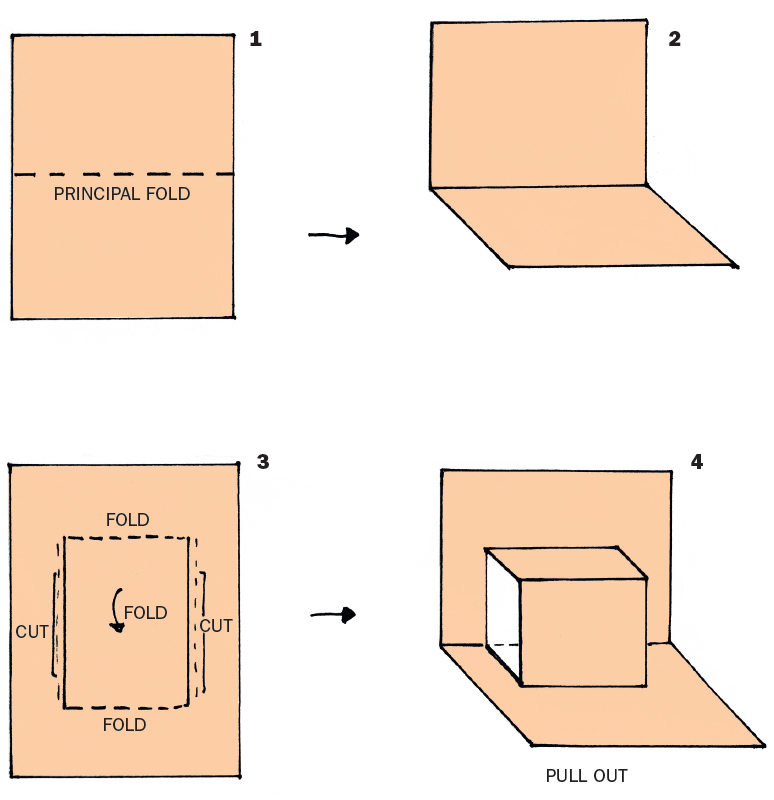
Nature and Animals
This section is inspired by the beauty of nature and features kirigami in the shape of animals, flowers and other natural forms. Some pieces are simple cut-outs while others are 3D projects.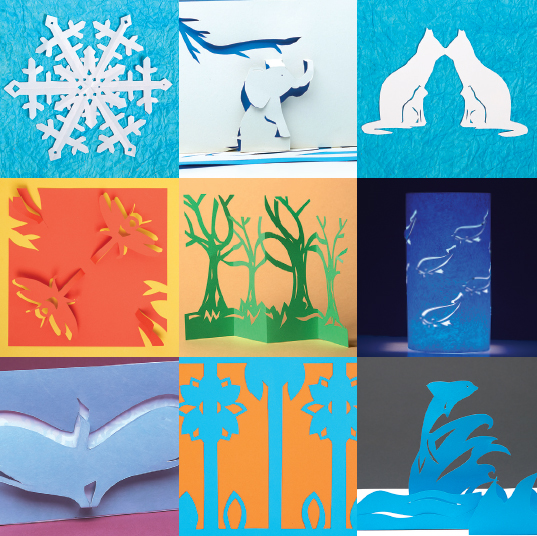
Kissing cats
This simple cut-out design includes a pair of kittens to give added interest. You can make it using colored thin card or heavy paper.
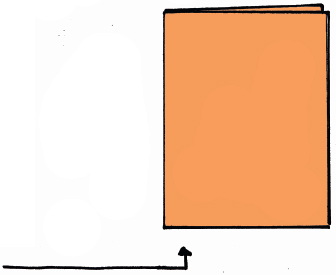
Fold the rectangle in half vertically.
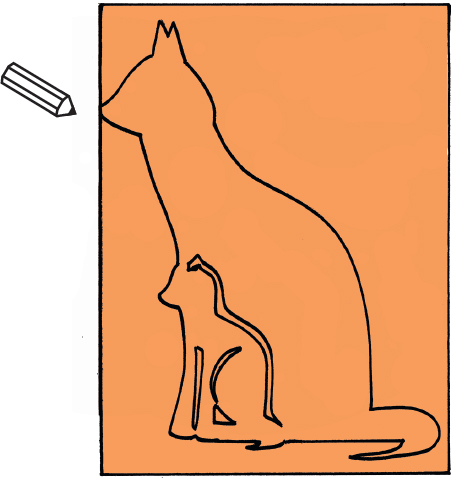
Using a pencil, draw your cat and kitten, adding the delineation of the animals forms inside the main design.
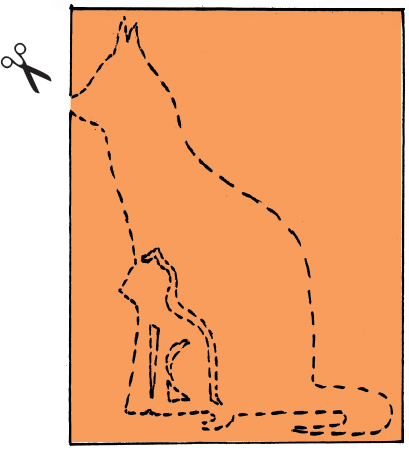
Cut along the lines, being careful not to cut where the cats nose touches the side of the card.
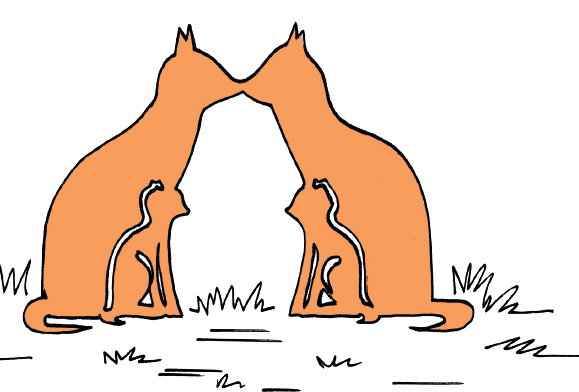
Open the card.
 You can use your final design as either a card or a decoration.
Trees
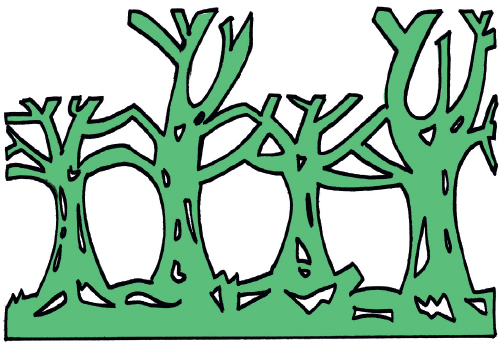
This project shows a copse of trees and stands in a zigzag pattern, like a screen.
 You can use your final design as either a card or a decoration.
Trees
This project shows a copse of trees and stands in a zigzag pattern, like a screen.
It works best against a contrasting background, with the addition of an LED light to give the effect of sunlight and shadow. 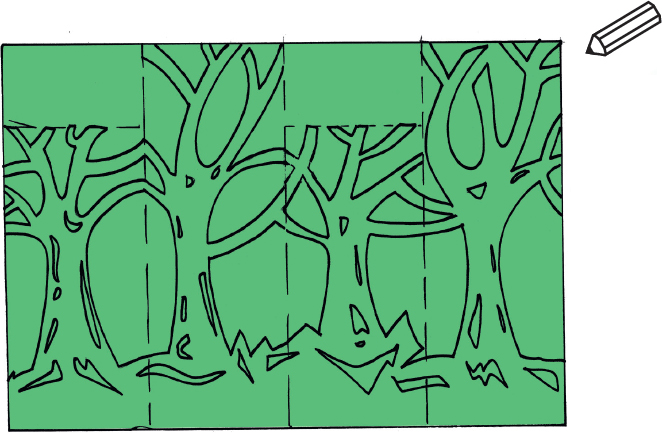 Take a piece of medium-thickness rectangular card measuring 21 x 30 cm (8 x 11 in) and section it into quarters. Draw your design of two tall trees and two shorter trees using a pencil.
 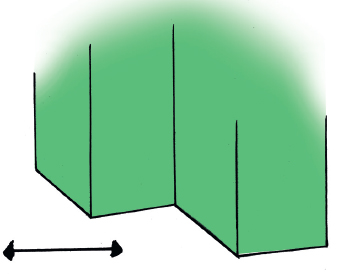 Fold the card to make the four creases and then flatten it again.
Next page



 Square base
 Triangular base
 Any type of paper or card is suitable for kirigami, though thinner paper is best for projects that involve lots of folds. You can use scissors to make the cuts, but a craft knife is necessary for thicker card and internal detailed cutting. The knife needs to be sharp, so its important to use a cutting mat to protect the work space and provide a flat surface on which to do your cutting. A ruler is useful for measuring paper sizes and keeping folds in place. A glue stick or double-sided tape may be necessary for joining various paper structures and completing greetings cards.


 Fold the rectangle in half vertically.
  Using a pencil, draw your cat and kitten, adding the delineation of the animals forms inside the main design.
  Cut along the lines, being careful not to cut where the cats nose touches the side of the card.
  Open the card.
  You can use your final design as either a card or a decoration.
 Take a piece of medium-thickness rectangular card measuring 21 x 30 cm (8 x 11 in) and section it into quarters. Draw your design of two tall trees and two shorter trees using a pencil.
  Fold the card to make the four creases and then flatten it again.