Copyright 2014 by Instructables.com
All rights reserved. No part of this book may be reproduced in any manner without the express written consent of the publisher, except in the case of brief excerpts in critical reviews or articles. All inquiries should be addressed to Skyhorse Publishing, 307 West 36th Street, 11th Floor, New York, NY 10018.
Skyhorse Publishing books may be purchased in bulk at special discounts for sales promotion, corporate gifts, fund-raising, or educational purposes. Special editions can also be created to specifications. For details, contact the Special Sales Department, Skyhorse Publishing, 307 West 36th Street, 11th Floor, New York, NY 10018 or .
Skyhorse and Skyhorse Publishing are registered trademarks of Skyhorse Publishing, Inc., a Delaware corporation.
Visit our website at www.skyhorsepublishing.com
10 9 8 7 6 5 4 3 2 1
Library of Congress Cataloging-in-Publication Data is available on file.
ISBN: 978-1-62914-757-4
eISBN: 978-1-62914-813-7
Printed in China
Disclaimer:
This book is intended to offer general guidance. It is sold with the understanding that every effort was made to provide the most current and accurate information. However, errors and omissions are still possible. Any use or misuse of the information contained herein is solely the responsibility of the user, and the author and publisher make no warrantees or claims as to the truth or validity of the information. The author and publisher shall have neither liability nor responsibility to any person or entity with respect to any loss or damage caused, or alleged to have been caused, directly or indirectly, by the information contained in this book. Furthermore, this book is not intended to give professional dietary, technical, or medical advice. Please refer to and follow any local laws when using any of the information contained herein, and act responsibly and safely at all times.
Introduction
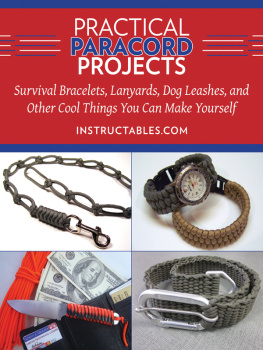
Every outdoorsman and woman knows that paracord is the number one item you dont want to be caught without when camping. It is incredibly strong and useful in many situations, but it isnt always easy to carry it around in a bundle. Dont worry. The DIYers at Instructables have you covered. Theyll show you every way to weave, knot, and intertwine your paracord into bracelets, belts, and bags so you can easily bring it with you for any survival situation.
What really makes paracord amazing is that there is so much you can do with it from tying crampons to your shoe or turning a spare piece of paracord into a fishing lure, to making a paracord army man and then decking him out with all the accessories a little army man could ask forincluding a miniature paracord horse!
So, get a roll of paracord, scissors, and a lighter, and youll be ready to learn how to make these Practical Paracord Projects!
Nicole Smith (Penolopy Bulnick)

Jewelry
Cobra Weave Bracelet
By mattrush
(http://www.instructables.com/id/Endless-Paracord-Bracelet/)
I was looking online and found lots of paracord bracelets that have buckles so you can take them off. I came up with this design that doesnt need to be taken off. Paracord is just as strong when it gets wet; it also dries pretty quickly. This bracelet also gives you one long bit of cord when its unraveled.
Step 1: Make Loops
Start by making folding the paracord in half and making two loops at either side, with the middle of it going behind the ends. Each loop should be the size of your wrist or wherever you want to wear it, plus one or two inches wiggle room.

Step 2: Cobra Stitch
Pull the two loops inwards so that they make a complete loop. Now fold the two ends back on themselves and begin to use the cobra stitch. For anyone new to this, it is the process of passing one end behind a center core and the other in front of it and threading each end through the loop created.


Step 3: Tie Knots
Keep tying these knots around the center two strands until you get back around to the other side. It is easiest to tie it snug and then try and slide it onto your wrist, as its hard to tie with one hand.


Step 4: Tighten Ends
To finish it off turn the bracelet inside out and thread the two ends back under the last two loops. A pair of pliers or a multitool is handy here to get the ends as tight as possible. Work the ends until its as tight as possible. Then cut the ends as close to the knot as possible. Then, using a lighter, wax the ends closed and heat the last knot slightly just to make it smoother. Turn it back the right way and slide it on your wrist. I only do it with one layer of cord as its not bulky or intrusive, but each to their own, so get creative.


Bracelet with Buckle
By Stormdrane
(http://www.instructables.com/id/Paracord-bracelet-with-a-side-release-buckle/)
This tutorial will show how to make a paracord bracelet with a side-release buckle. When made on a larger scale, you can make this for use as a dog or cat collar as well. A reliable online source of paracord is the Supply Captain, and for side-release buckles I recommend Creative Designworks.
Step 1: Materials
Youll need:
Paracord, or equivalent 1/8 diameter cord
Tape measure or ruler
Scissors
Side-release buckle
Lighter (torch lighter works best).
The amount of cord used can vary, but for this example, well use 10 feet of paracord to start with. Actual amount of cord used for the bracelet is about one foot of cord for every one inch of knotted bracelet length. So if your wrist is 8 inches, youd use approximately 8 feet of cord.

Step 2: Measure Wrist
Wrap the paracord around your wrist and make a note of where the cord meets. Hold this point next to your ruler or tape measure, and thats your wrist size.

