Practical HDR

David Nightingale

Focal Press is an imprint of Elsevier
30 Corporate Drive, Suite 400, Burlington, MA 01803, USA
Copyright 2011 The Ilex Press. All rights reserved
This book was conceived, designed, and produced by Ilex Press Limited
210 High Street, Lewes, BN7 2NS, UK
Publisher: Alastair Campbell
Creative Director: Peter Bridgewater
Managing Editor: Chris GatcumArt Director: Julie Weir
Senior Designer: Emily Harbison
Designer: Richard Wolfstrme
Digital Assistant: Emily Owen
No part of this publication may be reproduced, stored in a retrieval system or transmitted in any form or by any means electronic, mechanical, photocopying, recording or otherwise without the prior written permission of the publisher
Permissions may be sought directly from Elseviers Science & Technology Rights Department in Oxford, UK: Phone (+44) (0) 1865 843830; Fax (+44) (0) 1865 853333; Email: for further information
Notice - No responsibility is assumed by the publisher for any injury and/or damage to persons or property as a matter of products liability, negligence or otherwise, or from any use or operation of any methods, products, instructions or ideas contained in the material herein
Library of Congress Control Number: A catalog record for this book is available from the Library of Congress
Print ISBN: 978-0-240-81249-6
Digital ISBN: 978-0-080-96418-8
For information on all Focal Press publications visit our website at:
www.focalpress.com
Trademarks/Registered Trademarks
Brand names mentioned in this book are protected by their respective trademarks and are acknowledged.
Introduction
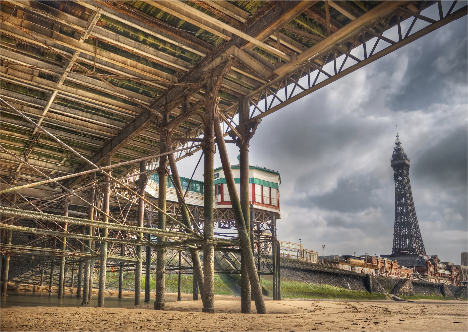
When I started out in photography, one of the things I found most frustrating was that my camera seemed to have a totally different view of the world to me. Where I saw a glorious sunset, my camera saw an overexposed wash of pale colors; where I saw clouds floating over a beautiful landscape, my camera saw a flat white sky, or a dark foreground, or both; and backlit portraits would all end up as silhouettes. With practice, I learnt a variety of techniques that improved my photography: using exposure compensation, setting my camera to Manual, and using different metering patterns to assess a scene. In other words, I developed a better understanding of how to compensate for the various ways in which my cameras perception of the world was more limited than my own.
At the same time, I also learnt that there are some shots that you just cant take at least not without using additional lighting, reflectors, neutral density graduated filters, and so on. These are the shots where the contrast is so high that some areas of the image will end up overexposed, underexposed, or both. The problem is that while our eyes can see a full range of tones in these high contrast scenes, our digital cameras cannot.
This problem isnt a new one, and the earliest photographers looked for different ways to record high contrast, or high dynamic range images. In the 1850s, Gustave Le Gray produced a number of dramatic seascapes constructed from two negativesone exposed for the sea, the other for the sky. He cut both negatives along the horizon, then used the two parts to create a single photographic print. In this way he was able to capture all of the detail in the scene, which would have been impossible with a single exposure. Motivated by the same problem, Charles Wyckoff developed a wide dynamic range film composed of three layers, each of which had a different sensitivity to light. He used this to produce photographs of nuclear explosions, which first appeared on the cover of Life Magazine in the 1940s.
But it wasnt until much more recently that what we now commonly refer to as High Dynamic Range, or HDR, photography began to develop. In 1985, Gregory Ward created the Radiance RGBE file format for HDR imagesa format that is still in use todaywhile in 1993, Steve Mann reported creating a tone mapped image from a sequence of exposures of normal digital images. The idea was simpleshoot a sequence of exposures that covered the full brightness range of the image, and combine them into a single, high dynamic range picture that would contain detail in everything from the brightest highlight to the deepest, darkest shadow.
This sounds straightforward, but there are numerous issues that can make it far from easy. To start with, you need to be able to meter the scene to calculate the number of exposures to make to capture the entire dynamic range. You also need to know how to deal with any significant movement between the frames, and you have to understand how to create and tone map your images to create a final picture that meets your creative expectations. As you will see in this book, once you understand these issues, HDR imaging is a powerful technique that can be used to produce photographs that are simply not possible through any other means.
Understanding Dynamic Range
Real World Dynamic Range
One of the first things you learn as a photographer is that the way you perceive a scene is often quite different to how your camera evaluates and processes the same data. For example, a shot you intend as a backlit portrait may well end up as a silhouette, a shot of a brightly lit scene may end up looking too dark, and so on.
In other words, the image you see is sometimes not the one you manage to take.
There are two main reasons for this. The first is that your camera will attempt to set an optimum exposure for a particular shot, so it will set the aperture or shutter speed, or both, to ensure that enough light hits the sensor to produce a well-exposed image. The problem is, your camera assumes an average level of illumination for every shot you take so, if you shoot in a dark room, the image may well end up brighter than the original scene as your camera bases its exposure on an average level of illumination. By the same token, a shot of a person, backlit by a bright sky, may produce a shot with a beautifully exposed sky but no detail in your subjects faceagain because the camera works on the assumption that all pictures are taken under average lighting conditions.
The second reason your images may not end up as you intend them is because of the difference between the way in which you see things and how your camera records them. While you might see a richly detailed landscape, set against the backdrop of a bright, but cloudy sky, the camera will be likely to deliver a picture where the sky looks as you intended, but the foreground is too dark, or, with a correctly exposed foreground, but an overexposed, blank white sky. Worst of all, you might get an image with both a featureless sky and an overly dark foreground. In this instance, adjusting the exposure wont fix the problem, it will just present you with a different onceincreasing the exposure to compensate for an overly dark foreground will overexpose the sky, while decreasing the exposure to retain the detail in the sky will lead to a very dark foreground.


