
More Ways to Glow! Introducing EL Wire
LEDs are amazing, but if you want to expand your repertoire, check out EL wire, a flexible wire that glows in neon colors when electricity passes through it.
The term EL wire is short for electroluminescent wire. Most people pronounce it E-L wire, but some people say el wire; either is fine.
EL wire comes in different formsfrom thin wires and thick tapes to whole panelsand in every color you can imagine. Its driven by a controller called an inverter, which changes the power coming from your batteries into the high-voltage alternating current the wire needs to glow. But dont worryeven though its high voltage, it uses very little current, so its safe for you to use and wear, and its great for creating personalized projects.
You can attach EL wire to just about anything, from backpacks to bicycles, but its especially fun to use on glow-in-the-dark hats, shoes, and one-of-a-kind fashions. You can braid different colors of wire together to create special effects, cover the wire with bits of electrical tape to design patterns, or use special controllers to make the wire blink, pulse, react to sound, or even look like its moving! Let your imagination be your guide.

MORE TIPS & TROUBLESHOOTING
FOR ALL YOUR LED PROJECTS
+ Get in the habit of using a black marker to darken the long, positive (+) legs of all your LEDs, and youll always be able to track themvery handy when you start making complex circuits.
+ If an LED doesnt light up right away, you probably have the legs on the wrong sides of the battery. Flip the battery and try again. If it still wont work, try using a new battery or LED.
+ Handle your batteries with care. Dont jumble them together, since this can short them out, and dispose of them responsibly when youre done. Dont just throw them in the trash! See page 9 for more.
+ You can collect LEDsand repurpose themfrom lots of unexpected, inexpensive objects. Look for reusable strings of LED holiday lights, broken toys, or key-chain-sized mini flashlights (some have flash settings). Check out your local hardware store with your Maker brain, and watch for new opportunities all around you.
FOR GLOWIE/THROWIE PROJECTS
+ If you want to make a Glowie or Throwie last longer, you can make a simple on/off switch from a thin strip of stiff plastic. Just insert the plastic between the battery and one leg of the LED (either leg will work) before you tape it all together. The plastic strip will interrupt the circuit and keep the LED from turning on. Pull the plastic out when you want the LED to come on; push it back in when youre done.
FOR PAPER-CIRCUIT PROJECTS
+ If a circuit-sticker LED is not lighting up, check that its oriented correctly: the wide, positive (+) side on the positive (+) lead, and the pointy, negative () side on the negative () lead. If that doesnt solve the problem, be sure the LED is stuck tight to the copper tape.
+ Remember to bend the copper tape around corners as youre making each circuit. Dont cut copper tape if you can help it.
+ If the copper tape gets broken or cut in the wrong place, put another piece over the break. Be sure the pieces are stuck tight to each other to maintain the circuit. Do the same thing if you discover that you need to patch another piece over a too-short length of copper tape.
+ Dont let negative and positive lines of copper tape touch or cross one another, or youll short out the circuit. If one line of copper tape must cross another, cover the bottom line with a scrap-paper bridge to keep them from touching.
+ Copper tape will still work even if it gets covered in glue or transparent tape.
+ Dont have any circuit stickers? You can use regular LEDs. Just separate their legs and tape or glue them securely into the copper-tape circuit. Remember that the LEDs long leg is its positive (+) side and the short leg is its negative () side.
FOR SOFT-CIRCUITRY PROJECTS
+ Before you start a project, be sure your sewing needles will fit through the components. Some components have holes too small for certain needles.
+ Sewing with conductive thread can be tricky. Even when youre working carefully, it can get snarled and knotted. If your thread breaks, or if you need to cut and start over for any reason, you can reconnect by sewing a new piece tightly around the broken end. Do the same thing if you accidentally begin sewing with a strand of thread thats too short.
FOR MIXED-MEDIA PROJECTS
+ In commercial electronics, wire colors are coded for different kinds of uses, but you dont need to worry about that in these activities. Hookup wire is hookup wire. Using different colors just helps you keep track of your circuit. Red normally indicates positive (+) connections; black normally indicates negative () connections.
ACTIVITIES BY SKILL LEVEL
SKILL LEVEL 1
Start by Making Glowies >>
Floaties: Light Up the Night! >>
Glow Ghosts >>
Eyes in the Bushes >>
Flickerbugs >>
Awesome Ornaments >>
Start by Making a Simple Paper Circuit >>
Shooting-Star Card >>
Electric Roses >>
Thunderclouds >>
Firefly Nightlight >>
Jazzed-up Jewelry: Start by Making Glue Jewels >>
SKILL LEVEL 2
Throwie Dartboard Game >>
Origami Firefly >>
Power Cuff >>
Superhero Cape >>
Glue-Jewel Glimmer Ring >>
SKILL LEVEL 3
Glowing Pinwheel >>
Fashion for Fido: Glow-in-the-Dark Dog Collar >>
I My Stuffie >>
Fairy Wings >>
Light-up Tote Bag >>
Marquee Letter >>
Glue-Jewel Royal Crown >>
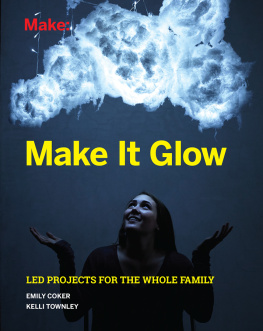
About the Authors
Emily Coker is a maker professional who is passionate about empowering herself and others through hands-on learning and making. When not creating projects for the masses, she can be spotted tinkering around in her shop futzing with electronics, robotics, and the latest in tech and craft. She is an avid comic and graphic novel enthusiast who enjoys drawing. Emily is also a contributing author for Make: magazine and Makezine.com.
Kelli Townley is a lifelong creator and tinkerer. When she was a little girl, she built circuits with her dad, sewed fingerless gloves with a 1930s Singer sewing machine from a thrift store, and disassembled electronics (like that VCR that kept eating tapes). As an adult, shes worked in video games, VFX/animation, education, and most recently, virtual reality. In her spare time, shes constantly doing hands-on projects like upholstery, cosplay, woodworking, and quilting. Kelli is passionate about encouraging makers of all ages and skill levels, and hosts frequent making get-togethers with her friends and colleagues.
Acknowledgments
Maker Media wishes to thank the many people who contributed to the book, especially the contributing Makers Kelli Townley, Emily Coker, Angie Callau, and Jie Qi. A huge thank you to the book team, including book packager Leslie Jonath, writer and editor Ruth Tepper Brown, photographer Rory Earnshaw, designer Kevin Plottner, managing editor Dean Burrell, and copy editor Jeff Cambell as well as to Evan Brown, Katje Richstatter, Peter Cole, and Eunice Choi and to readers Natalie Freed, Ken Murphy, and Pat Murphy.
Next page
