Contents
Guide
Metalsmithing Made Easy
KATE FERRANT RICHBOURG
Contents


Introduction
You and I have something in common. We both like to make metal jewelry. We are metalsmithscraftspeople who like to fashion pieces from metal. That sounds about right, doesnt it? When Im pounding away on my anvil with a hammer or soldering parts together with my torch, Im in my happy place. I would venture a guess that you feel the same way. Over the years, Ive learned a lot about metalworking through making and teaching.
Now lets talk about you for a minute. Im guessing that youve had at least a passing flirtation with metalworking. Maybe youve pounded on metal with a hammer, or wrapped wire, or even picked up a torch and done some soldering, but something hasnt clicked and you need coaching. Or maybe you possess some metal experience and want to up your game and learn new skills. What I want you to know is that Ive been right where you are. Ive made many of the same mistakes and have had the same frustrating setbacks and bewilderment at the variety of tools and materials that are out there. So I wrote this book with you, the home jeweler, in mind, to fire up your imagination with metalworking techniques that work in a small space or studio.
Metalworking isnt an easy craft that can be conquered with a few flicks of a torch flame. Ill bet youve felt the frustration of a melted bezel or a piece that simply would not come out as planned, just as I have. While some techniques are simpler and mastered more quickly than others, honing your skills takes time. Ease and satisfaction come as you build muscle memory and see the results of your labor by completing a piece of jewelry to be proud of. The more you learn and build on your technique, the easier new or difficult things become. Thats why I wrote this book. Im here to share my tips, steps, tricks, and methods, to answer your questions, and to coach you through the tough spots.
How to Use This Book
Id love it if you read this book from start to finish before you even picked up a tool. Grab your favorite beverage, tuck in, relax, and read away. Make notes in the margins. Grab a highlighter and mark passages that speak to you. Spill coffee on this book. Get it dusty and dog-eared. As you digest the chapters one by one, a big picture is going to take shape.
You may be in a rush to get started making jewelry, but if youre a bit of a newbie to the metals world, reading the chapters over before you begin makes it easier for you to "get it." As you go, if you feel overwhelmed, take a break and look through the tools and materials that you already have. And if you want to jump in and try something that piques your interest along the way, do it! I wrote this book for you, so do what you think is best. You are the master of your metalworking destiny. Im just along for the ride.
Sometimes we just want to jump in and make something. If youre a beginner and that mood strikes as youre reading, a great way to scratch that "I wanna make something" itch is to pick a piece from the Sampler section and get to work. These projects are arranged in order of difficulty, and some can be completed with just a few tools and little experience.
Icon Key

TIP
In order to make the trickier bits easier, this icon appears at points needing a little more explanation, clarification, or just a nudge about the project or technique youre learning.

MEET A NEW TOOL
Certain projects require more specialized or advanced tools. I will introduce these as they are needed throughout the book with the icon at left.
The Samplers
When I was little, I was charmed by the idea of creating samplers. I read stories of little girls in days gone by exercising their nimble fingers on crazy-quilt blocks or cross-stitch samplers. Even at an early age I was attracted to this idea of repetitions and variations, and I practiced my motor skills making doll clothes and building villages with Lincoln Logs and Tinker Toys on the living room floor.
Enter the Sampler part of this book. These are your warmups and practice pieces. They offer a chance to learn basic techniques and try your hand at different methods. If you screw up or things dont quite turn out the way you planned, who cares? Its all part of the learning process. No one is judging you, and no grades are given. Keep working away, and I promise the next attempt will look better.
One of the roadblocks that I encounter with students (from beginner to intermediate) is the fear of messing up their piece simply due to the fact that they have not practiced the skill theyre using to make a finished piece of jewelry. One wrong move with the saw or lingering too long with the torch can ruin a piece. Thats no fun. Its like going out to the pitchers mound without a warmup. No one throws a perfect game without getting a few wild practice pitches out of the way in the bullpen.
The samplers intentionally use inexpensive materials, so all you invest is your time and a small cost. Once youve worked your way through them and are happy with your results, youll be ready to tackle the jewelry projects at the end of the book with confidence and gusto. Each project refers to the Sampler skills used, so you can check back to the exact one if needed.
Finding a Place of Your Own
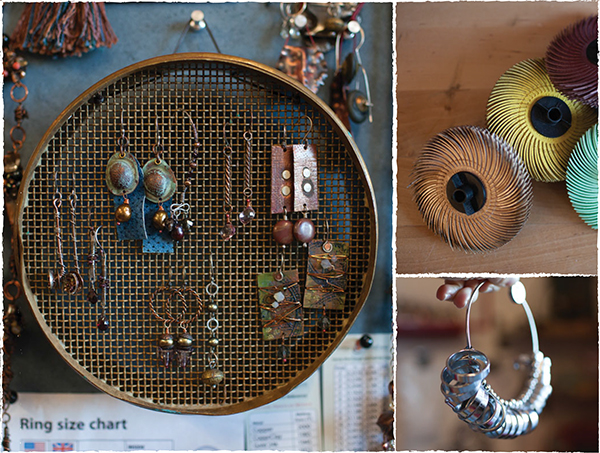
Ive said it before and Ill say it again: Whether you have a large studio or a cozy corner in which to practice your craft, you have enough room to proudly proclaim your metalworking space. I hear students say all the time that they "just need to find a place to work" or "just need a little more space." But viewing tight space as a shortage can be limiting; instead, view it as a challenge. Youre creative; look at the fantastic jewelry that you make already! So get creative about your space.
ASSESS WHAT YOU HAVE NOW
Its time to strike while the iron is hot (pun intended). Look up from this page and check out your surroundings. Do you have an extra bedroom where you could work? A closet? A coffee table in front of you in the living room? If your dream space needs refurbishing, make a date with yourself and mark it on the calendar. Title it "My Studio Redo" and get busy. Tidy up a corner of that bedroom and add a desk and shelf and some special inspirational items. Ditch half the stuff you dont use in that closet, then pack your tools in a rolling suitcase so they are all together and ready to travel out to the dining table for a work session. Coffee table? You could replace it with a chest or a version with drawers, so your tools can fit right in there and pop out when youre ready to create. Whatever you come up with, make it yours and be proud of it!

