Bobbie Matela - Learn to Knit Cables on Looms
Here you can read online Bobbie Matela - Learn to Knit Cables on Looms full text of the book (entire story) in english for free. Download pdf and epub, get meaning, cover and reviews about this ebook. year: 2007, publisher: Annies, genre: Home and family. Description of the work, (preface) as well as reviews are available. Best literature library LitArk.com created for fans of good reading and offers a wide selection of genres:
Romance novel
Science fiction
Adventure
Detective
Science
History
Home and family
Prose
Art
Politics
Computer
Non-fiction
Religion
Business
Children
Humor
Choose a favorite category and find really read worthwhile books. Enjoy immersion in the world of imagination, feel the emotions of the characters or learn something new for yourself, make an fascinating discovery.
- Book:Learn to Knit Cables on Looms
- Author:
- Publisher:Annies
- Genre:
- Year:2007
- Rating:3 / 5
- Favourites:Add to favourites
- Your mark:
Learn to Knit Cables on Looms: summary, description and annotation
We offer to read an annotation, description, summary or preface (depends on what the author of the book "Learn to Knit Cables on Looms" wrote himself). If you haven't found the necessary information about the book — write in the comments, we will try to find it.
Bobbie Matela: author's other books
Who wrote Learn to Knit Cables on Looms? Find out the surname, the name of the author of the book and a list of all author's works by series.


Learn to Knit Cables on Looms — read online for free the complete book (whole text) full work
Below is the text of the book, divided by pages. System saving the place of the last page read, allows you to conveniently read the book "Learn to Knit Cables on Looms" online for free, without having to search again every time where you left off. Put a bookmark, and you can go to the page where you finished reading at any time.
Font size:
Interval:
Bookmark:
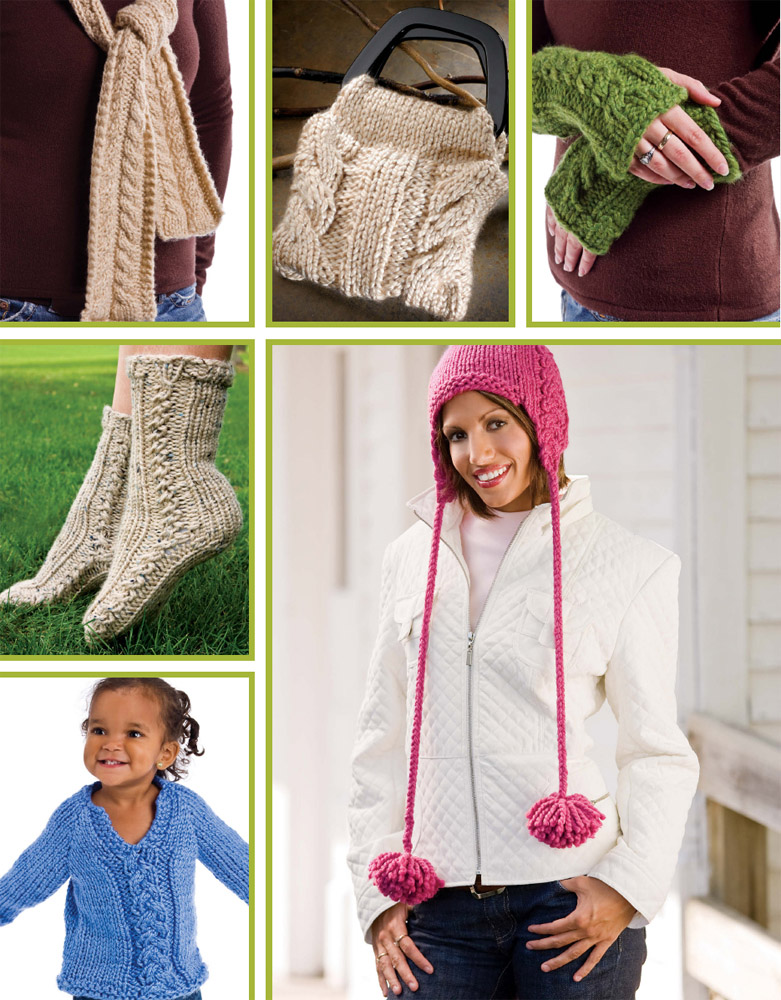
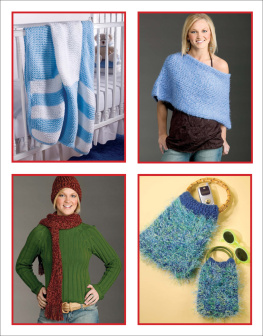
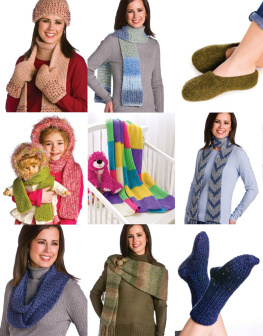
Pattern Services and Revisions If you are an Annies customer and have a question about the instructions on a pattern you have purchased, please visit: http://www.anniescatalog.com/pages/customer_care/pattern_services.html Contents Cables are classic elements found in many knitwear designs. They add beauty, fluidity and a touch of class to a simple design. Knitting cables on a knitting loom requires the manipulation of stitches, which is easily done by using a cable needle. Work the cables on a background of reverse stockinette stitches to make your cables pop even more! The designs included in this booklet will introduce you to a few cabling techniques. Master the cabling techniques at the front of the book, and you can design your own projects too! Cables work best when worked with yarns that have some inherent elasticity; for this reason, yarns with wool content are a good choice. The yarns used in this booklet were selected because of their elasticity/bounce.
When selecting your yarns, stretch them out and test their bounce. Have fun knitting these classic designs! Begin with the following materials to get started knitting cables on circle looms. Materials Knifty Knitter circle- and long-loom series from Provo Craft* Knitting tool included with loom Cable needle Crochet hook (for casting on) 2 size 5 (3.75mm) double-pointed knitting needles (for holding stitches) Yarn needle Split-ring stitch markers Scissors Measuring tape/gauge checker Blocking wires (optional) *Samples were knit on Provo Craft Knifty Knitter series looms; however, patterns can be knit on other knitting looms. Be sure to check for gauge and peg count when substituting knitting looms. Pattern Note All of the patterns are worked in a clockwise direction around the knitting loom (where the first row starts from right to left). Basic Techniques Chain Cast On To cast on, move your loom from left to right. Working yarn should end up on the right side to begin the first row (in order to have the first row start from right to left).
Make a slip knot and place it on the peg. Take the working yarn towards the inside of the loom. Step 1: Insert crochet hook through the slip knot. Hook working yarn, forming a chain. Step 2: Place chain on next empty peg to the right. Step 3: Insert crochet hook through chain just made.
Hook working yarn forming a chain. Step 4: Place chain on next empty peg to the right (Photo A). Step 5: Repeat Steps 3 and 4 until desired number of stitches have been cast on. Each peg will have 1 loop. 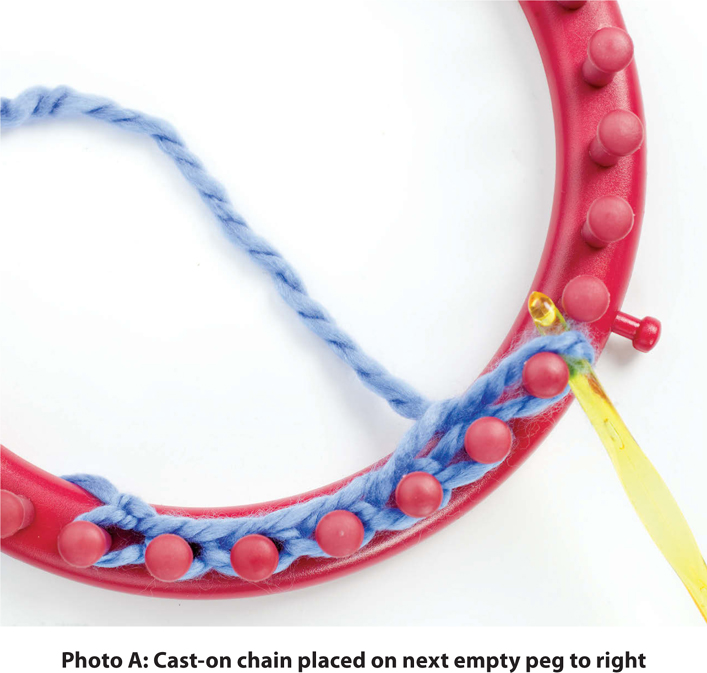 Knit Stitch (k) The knit stitch is a smooth V-shaped stitch; it is identical to the knit stitch created with knitting needles. Step 2: Insert knitting tool from bottom up and catch the working yarn with the tool, thus forming a loop. Step 3: Hold the newly formed loop (from Step 2) with the knitting tool (Photo B). Step 4: Pull up on the loop on the tool to take the loop that was originally on the peg, off the peg. Step 5: Place the loop you are holding (from Step 3) on the peg. Step 5: Place the loop you are holding (from Step 3) on the peg.
Pull on the working yarn to tighten the stitch. 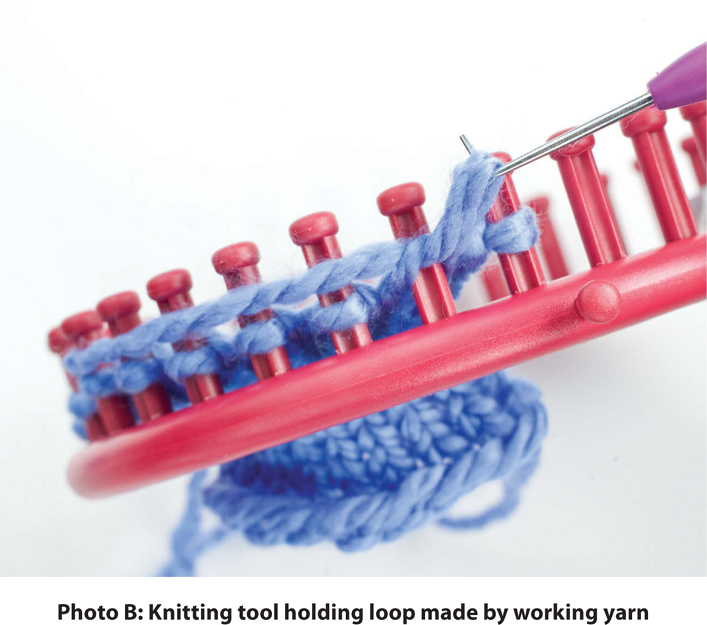 Twisted Knit Stitch (also known as single stitch) In needle knitting, this stitch is known as the twisted knit stitch or a stitch knit through the back loop. Step 1: Take the working yarn (yarn coming from the ball of yarn) to the inside of the knitting loom. Step 2: Moving in a clockwise direction around the knitting loom, encircle the peg counter clockwise with the yarn to form e-wrap (Photo C). Step 3: Continue to e-wrap all the pegs. Step 4: Using your knitting tool, lift the bottommost loop off the peg, let it fall towards the inside of the knitting loom.
 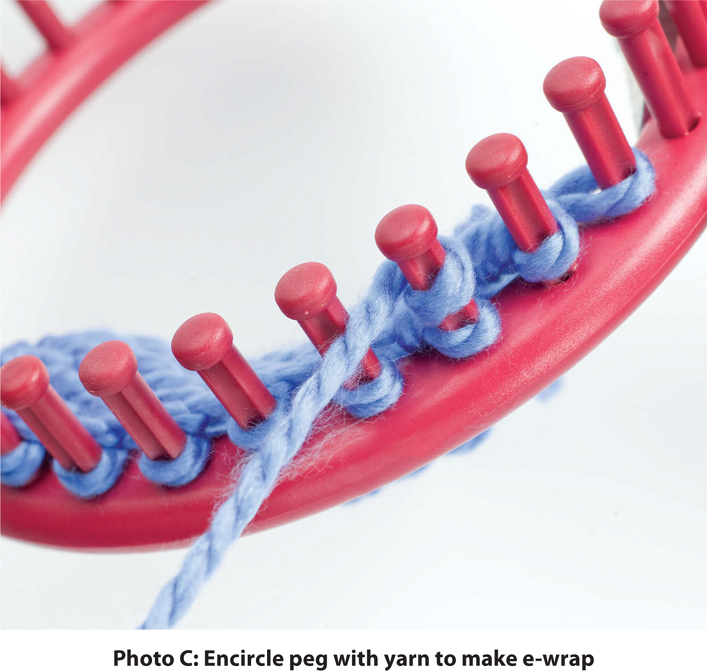 Purl Stitch (p) The purl stitch is the opposite of the knit stitch. Purl Stitch (p) The purl stitch is the opposite of the knit stitch.
Instead of a smooth V, you will see bumpy fabric. Step 1: Place working yarn in front of peg and below the loop on the peg. Step 2: Insert knitting tool from the top down and hook the working yarn with the tool (Photo D). Step 3: Pull the loop caught with the tool, up through the stitch. Step 4: Continue to pull up on loop to remove the original loop from the peg. Step 5: Place the loop you are holding (from Step 3) on the peg.
Gently tug on the working yarn to tighten the stitch. 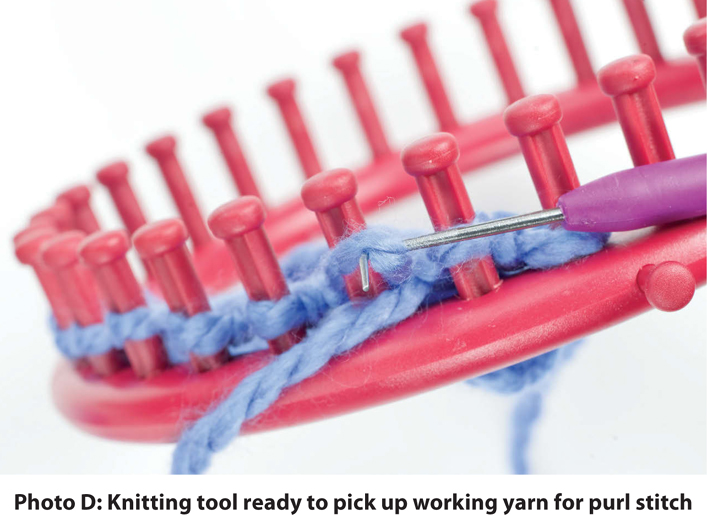 Stockinette Stitch The stockinette stitch is created by knitting every row. Garter Stitch The garter stitch is formed by 2 rows. Row 1: Knit. Row 2: Purl. The combination of these 2 rows creates 1 garter-stitch row and 1 garter-stitch ridge.
Adding Another Skein To attach a new skein of yarn at beginning of the next row, join the 2 ends of yarn with a slip knot. Knit the first 3 stitches of the row with both yarns together. Drop the old strand and continue knitting with the new strand. Basic Bind Off (also called flat removal method) Step 1: Knit the item until you have only 1 loop on each peg. The working yarn is coming from the last peg. Knit the first 2 loops.
Move the loop from the 2nd peg over to the first peg. Lift the bottom loop over the top loop and off the peg to bind off first stitch (Photo E). Move the loop from the first peg over to the vacated 2nd peg. Step 2: Knit the next loop. Move this loop over to the previous peg. Step 3: Repeat Step 2 until all stitches have been bound off. Step 4: When you reach the last peg, cut the working yarn leaving a 5-inch tail. Step 4: When you reach the last peg, cut the working yarn leaving a 5-inch tail.
Knit the loop. Remove the stitch from the peg. Pull the yarn tail end through the loop. 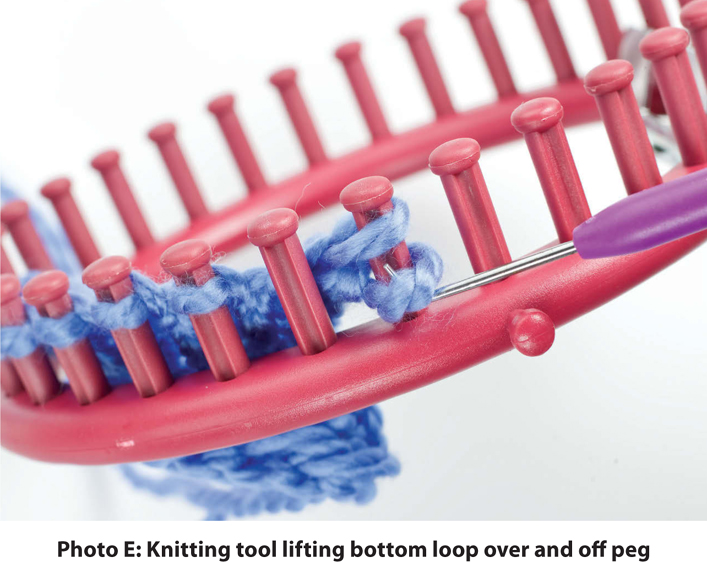 Shaping Techniques Decreases There are 2 decrease techniques used in this book, the terms used are the same as used in needle knitting. These decreases take place on 2 pegs. K2tog (knit 2 togetherslants to the right)Step 1: Take the loop from Peg 1 and place it on Peg 2. Step 2: Knit all the pegs as you normally would. Step 2: Knit all the pegs as you normally would.
When you reach the peg with 2 loops, treat the 2 loops as 1 and knit them together. Ssk (slip, slip, knitslants to the left)Step 1: Take the loop off Peg 1 and hold it. Take loop off Peg 2 and hold it. Place the loop from Peg 1 on Peg 2. Place the loop that was on Peg 2 back on Peg 2. Step 2: Knit all the pegs as you normally would. Step 2: Knit all the pegs as you normally would.
When you reach the peg with 2 loops, treat the 2 loops as 1 and knit them together. Increases M1 (Make 1)Step 1: Create an empty peg where you need to increase a stitch by moving the loops to the outer pegs. Step 2: With knitting tool, reach for the ladder that runs from 1 peg to the next, pick it up, twist it and place it on the empty peg.
Next pageFont size:
Interval:
Bookmark:
Similar books «Learn to Knit Cables on Looms»
Look at similar books to Learn to Knit Cables on Looms. We have selected literature similar in name and meaning in the hope of providing readers with more options to find new, interesting, not yet read works.
Discussion, reviews of the book Learn to Knit Cables on Looms and just readers' own opinions. Leave your comments, write what you think about the work, its meaning or the main characters. Specify what exactly you liked and what you didn't like, and why you think so.