Bobbie Matela - Learn to Knit on Circle Looms
Here you can read online Bobbie Matela - Learn to Knit on Circle Looms full text of the book (entire story) in english for free. Download pdf and epub, get meaning, cover and reviews about this ebook. year: 2006, publisher: Annies, genre: Home and family. Description of the work, (preface) as well as reviews are available. Best literature library LitArk.com created for fans of good reading and offers a wide selection of genres:
Romance novel
Science fiction
Adventure
Detective
Science
History
Home and family
Prose
Art
Politics
Computer
Non-fiction
Religion
Business
Children
Humor
Choose a favorite category and find really read worthwhile books. Enjoy immersion in the world of imagination, feel the emotions of the characters or learn something new for yourself, make an fascinating discovery.
- Book:Learn to Knit on Circle Looms
- Author:
- Publisher:Annies
- Genre:
- Year:2006
- Rating:5 / 5
- Favourites:Add to favourites
- Your mark:
Learn to Knit on Circle Looms: summary, description and annotation
We offer to read an annotation, description, summary or preface (depends on what the author of the book "Learn to Knit on Circle Looms" wrote himself). If you haven't found the necessary information about the book — write in the comments, we will try to find it.
Bobbie Matela: author's other books
Who wrote Learn to Knit on Circle Looms? Find out the surname, the name of the author of the book and a list of all author's works by series.


Learn to Knit on Circle Looms — read online for free the complete book (whole text) full work
Below is the text of the book, divided by pages. System saving the place of the last page read, allows you to conveniently read the book "Learn to Knit on Circle Looms" online for free, without having to search again every time where you left off. Put a bookmark, and you can go to the page where you finished reading at any time.
Font size:
Interval:
Bookmark:
If you are an Annies customer and have a question about the instructions on a pattern you have purchased, please visit:
http://www.anniescatalog.com/pages/customer_care/pattern_services.html
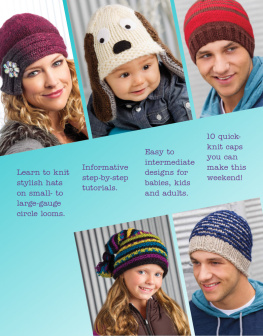
Jump on the knitting bandwagon and make yourself and a loved one a warm and cozy item with a circular knitting loom. Its easy to master by crafters of all ages.
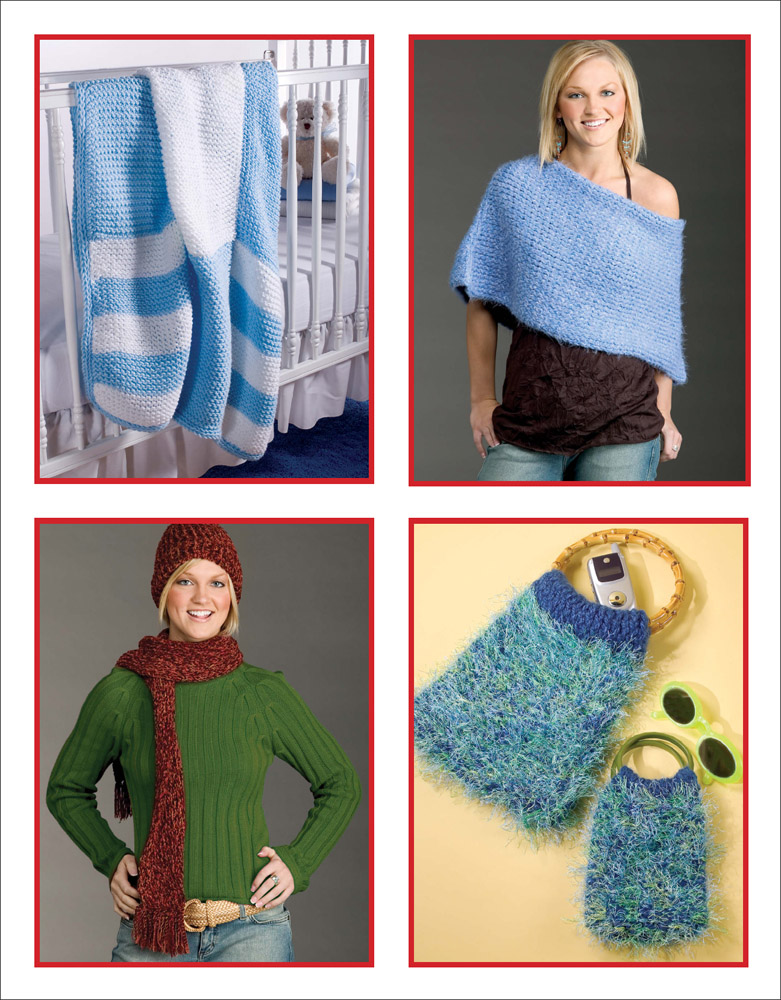
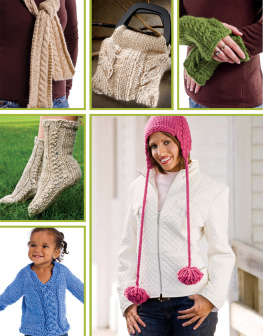
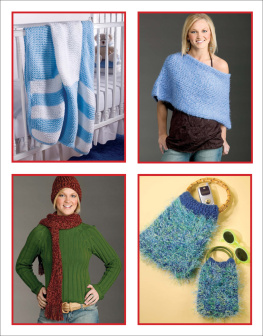
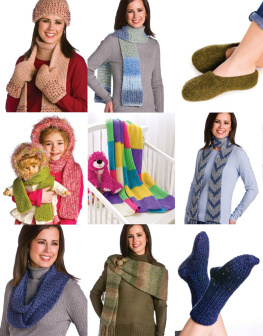
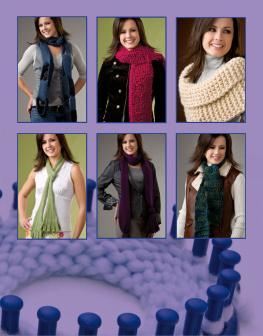
Keep-Warm Hat and Tubular Scarf are great starter projects. They will introduce you to knitting in the round on a loom. Make-It-Soft Hat & Scarf are made of luscious soft suede-like yarn.
The thick, cozy pair of At-Home-Comfort Socks is sure to keep your tootsies warm even on the coldest nights. Mom & Daughter Bangle Bags have their handles knit right into the design. Knit the large one for everyday and the small one for your daughter or for an evening out!
Pleasing Ponchette has versatile style for evening or everyday casual. Its a great addition to your wardrobe!
Striped Squares Baby Blanket is a wonderful gift to welcome the next baby in your life. A warm and cozy Relaxing Afghan is knit in your choice of three colors to match your home decor. It will keep you or that special someone comfy on a cool evening.
All of these easy knitting loom projects are fun and sure to be a hit with your friends and family!
Knifty Knitter looms from Provo Craft (Our photographed items were designed with the Knifty Knitter circle looms. Although you can use other circular looms, such as the In the Attic Looms, the gauge may be slightly off.)
Knitting tool
Crochet hook
Yarn needle
Casting On
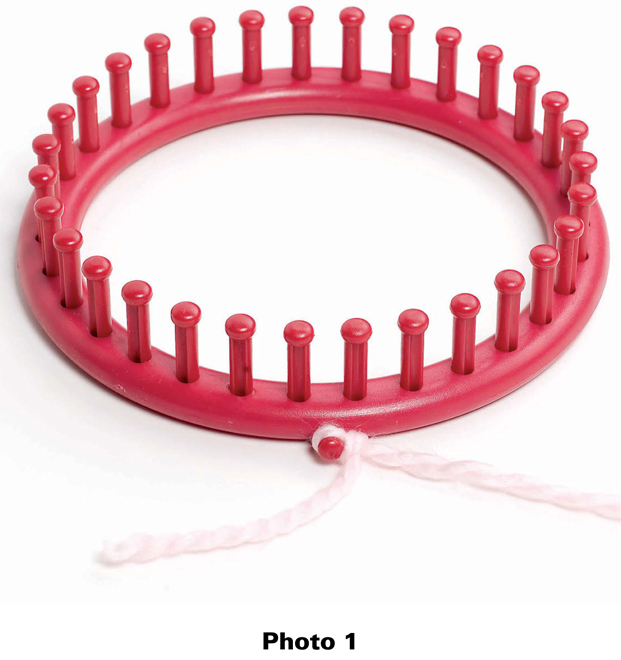
Tie a slip knot at the end of your yarn (check the pattern for the number of strands to be wrapped), leaving a 3-inch tail. Place this knot on the holding peg, and pull gently to tighten, Photo 1.
Note: After knitting two rows, the slip knot should be removed from the holding peg.
With your working yarn held in your left hand on the inside of the loom, wrap each peg in a counterclockwise direction starting on the first peg to the left of the holding peg. Work your way around the loom, going in a clockwise direction until there is one loop on each peg. Dont wrap too tightly, Photo 2.

Work your way around the loom sliding each loop halfway down each peg.
Continue to wrap your working yarn around the loom a second time until there are two loops on each peg.
Knitting on a knitting loom yields results similar to those of knitting with circular needles. The basic stitches used on the knitting loom are the Knit Stitch and the Purl Stitch. Alternating rows of these two stitches will result in a garter stitch that is the same on both sides of the piece.
Cast on and wrap two loops on number of pegs as directed in the pattern.
Start with the first peg to the left of your holding peg. Use your knitting tool to take the bottom loop and pull it up and over the top loop and over the top of the peg, Photo 3.
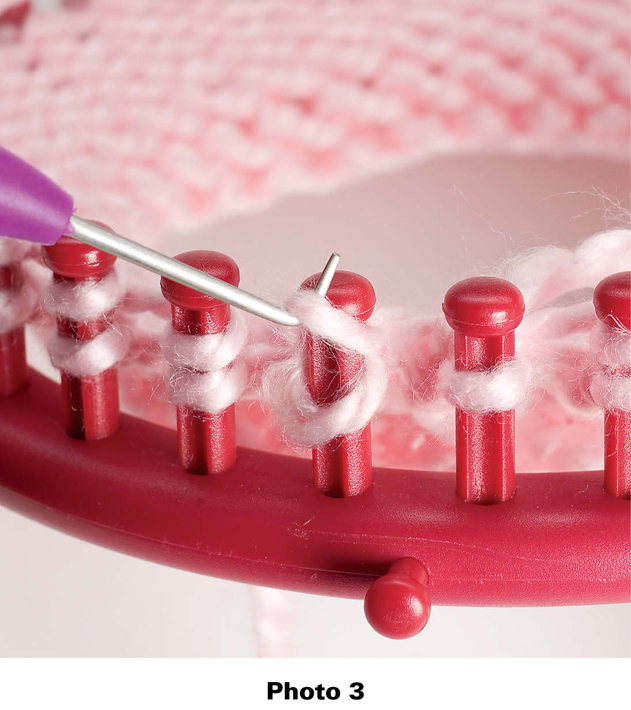
Continue in this manner, working in a clockwise direction around the loom until all pegs only have one loop remaining on them. This is one round.
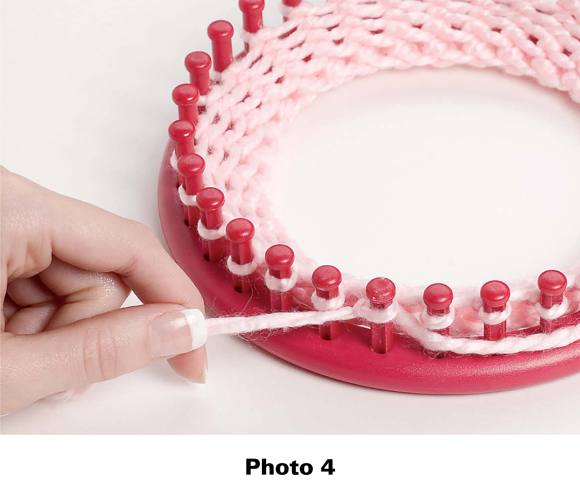
Wrap one loop on number of pegs as directed in the pattern.
Lay your working yarn across the front of the pegs, just below the first wrapped loop, Photo 4.
Using your knitting tool, reach down through the wrapped loop on the first peg and pull the working yarn up through the loop, forming another loop, Photo 5.

Pull the original wrapped loop off the peg, Photo 6, and place the newly formed loop on the peg. Tug gently on the working yarn to secure the loop on the peg.

Move to the next peg and repeat stitch as called for in the pattern.
Wrap the number of pegs as directed in the pattern until there are two loops on each peg and knit off one row.
The next row is done in purl stitch.
Alternate the rows in stockinette stitch and purl stitches as called for in the pattern. This creates a garter-stitch-look in your work.
Working around the loom clockwise, cast on the amount of stitches as directed in the pattern.
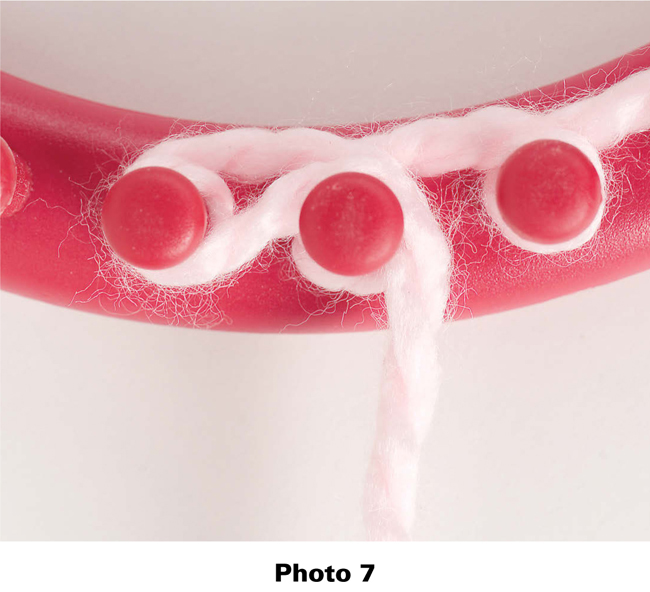
Wrap the last peg twice counter clockwise and bring your working yarn behind the next peg to the right. Wrap the yarn clockwise around the peg, Photo 7.
Continue to wrap the yarn around each peg clockwise working back toward the holding peg.
Starting with the last peg wrapped, knit off all pegs. The working yarn will be on the right end of the row.
Note: The stitch on the last peg that was double wrapped will be loose.
The working yarn will be behind the first peg on the right. Bring the yarn around to the front of the first peg wrapping in a counterclockwise direction.
Continue wrapping all pegs, working in a clockwise direction on the loom and knit off, again starting with the last peg that was wrapped.
Continue in this manner wrapping the pegs back and forth on the loom as directed in the pattern.
Note: Remember each peg will be wrapped clockwise as you move from left to right. Then they will be wrapped counterclockwise as you move right to left on the piece.
Cast on and wrap as many pegs as directed in pattern working in a clockwise direction.
Wrap the last peg and bring the working yarn around the left side of the last peg and in front of the peg just below the first loop.
Using your knitting tool, reach down through the wrapped loop on the first peg, and pull the working yarn up and through the loop, forming another loop.
Pull the original wrapped loop off the peg, and place the newly formed loop on the peg. Tug gently on the working yarn to secure the loop on the peg.
Continue to purl to the end of the row or as directed in the pattern.
There are four ways to bind off your finished piece: gather method, flat piece method, tube method and flat closed method. The gather method can be used to close up items like the tops of hats where the piece is a tube and then one end is gathered to close it. The flat piece method is used when making flat pieces such as scarves or afghan panels. The tube method can be used for items such as sleeves, where a circular piece is desired and both ends need to be left open. Flat closed method is used when knitting a piece in the round and a straight bottom is desired such as for a bag or pouch.
Font size:
Interval:
Bookmark:
Similar books «Learn to Knit on Circle Looms»
Look at similar books to Learn to Knit on Circle Looms. We have selected literature similar in name and meaning in the hope of providing readers with more options to find new, interesting, not yet read works.
Discussion, reviews of the book Learn to Knit on Circle Looms and just readers' own opinions. Leave your comments, write what you think about the work, its meaning or the main characters. Specify what exactly you liked and what you didn't like, and why you think so.