Duren Lista - Build Your Own Home Darkroom
Here you can read online Duren Lista - Build Your Own Home Darkroom full text of the book (entire story) in english for free. Download pdf and epub, get meaning, cover and reviews about this ebook. City: Amherst;NY, year: 1990, publisher: Amherst Media, genre: Home and family. Description of the work, (preface) as well as reviews are available. Best literature library LitArk.com created for fans of good reading and offers a wide selection of genres:
Romance novel
Science fiction
Adventure
Detective
Science
History
Home and family
Prose
Art
Politics
Computer
Non-fiction
Religion
Business
Children
Humor
Choose a favorite category and find really read worthwhile books. Enjoy immersion in the world of imagination, feel the emotions of the characters or learn something new for yourself, make an fascinating discovery.
- Book:Build Your Own Home Darkroom
- Author:
- Publisher:Amherst Media
- Genre:
- Year:1990
- City:Amherst;NY
- Rating:4 / 5
- Favourites:Add to favourites
- Your mark:
Build Your Own Home Darkroom: summary, description and annotation
We offer to read an annotation, description, summary or preface (depends on what the author of the book "Build Your Own Home Darkroom" wrote himself). If you haven't found the necessary information about the book — write in the comments, we will try to find it.
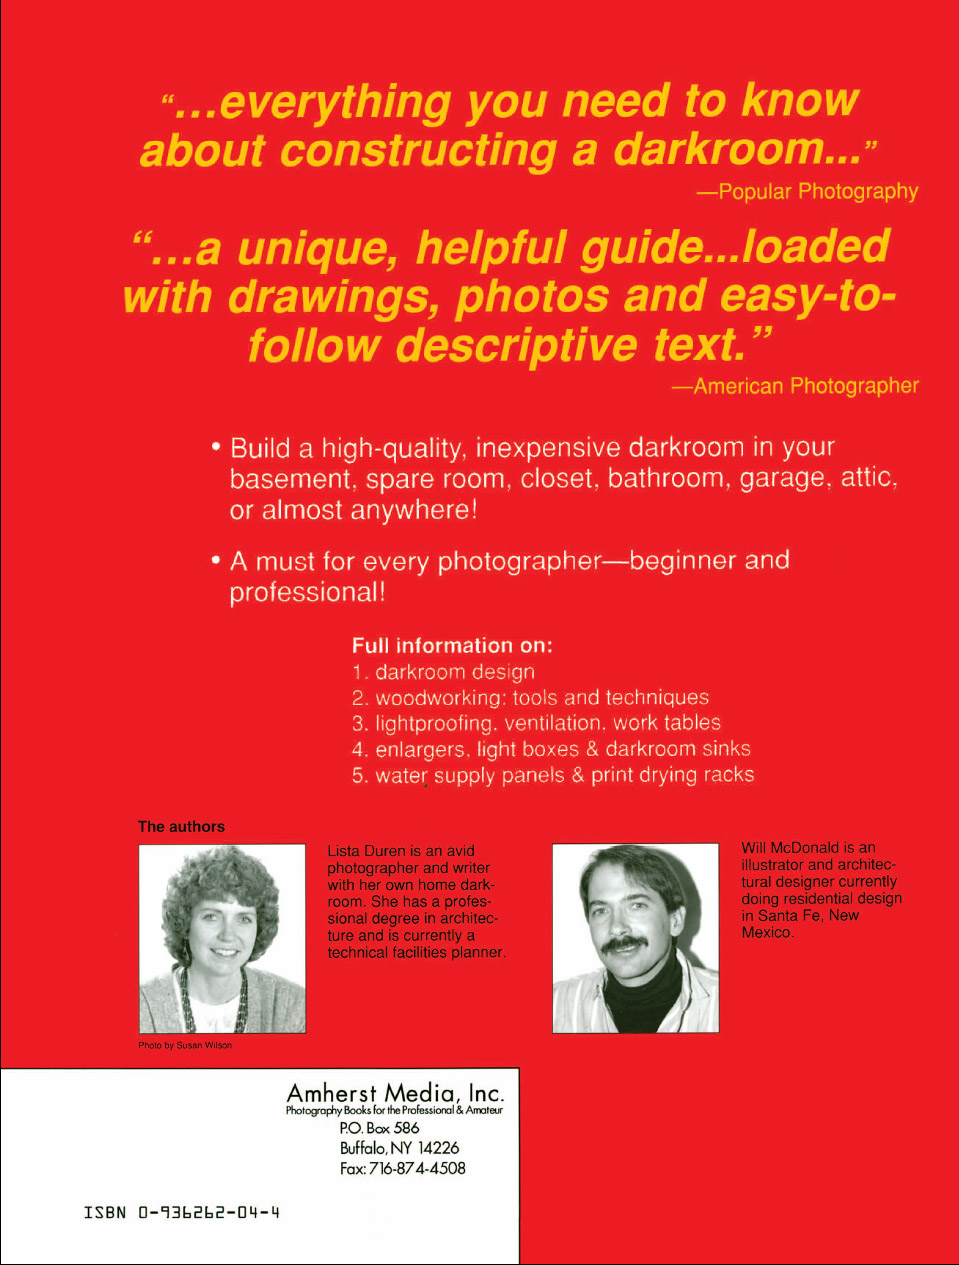
Covering every aspect from design to full operation, this clear and detailed book is perfect for photographers at all levels. It includes information on darkroom design, woodworking for the novice, lightproofing, ventilation, worktables, building enlarger baseboards, light boxes, water supply panels, print drying racks, darkroom sinks, and much more.
Duren Lista: author's other books
Who wrote Build Your Own Home Darkroom? Find out the surname, the name of the author of the book and a list of all author's works by series.


Build Your Own Home Darkroom — read online for free the complete book (whole text) full work
Below is the text of the book, divided by pages. System saving the place of the last page read, allows you to conveniently read the book "Build Your Own Home Darkroom" online for free, without having to search again every time where you left off. Put a bookmark, and you can go to the page where you finished reading at any time.
Font size:
Interval:
Bookmark:
Acknowledgments
This book came into being with the help of many generous people and we would like to acknowledge their contributions. The authors take ultimate responsibility for shortcomings, but appreciation should be directed to those who provided answers and assistance. Our thanks are extended particularly to:
Dennis Curtin whose whirlwind energy got this book off the ground and whose constant flow of ideas helped sustain it.
Barbara London for continuous support and enthusiasm, and for comments from the viewpoint of a novice carpenter.
Marvin Mendelssohn for blending a sense of humor with his design input and very patient woodworking instruction.
William Yarlett of Meynell Valve Co. for supplying the temperature control unit and contributing to the design of the water supply panel.
Don King of GTE Products Corp. for taking the time to answer questions about the properties of fluorescent lights.
Joe DeMaio, Fred Bodin, Elizabeth Hamlin, Don Dietz, Terry McKoy, Ken Buck, Alan Oransky, Catherine Renken, Bill Covington, and all the other photographers who offered their darkrooms for perusal and shared their ideas so freely.
Phil Edgerton for his typewriter and his general neighborly encouragement.
Fred Walling who answered questions when we were far away from our woodworking consultant and who built the most beautiful light box we've seen yet.
David Robinson for his multi-faceted editing and scrupulous attention to detail.
Susan Marsh for bringing aesthetic sense to the book.
Nancy Benjamin for calmly guiding this book into print.
CHAPTER 1: DARKROOM DESIGN
What to build for your darkroom
Many of the articles needed in your darkroom can be built with standard materials from a builders supply or hardware store and a usual selection of home tools. If you're willing to invest your time, you can build equipment yourself at less cost than buying it from a manufacturer, and you can build to fit the measurements and specific needs of your darkroom.
Following are some of the most commonly used pieces of darkroom equipment that you can build. Not every darkroom will need all of these items, so here is some information to help you decide which ones you want to build.
Lightproofing is a necessity unless you plan to print in an interior bathroom or closet that's already totally dark. Permanent lightproofing is easiest, but if you want the option of using your windows to admit light, we've provided a couple of plans for easily removeable lightproof panels.
Ventilation removes chemical fumes and keeps your darkroom from getting stuffy. Unless the room you've chosen has an air intake and exhaust system capable of 6 to 8 air changes per hour, you will need to provide one.
Install a bathroom exhaust fan in your darkroom or, if you don't want to make a permanent installation, build a portable exhaust fan. This fan can also be used for doing smelly projects outside your darkroom, such as painting the items you're building.
For fresh air intake, build a light-proof vent in your wall or door, or install a window air conditioning unit that will also provide temperature control. (See Chapter 4.)
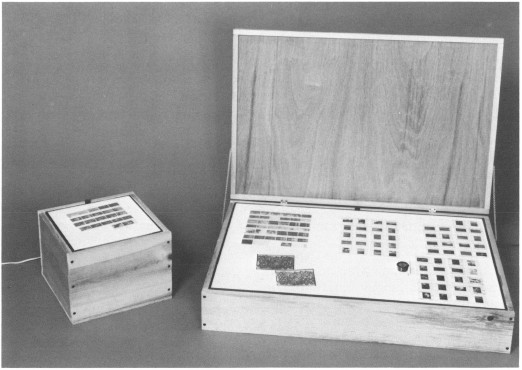
A small light box (about 12 x 12 inches) can be used in a black-and-white or color darkroom for evaluating negative density before printing. It sure beats holding your negatives up to the light and squinting at them. We think every darkroom should have one.
A large light box (about 24 x 35 inches) with a light source similar in color to daylight is used for evaluating, sorting, and editing color transparencies. It is very bright and is usually used in the studio rather than in the darkroom. If you work a lot with color transparencies (or if you do any kind of layout or graphic design work) you will find a large light box worthwhile.
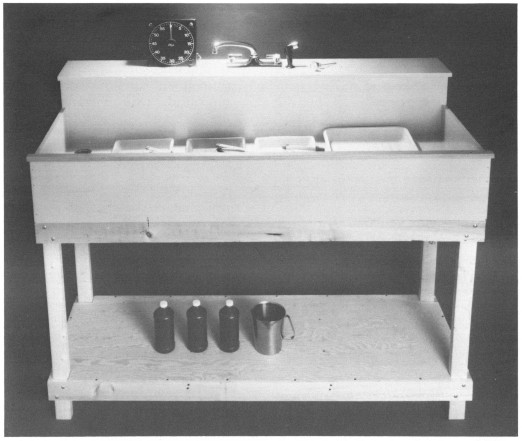
A darkroom sink is a great convenience but not a necessity. Many a professional photographer has worked for years without one by keeping developed prints in a "holding tray" of water and carrying them in batches to a nearby sink for washing. Among the advantages to having a sink: you don't have to worry about splashes or spills. All of your operations are in the same place, making setting up and cleaning up a lot easier and faster because you don't have to walk to and from your water supply with trays of chemicals.
The ideal darkroom sink is at counter height. It is large and shallow so that you can handle the travs and prints easily. You can buy one ready made or build your own. Darkroom sinks are made of stainless steel or plastic. They are generally expensive, will usually have to be ordered, and may not come in the exact size you need for your darkroom. Occasionally, a suitably shaped sink (such as an industrial sink or a shallow restaurant sink) will turn up, second hand, at a builders salvage yard.
Because of the deep shape, a laundry sink or bathtub is not a comfortable substitute for a darkroom sink. If you have one in your darkroom already, you might find it useful as an auxiliary sink in which to mix chemicals or wash trays, or you might build your darkroom sink over it and take advantage of the existing drain.
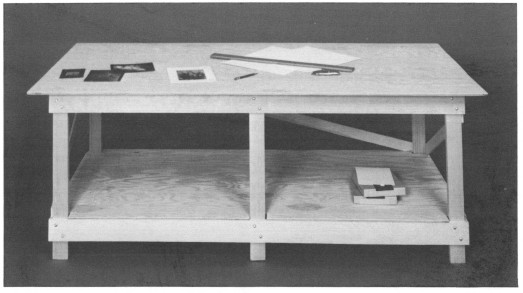
A work table is useful in just about every phase of darkroom workreviewing transparencies and prints, enlarging, mounting and matting, and so on. Perhaps you already have desks, tables, or built-in counters to serve some of these functions. The table shown is designed to fill in wherever you need another sturdy work surface. You can alter the dimensions to fit your situation, and build any kind of storage you want under the tabletop. See Chapter 5 for instructions.
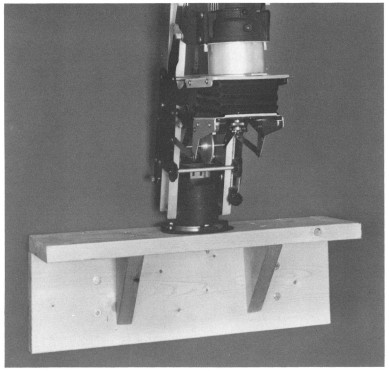
An enlarger wall mount is a sturdy shelf attached to the wall to hold your enlarger. In most situations, leaving your enlarger mounted onto its own baseboard or mounting it onto a sturdy counter is perfectly adequate. We only recommend wall-mounting your enlarger if you need to:
Leave your entire counter free for work space.
Make larger prints by projecting onto a lower counter or the floor. (If you plan to build the adjustable enlarger baseboard [Chapter 6], you won't need to wall-mount your enlarger.)
A disadvantage to wall-mounting your enlarger is the problem of making sure the film plane is parallel to your printing surface. This is crucial for the overall sharpness of your prints, and may not be easy to do.
Ready-made wall mounts are available from some enlarger manufacturers.
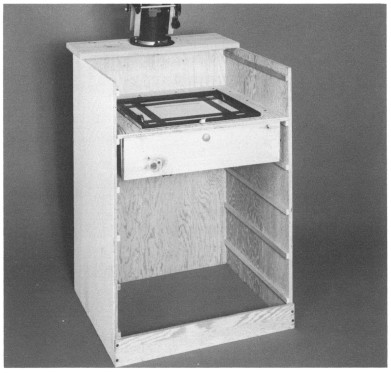
An adjustable enlarger baseboard has a narrow shelf for mounting your enlarger and a moveable shelf for your printing easel. This gives you two advantages:
It increases the maximum distance between the enlarger head and the printing surface so you can make oversize prints.
It allows you to print any size with the enlarger head low on the shaft. This minimizes vibrations, giving you sharper prints.
Font size:
Interval:
Bookmark:
Similar books «Build Your Own Home Darkroom»
Look at similar books to Build Your Own Home Darkroom. We have selected literature similar in name and meaning in the hope of providing readers with more options to find new, interesting, not yet read works.
Discussion, reviews of the book Build Your Own Home Darkroom and just readers' own opinions. Leave your comments, write what you think about the work, its meaning or the main characters. Specify what exactly you liked and what you didn't like, and why you think so.