Illustrated WoodWorking For Adults
How To Design And Construct Furniture
Antonio Diaz
Copyright 2020 Antonio Diaz
All rights reserved.
DEDICATION
The author and publisher have provided this e-book to you for your personal use only. You may not make this e-book publicly available in any way. Copyright infringement is against the law. If you believe the copy of this e-book you are reading infringes on the author's copyright, please notify the publisher at: https://us.macmillan.com/piracy
Contents
A Woodworkers Guide to Custom Cabinets
I am often tempted to say that there are as many ways to build cabinets as there are cabinetmakers. Its an exaggeration, I know, but it gets at a basic truth about the world of cabinetry and built-ins: There is no single right way to build them.
At the first shop where I worked, a custom cabinetmaking business in rural England, we built casework out of melamine-coated particleboard. We joined the sides, tops and bottoms using thin plywood splines, then applied solid wood face frames made with a shaper-cut bridle joint. The face frames were glued onto the cases with more plywood splines. Our doors and drawer fronts were inset, and we hung the doors on solid-drawn brass butt hinges mortised only into the door, then simply screwed onto the inside edge of the face frame.
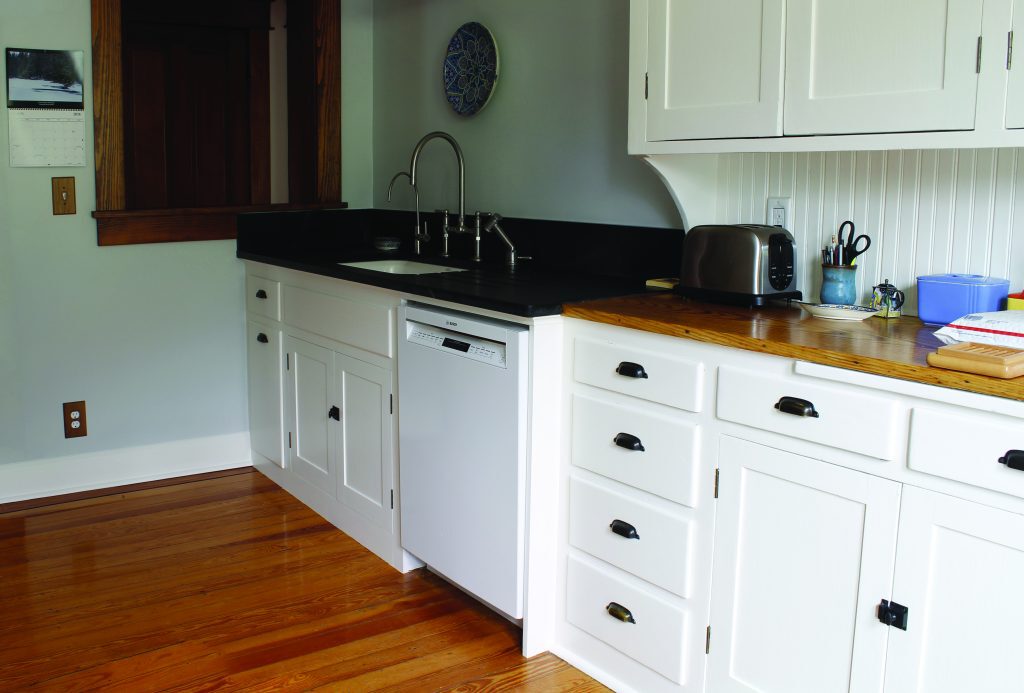
Just like the originals. For a recent job, Hiller built new cabinets, such as the sink base visible here, on details drawn from the surviving original built-in at right.
At the next shop, also a rural English operation, we made casework out of solid pine floorboards. The first step was to glue and clamp the tongue-and- groove material in long lengths, then flatten them on a stroke sander and saw the parts to size. We housed the cabinet floors in dados. Although I cant recall which type of joinery we used for the tops, I know we werent using biscuits; I didnt encounter a biscuit joiner until I moved back to the United States. We applied face frames with a simple butt joint and glue. All of our doors were inset, hung on solid- drawn brass butts; our drawers ran on traditional wooden runners, and we dovetailed our drawers by hand.
Much of my current carcase-building technique comes from what I learned at a contemporary furniture business in Vermont. There, we built casework from beautifully veneered MDF, joining the parts with biscuits and Twinthread screws. It was amazingly quick and simple. Doors were full overlay, hung on European hinges; a novelty for me. Drawers, too, were full overlay and ran on Accuride ball bearing slides.
In the 23 years since I started my own business, I have selectively adopted new materials and methods. The method I use most often for built-in cabinetry combines simplicity and strength for the basic casework with materials and techniques that owe more to the world of furniture than that of contemporary commercial cabinetmaking. The technique I will describe here is a hybrid that draws on what I learned at the different shops where I have worked. I have chosen materials and methods that make sense for my business, given my clientele and the styles in which I specialize.
Preliminaries
When designing built-in cabinets, you need to think about installation and take into account certain features of the cabinets future context. Im not referring to aesthetic features alone timber species, hardware, how the various cabinet components will interrelate (will the doors be inset or overlay?), or style (slab doors or frame-and-panel?). Im also referring to how the cabinets will literally intersect with the walls, floors, and ceilings, which are rarely square, level, or plumb. There are many ways of handling these points of intersection, and each has distinct period and other cultural connotations.
For example, many built-ins from the early 20th century were made with flush kicks the bottom rail of their face frames extended all the way down to the floor. By the 1930s the recessed kick had become nearly ubiquitous no surprise, considering how much easier it is to install than a flush kick that has to sit on an uneven floor.
The cabinet Im building in this article was designed for the kitchen of a 1912 house. I planned to scribe (saw and plane) it to the floor and to the wall at its left; thats why the face frame protrudes beyond the cabinets left side. Unless youre running a production facility where you build things in multiples to standard sizes, you should take the building work in stages. That way youll have a chance to adjust the different parts to fit what youve made so far, instead of finding that your face frame is 1/16 too narrow or you cut the recess for your kick 14 too high. Some people start with face frames then build their carcases to fit. I work the other way around. Once the basic cases have been assembled, I move on to faces.
Lets Get Going
So you have your scale elevations at hand and have made a cutting list based on them. My typical material for kitchen casework is 34 maple-faced veneer-core plywood, pre-finished on one side. The pre-finished side goes to the cabinet interior; it saves a lot of time, which helps make my work affordable. That said, some jobs call for painted interiors or other finish treatments, so I always choose the sheet material to suit the job. The next step is to cut your basic parts (sides, tops and cabinet floors) to size. Because Im building each job to genuinely custom dimensions, some base cabinets may not be designed to end up 24 deep or 36 high. (For example, I love a 38- high counter. It should go without saying that the carcase height must be adjusted to allow for the thickness of whichever counter material youll be using.) And even if most of the uppers in a kitchen job will be 12 deep, one may be a 5- deep spice cabinet, while another may be 16 deep.
Rip all of the sides and floors to width. The edges and corners of sheet goods may not be square, and they often have minor damage. Its ideal to make the first rip slightly over-width, then turn it around and rip the other edge to the size you require. That way youll have two square, clean edges for joinery.
After ripping, cut the parts to length. There are various ways to do this. Aside from cutting each part accurately to length, its important to cut the ends square. You can do this with a track saw if you have one. Alternatively you can use a straightedge and a pattern- cutting bit to rout one end square, then crosscut on a table saw, running that end along the fence. (The same technique will work with a radial arm saw for the second cut, which trims the piece to length.) My current method is to crosscut one end of each piece using a slider on my table saw, then crosscut it to length using the rip fence. Be sure you add an identifying mark (for example: upper 1, left side) to each part as you cut it.
My method for joining cabinet floors to sides may not be refined, but its quick, simple and strong. I use a spacer made from scrap 34 plywood to position the floor and support it. Twinthread screws run in through the cabinet sides will fasten the whole thing together.
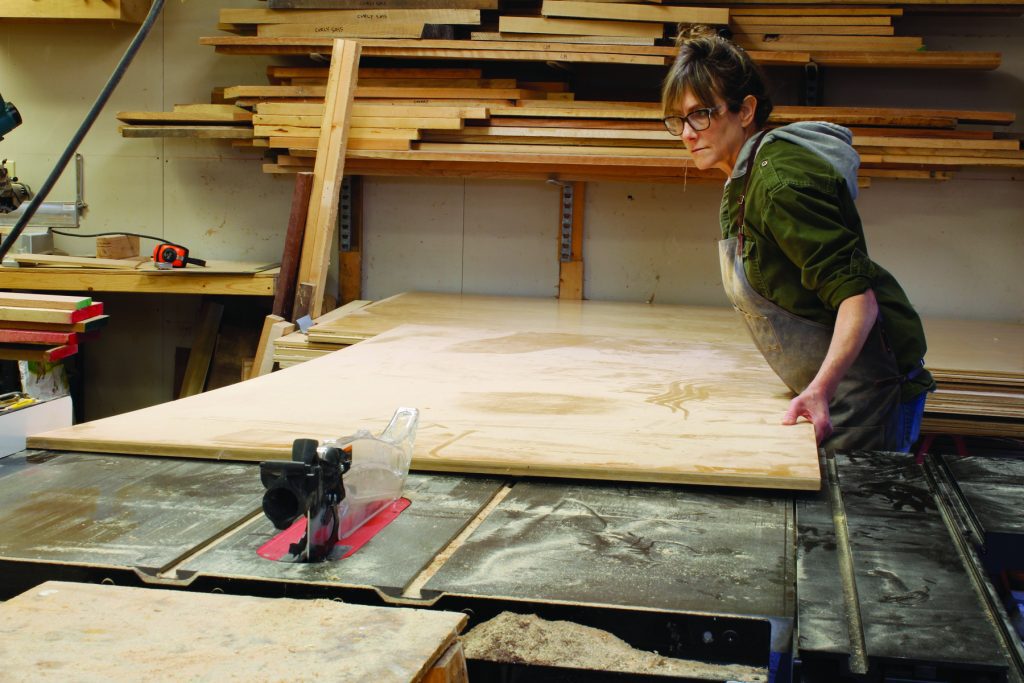
Rip first. I store my plywood on sturdy sawhorses near the table saw so that I can pull one end of a sheet over to the edge of the saw, adjust it against the fence and rip.