Copyright 2016 by Kimberly Callard
All rights reserved. No part of this book may be reproduced in any manner without the express written consent of the publisher, except in the case of brief excerpts in critical reviews or articles. All inquiries should be addressed to Skyhorse Publishing, 307 West 36th Street, 11th Floor, New York, NY 10018.
Skyhorse Publishing books may be purchased in bulk at special discounts for sales promotion, corporate gifts, fund-raising, or educational purposes. Special editions can also be created to specifications. For details, contact the Special Sales Department, Skyhorse Publishing, 307 West 36th Street, 11th Floor, New York, NY 10018or .
Skyhorse and Skyhorse Publishing are registered trademarks of Skyhorse Publishing, Inc., a Delaware corporation.
Visit our website at www.skyhorsepublishing.com.
10 9 8 7 6 5 4 3 2 1
Library of Congress Cataloging-in-Publication Data is available on file.
Cover design by Jane Sheppard
Cover photo credit K. Callard
Print ISBN: 978-1-5107-0763-4
Ebook ISBN: 978-1-5107-0767-2
Printed in China
AUTHORS NOTE
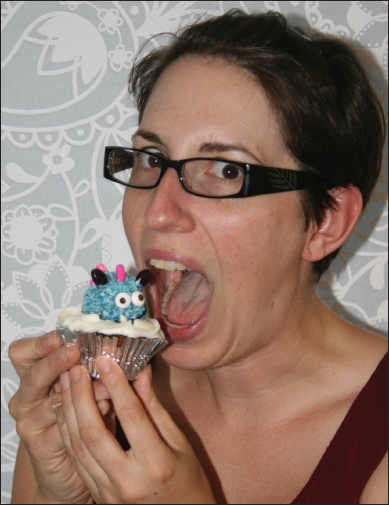
My cake decorating teachers motto was: Who cares what it tastes like, so long as it looks good.
Well, I care.
Cakes are made to be eaten, not just to look pretty in photos. Thats why Ive done my best to always put flavor first in my designs. I use candy instead of fondant, stay away from salty crackers as decorations, and try to keep the frosting levels within reasonbecause whats the point of having a cake if you cant eat it, too?
K. Callard
CONTENTS
BRILLIANT BASICS
BAKING
In my opinion, nothing tastes quite as good as a homemade, from-scratch cake. But, if youre low on time/energy, or baking just isnt your thing, theres nothing wrong with making a cake from a mix. All the tools and techniques on the following pages can be used for from-scratch cakes or those made from mixes to help make your cakes turn out great.
One note of caution, though. Most cake mixes do not produce a sturdy enough cake to cut for the Creative Cutout designs in this book. I highly recommend using either the pound cake recipe in this book, or doctoring a cake mix recipe using the Cake Mix Fix instructions on , to get a sturdy cake to carve.
Tools
Stand mixer/electric mixer/hand whiskunlike muffins, cake batter should be smooth and lump-free. I typically use my hand whisk on my Chocolate Cake (see recipe on ) needs the more thorough mixing provided by a stand or electric mixer.
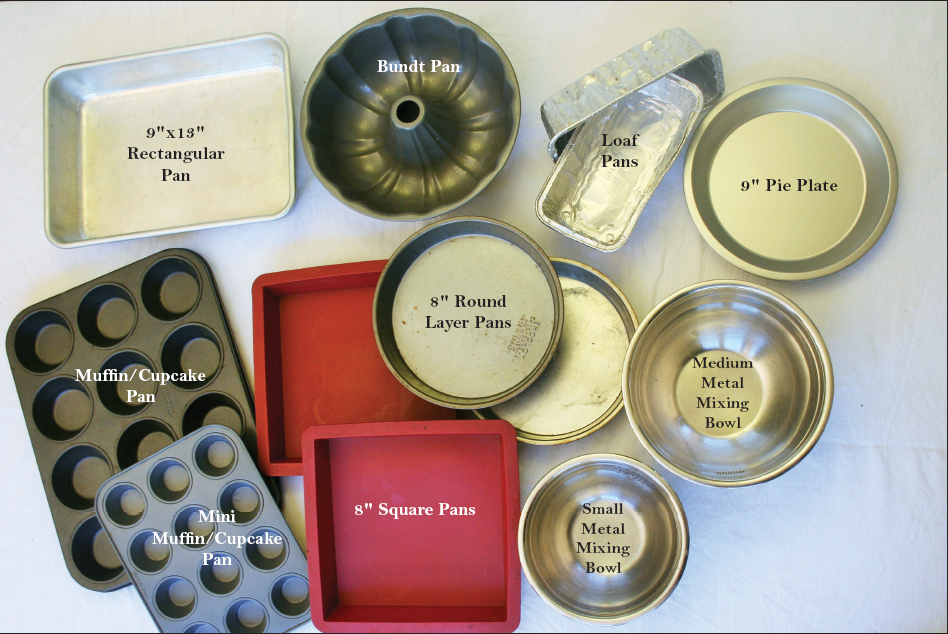
Pansthe designs in this book rely on a variety of pans that can be found in most households, or you can use disposable foil pans available at grocery stores.
Shortening/butter/margarine/quick release sprayto grease your pan. I typically use shortening.
Flour/cocoagoes on top of the grease. I usually use cocoa for my chocolate cakes and flour for the rest.
Pastry/basting brushto spread the flour.
Skewer (metal or wood is fine) or toothpick (depending on the height of your cake)to check if the cake is done.
Cooling racks (and a way to raise them up)standard cooling racks only lift your cake a few inches off the counter. To increase air flow, and reduce cooling time, sit your rack on something 45 inches tall (I use 34 bean cans). Just make sure your rack is level and stable.
Techniques
Sadly, while cake decorating is an art, baking is most definitely a science. To make sure your cakes turn out well, be sure to follow all the instructions given.

Greasing the Pan
This helps keep the cake from sticking to the pan. Use about a tablespoon or so of shortening/butter/margarine and rub it liberally around the pan, making sure to hit all the corners. Remember, cake batter expands as it cooks, so you want to bring it as far up the sides of the pan as you can.
If youre a hands-on kind of person, you can rub the shortening around with your fingers, but if youre like me and dislike greasy hands, simply put the grease on a small piece of waxed or parchment paper.
Once the pan is completely covered, add about a tablespoon of flour to the pan (or cocoa for a chocolate cake) and spread it with a pastry brush.
Knock any excess flour/cocoa off into the trash.
Measuring Ingredients
Part of following the instructions is making sure to measure accurately. Never measure ingredients over your mixing bowlspills will land in the bowl, leaving you with too much of your ingredient.
Dry ingredients, except for brown sugar, should be scooped loosely into a dry measuring cup. Use the back of a knife to tip off any excess.
Brown sugar should be packed tightly into a dry measuring cup, as if youre making a sand castle.
Wet ingredients should be measured in a liquid measuring cup, sitting on a level surface. For best results, crouch down to look at the amount straight on.

Mixing the Ingredients
The exact requirements for each recipe will differ, but generally speaking, cake ingredients (especially eggs and butter) work best at room temperature. To speed up the process, cut your butter into small cubes and lay them out on a platethe increased surface area makes it warm faster. In a pinch, Ive also sat my butter on my preheating ovenjust keep an eye on it: melted butter works differently in a recipe than softened butter.
Eggs should be cracked into a small bowl before adding to the mixits easier to see (and remove) little bits of shell from a small bowl than the large bowl full of batter. Also remember that raw eggs can carry bacteriayou shouldnt taste your cake until its been fully cooked.
Mix your batter thoroughly until no lumps remain. Make sure to scrape the sides of the bowl with a rubber spatula as you mix to incorporate all the dry ingredients into the batter. If you notice dry patches when pouring it into the pan, youll have to pop it back in the bowl and re-mix or else you could end up with dry bites of pure flour in your finished cake.
Pour the batter into the pan, scraping the bowl with a spatula. Wipe off any spills from the edge of the pan to prevent burnt-on bits.

How to Tell When Its Cooked
Lets face it, not all ovens are created equal. And nothing is worse than flipping your cake out of the pan and having it explode in a mushy, undercooked mess. For this reason, knowing how to tell if your cake is cooked is a must.
I tend to start checking my cakes about five minutes before the earliest end of the cooking time, and add more time from then.

