Table of Contents
- General Information
Guide
Pages
If you are an Annies customer and have a question about the instructions on a pattern you have purchased, please visit:
AnniesCatalog.com/pages/customer_care/pattern_services.html
Templates
To download templates for easy printing, view the download instructions at the end of this book or click the Templates chapter in the Table of Contents.
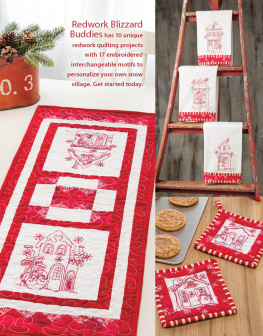
Redwork Blizzard Buddies is a collection of fun designs that are perfect for simple embroidery work. Combine your embroidery skills with your piecing skills to make unique and treasured quilted projects. These 10 gorgeous projects will add a fun personal message to your home and show off your talent. Make all of the projects or select the ones you like best. And if youre feeling especially creative, consider using a different color scheme than the one shownperhaps blue embroidery floss with blue fabrics. You are only as limited as your imagination. Your options are endless!
Combine simple embroidery stitches, red embroidery floss, and red and white fabrics, and soon you will have created the sweet designs shown in the following pages. Hand stitching is a wonderful way to relax the body and soul. Creating fun and functional projects can bring you hours of fulfilling recreation.
Enjoy!
Table of Contents
General Information

I simply love to design projects that make people smile. Even as a child, I enjoyed making things from paper, clay and fabric, and I began my creative adventure through 4-H Club.
I have been designing and creating projects for the creative industries for over 20 years.
I developed the Pearl Louise Designs pattern company in 1984. I have designed and produced more than 800 patterns for the quilt industry. I have written several craft and quilt books and have designed and produced kits for Annies, Mary Maxim and Herrschners. The McCalls Pattern Company also produces some of my designs. Many of my designs are included in various quilt magazines.
I have also been a part of several videos including Everyday Embroidery available through Annies. Other videos can be seen on PBS, on the Its Sew Easy online program and on Quilting Arts TV.
I have designed gift lines for Seasons of Cannon Falls, Decorator Craft Corp and Wangs International. Several years ago I started designing fabric for the Troy Corp. in Chicago.
My hobbies include designing, reading, embroidery, fishing and spending time with my beautiful family.
Pearl Louise Krush

Redwork embroidery requires a few supplies and some simple instructions. Read through these basics before you select and begin stitching one or more of the whimsical projects in this book.
Supplies
Use good-quality, 100 percent cotton fabrics in your redwork quilts or projects. The projects in this book were made using white and cream tonals, but any white, off-white or cream-color high-quality cotton fabric may be used. Be sure to visit your stash to use up those white, cream and red fabrics youve been storing. These projects are very scrappy, so have tons of fun visiting and using up those scraps.
Prewashing your fabrics is recommended, but not absolutely necessary. If you choose not to prewash, you must test the fabrics to make sure that they are colorfast and wont shrink.
Start by cutting a 2" by fabric width strip of each fabric you have selected for your redwork project; measure and record the width of each strip.
To determine whether the fabric is colorfast, immerse each strip separately into a clean bowl of extremely hot water or hold the fabric strip under hot running water. If your fabric bleeds a great deal, all is not necessarily lost. You might be able to wash all of that fabric until all of the excess dye has washed out. Fabrics that continue to bleed after they have been washed several times should be eliminated. You do not want the red fabrics bleeding onto the embroidered squares.
To test for shrinkage, iron each saturated strip dry with a hot iron. When the strip is completely dry, measure and compare the size to the original recorded length. If one of the fabrics shrinks more than the others, it should be eliminated. If there is a lot of variety in shrinkage, its best to wash and dry all of the fabrics before beginning so that the shrinkage is no longer an issue.
Needles
There are several different types and sizes of needles that can be used for embroidery. Sharps(sizes 710) and embroidery needles (sizes 7 and 8 with a longer eye for easier threading) are popular. You should choose the size and type of needle you are comfortable with to do your embroidery.
Embroidery Floss
Six-strand cotton embroidery floss was used to embroider the designs in these redwork projects. Work with 2 strands in 18" lengths. I used 2 strands for most areas on the projects and 1 strand for tiny designs such as facial features. I used DMC colors 816 (garnet) and 817 (very dark coral red) on the projects featured. Make sure the embroidery floss is colorfast.
Embroidery Hoops
The best embroidery results are achieved when an embroidery hoop is used to hold the fabric taut while stitching. There are several types and sizes of hoops available on the market. Wooden hoops with an adjustable screw are the most common, but there are also spring tension hoops and Q-Snap frames. Use the type and size hoop or frame that you find most comfortable for embroidering. It is best to use a hoop that is larger than the design you are embroidering, if possible. This helps avoid distorting stitches when the hoop is moved from one area to another.
Redwork Embroidery
Tracing the Design
Cut the fabric that is to be embroidered into the size specified with each projects instructions.
Center the fabric over the printed design and trace, using a sharp lead pencil or fabric marking pen. If you cannot see the design lines clearly through the fabric, use a light box or window for tracing. Remember that the traced lines should not be visible when embroidery is completed. If you use a fabric marking pen be sure to follow the manufacturers directions for proper use and removal.
Embroidering the Design
Wash your hands before you start hand embroidery to avoid soiling the fabric. Thread floss into the needle, tying a small knot at one end. When there are only a few inches of floss remaining, tie off by weaving the needle through several stitches on the back of the fabric to form a knot. Cut off the excess floss.
When you embroider separate lines in a close area, it is best to carry the floss across the back as long as the distance is not more than 1". If the lines are more than 1" apart, tie off and start again.
Never carry floss across a large unworked area. The floss will show through on the front of the finished project.
The Stitches
Stem Stitch
The stem stitch is the main stitch used to embroider redwork designs.
To execute the stem stitch, bring the needle up at position 1. Hold floss down with thumb of your non-stitching hand. Reinsert the needle at 2 and bring up at 3, about halfway between 1 and 2.

